“Documentation of Ionic Material Design ”
“Ionic Material Design”
Created: 24.06.2016
By: Ionic Material Design Team
Email: ionicmaterialdesign@gmail.com
Thank you for purchasing Ionic Material Design. If you have any questions that are beyond the scope of this help file, please feel free to email via my user page contact form here. Thanks so much!
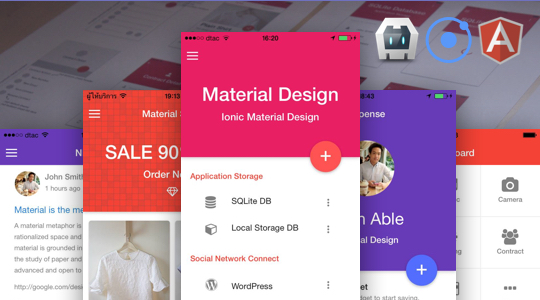
Table of Contents
- Introduction
- Important Notes
- File & Folder Structure
- Getting Started
- D-1 Installing Ionic Framework
- D-2 Open Project
- D-3 Add Platform
- D-4 Add Ionic Plugin
- D-5 Install Crosswalk Browser
- D-6 Run and Debug On Browser
- D-7 Android Build
- D-8 IOS Build
- D-9 Deploy to Android device
- D-10 Deploy to IOS device
- D-11 Sass Setup
- D-12 Icon and Splash Screen
- D-13 Update project to latest version
- How to edit a Project File.
- HTML Files and Structure
- CSS Files and Structure
- Javascript Files and Structure
- Configuration
- I-1 Theme Color
- I-2 Android Keyboard
- I-3 Disable phone number typing
- I-4 Phone call
- Component Detail
- J-1 Application Storage
- J-1-1 SQLite Database
- J-1-2 Local Storage Database
- J-2 Social Network Connect
- J-2-1 WordPress
- J-2-2 Facebook
- J-2-3 Google Plus
- J-2-4 Instagram
- J-2-5 Foursquare
- J-2-6 Dropbox
- J-3 Share Application Content
- J-3-1 Social Share
- J-3-2 Email & Message
- J-4 Advertising Application
- J-4-1 Google AdMob
- J-5 Push Notification
- J-5-1 Single Push
- J-5-2 Schedule Push
- J-6 Map API Connect
- J-6-1 IOS Map
- J-6-2 Android Map
- J-7 Hardware Connect
- J-7-1 Mobile Contract
- J-7-2 Image Picker
- J-7-3 Vibration
- J-7-4 Flashlight
- J-7-5 Device Information
- J-8 Material Design Themes
- J-1 Application Storage
- Known Issues
- Compatibility
- Support
- Useful Resources
- Sources and Credits
- Version History
A) Introduction - top
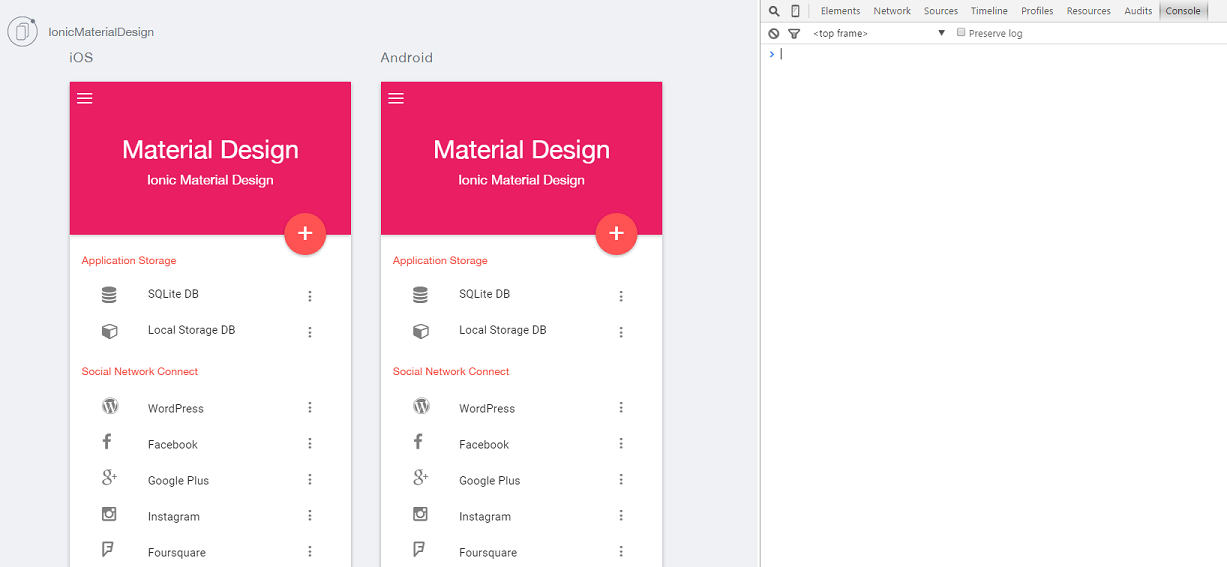
Ionic Material Design is mobile application that developed by Ionic Framework under the design concept of Google Material Design including the functions of ngCorgova. The application will present the function of :
- Application storage
- SQLite Database : Best way to store data to application storage. It allow you to manage complex relational database.
- Local Storage Database : Use HTML5 Local Storage feature to save data to device.
- Social Connect
- WordPress Connect : The easy way connect with WordPress. Just input your wordpress url to the application.
- Facebook Connect : Connecting the application with Facebook and guideline how to get start with Facebook APIs.
- Google Connect : Connecting the application with Google Plus and guideline how to get start with Google Plus APIs.
- Instagram Connect : Connecting the application with Instagram and guideline how to get start with Instagram APIs.
- Foursquare Connect : Connecting the application with Foursquare and guideline how to get start with Foursquare APIs.
- Dropbox Connect : Connecting the application with Dropbox and guideline how to get start with Dropbox APIs.
- Share content to social network
- Facebook sharing: Share Application content via Facebook.
- Twitter sharing: Share Application content via Twitter.
- Email sharing: Sending Application content via Email.
- Text Message: Sending Application content via Text Message.
- Advertising in application
- Google AdMob : Earn money with advertising application by Google AdMob APIs.
- Push Notification
- Single Push : Interacting with user by send single push notification message.
- Schedule Push : Interacting with user by create schedule queue for sent push notification message.
- Map API Connect
- IOS Map : Connecting the application with IOS and Google map application.
- Android Map : Connecting the application with Android map application.
- Hardware connect
- Mobile Contract : Getting all contracts from mobile device contracts.
- Image Picker : Getting image from mobile device photo gallery.
- Vibration : APIs for vibration your device.
- Flashlight : APIs for open your device flashlight.
- Device Information : Getting Device Information from mobile device.
- Material Design Themes
- Themes : Material theme that will help you to generate idea to create your powerful application.
We hope Ionic Material Design will help you gain idea to developing your application and decrease your development period.
This document cover : Introduction of Project, Important Notes, File & Folder Structure, Installation guide, HTML Files and Structure, CSS Files and Structure, Javascript Files and Structure, Configuration, Component Detail, Known Issues, Compatibility, Support, Useful Resources, Sources and Credits, Version History. We encourage you to deeply read this document. If you have any difficulties. Please contact us at ionicmaterialdesign@gmail.com or via my user page contact form here.
B) Important Notes - top
- You’ll need a basic understanding of : To get this up and running. I’ve made it as simple as possible but you’ll still need to know the basics.
- If you would like to learn or find more information go to Useful Resources and Sources and Credits
C) File & Folder Structure - top
First of all when you extract files from a zip package you will found below directory :
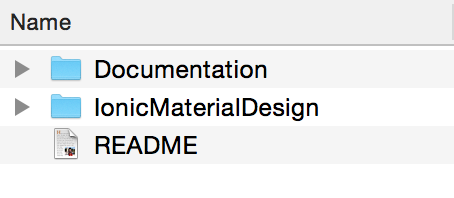
- Folder IonicMaterialDesign : Place of the Project File . C-1)
- Folder Documentation : Place of the Documentation . C-2)
- File README : Contains information about other files in a directory . C-3)
C-1) Folder IonicMaterialDesign
This folder is a default file & folder structure of ionic framework, And place of Project Ionic Material Design please user below detail to access the HTML, CSS, JavaScript, Configuration file.
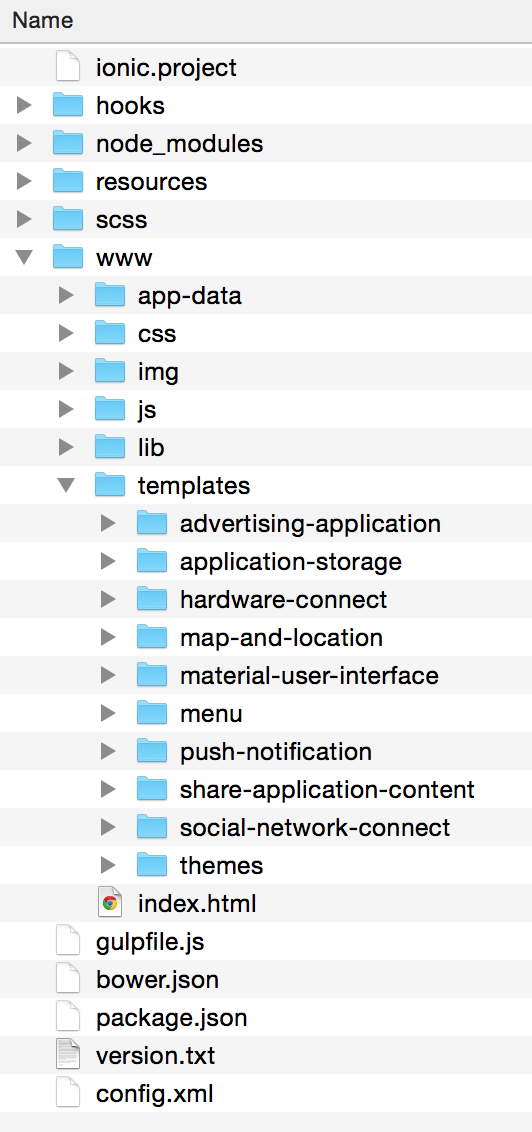
- Folder hooks - This is a default folder of Ionic Framework.
- Folder node_modules - This is a default folder of NodeJs component.
- Folder platforms - This is a place of android and ios project after build ionic will paste
it here.
- Folder plugins - This is a place of plugins, When you install plugin.
- Folder resources - This is a place of Application Icon and Splash
Screen file.
You can learn how to change it at Add Icons and Splash Screens.- Folder android -This is a place of android icons and splash screens file.
- Folder ios -This is a place of ios icons and splash screens file.
- Folder scss - This is a place of SCSS File. You can learn how to
Using Sass.
- Folder www - This is a place of HTML and Javascript File.
- Folder app-data - This is a place of all data JSON File.
- Folder css - This is a place of css File.
- Folder img - This is a place of image File.
- Folder js - This is a place of main javascript File.
- Folder shared - This is a place of shared angular controllers, directives, filter.
- File app.js - This is a main javascript file of project. All javascript setting is here.
- File controllers.js - This is main AngularJs module of controllers and
service file of project.
- Folder lib - This is a place of javascript lib Framework.
- Folder templates - This is a place of component.
- Folder advertising-application
- Folder googleAdmob - This is a place of googleAdmob html and
javascript file.
- Folder googleAdmob - This is a place of googleAdmob html and
javascript file.
- Folder application-storage
- Folder local-application-db - This is a place of Local Storage Database html and javascript file.
- Folder sqLite - This is a place of SQLite Database html and
javascript file.
- Folder hardware-connect
- Folder device-information - This is a place of Device Information html and javascript file.
- Folder flash-light - This is a place of Device Flashlight html and javascript file.
- Folder image-picker - This is a place of Device Image Picker html and javascript file.
- Folder mobile-contract - This is a place of Device Mobile Contract html and javascript file.
- Folder vibration - This is a place of Device Vibration
html and javascript file.
- Folder material-user-interface
- Folder dashboard - This is a place of Dashboard html and javascript file.
- Folder default-user-interface - This is a place of Default User
Interface Information html and javascript file.
- Folder menu- This is a place of menu html and javascript file.
- Folder push-notification
- Folder schedule-push-notification - This is a place of schedule push notification html and javascript file.
- Folder single-push-notification - This is a place of single push
notification html and javascript file.
- Folder map-and-location
- Folder ios-map-connect - This is a place of IOS map connect html and javascript file.
- Folder android-map-connect - This is a place of Android map connect html and javascript file.
- Folder share-application-content
- Folder email-message - This is a place of Email and Message html and javascript file.
- Folder social-share - This is a place of Social Share html and
javascript file.
- Folder social-network-connect
- Folder dropbox - This is a place of Dropbox html and javascript file.
- Folder facebook - This is a place of Facebook html and javascript file.
- Folder foursquare - This is a place of Foursquare html and javascript file.
- Folder google-plus - This is a place of Google html and javascript file.
- Folder instagram - This is a place of Instagram html and javascript file.
- Folder wordpress - This is a place of Wordpress
html and javascript file.
- Folder themes - This is a Material Themes html and javascript file.
- Folder advertising-application
- File index.html - This is a main HTML file of project default page when application
start and all reference of css and javascript lib is here.
- Folder app-data - This is a place of all data JSON File.
- File config.xml - This is a main configuration file of Ionic Framework.
C-2) Folder Documentation
You will found file index.html : This is a documentation file.
C-3) File README
You will found information about project files and documentation directory.
D) Getting Started - top
D-1) Installing Ionic Framework - top
To run this Ionic Material Design project you have to install Ionic Framework by follow this step:
First, install LTS Mature and Dependable Version Node.js ( Do not use Stable Latest Features Version, Some of cordova plugin will not work 100% and you will lag with plugin issue). Then Downloading Ionic and installing all necessary
dependencies for development by
open a new cmd.exe for windows or Terminal for
mac and run :
      npm install -g cordova
      npm install -g ionic
For mac user don't forgot to add admin permission by :
      sudo npm install -g cordova
      sudo npm install -g ionic
Follow the
Android
and iOS
platform guides to install required platform dependencies.
More: Getting Started with Ionic
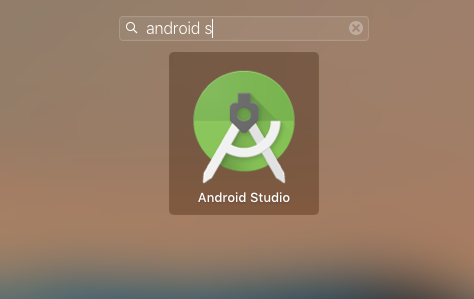
Install Android SDK :
To build locally using cordova-plugin-admobpro, to avoid build error, you need install some extras in Android SDK manager (type android sdk to launch it): Ref:
AdMob Pro Installation .
This is the installation step :
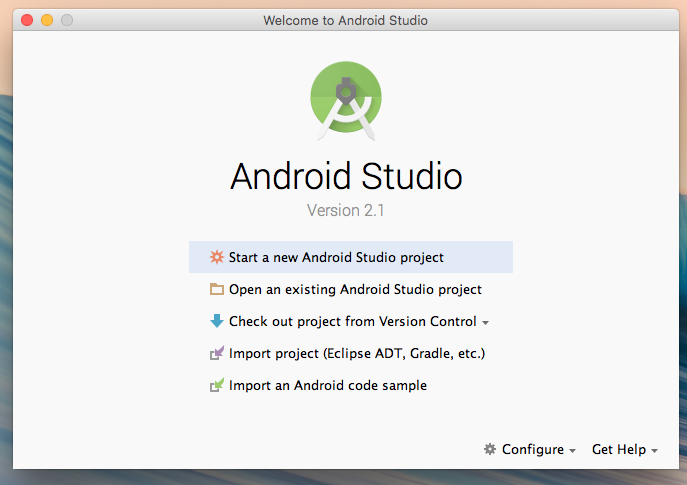
- Open program Android Studio
- Click Configure then SDK Manager
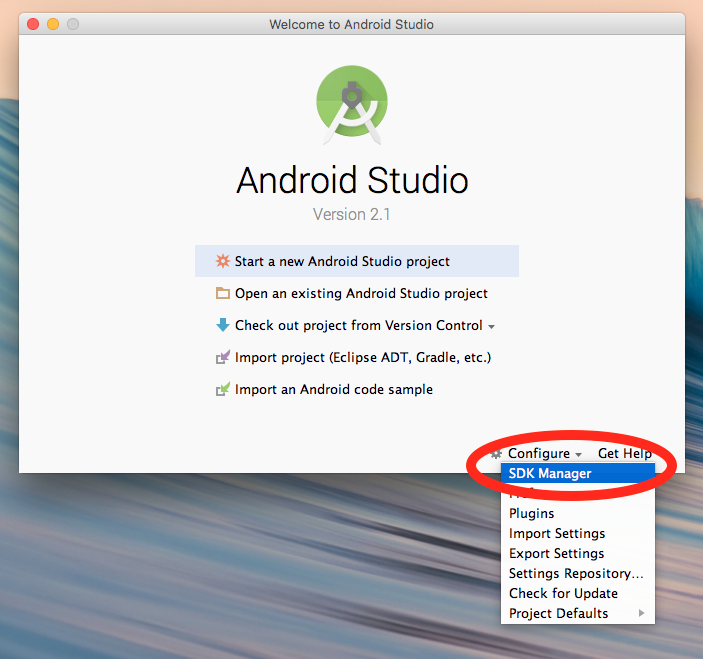
- Click Luanch Standalone SDK Manager
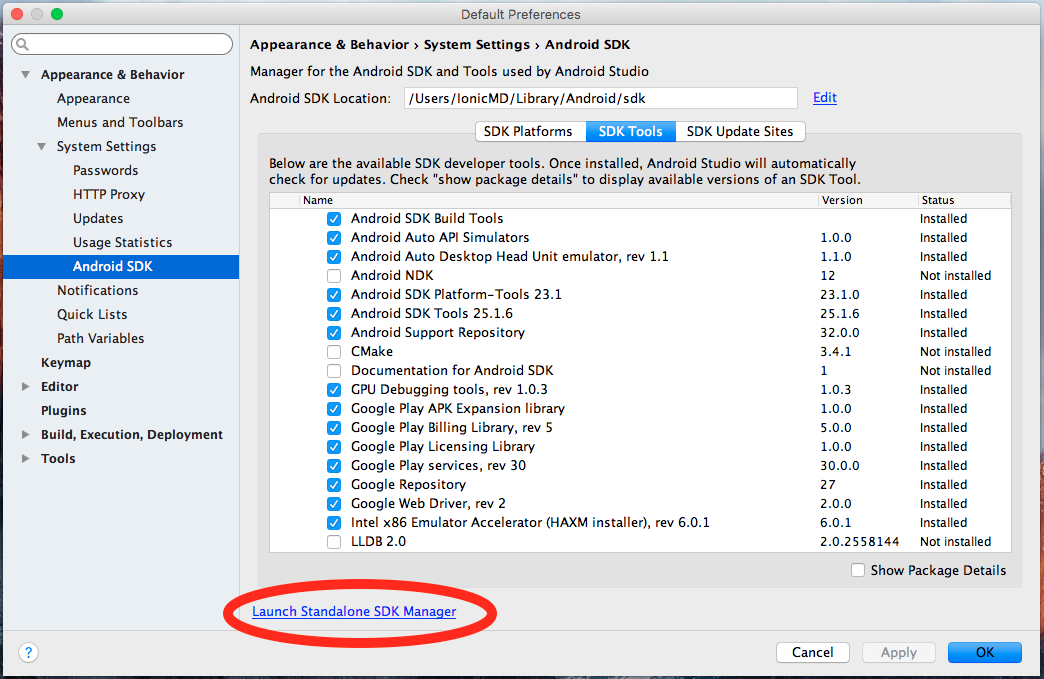
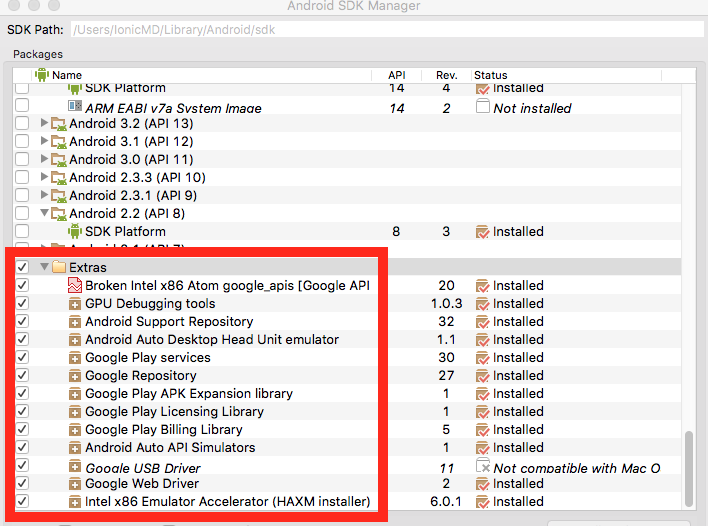
- Select Extar Folder to check all extar SDK then click Install ..
- Select packages Android SDK License then select Accept License and click
Install
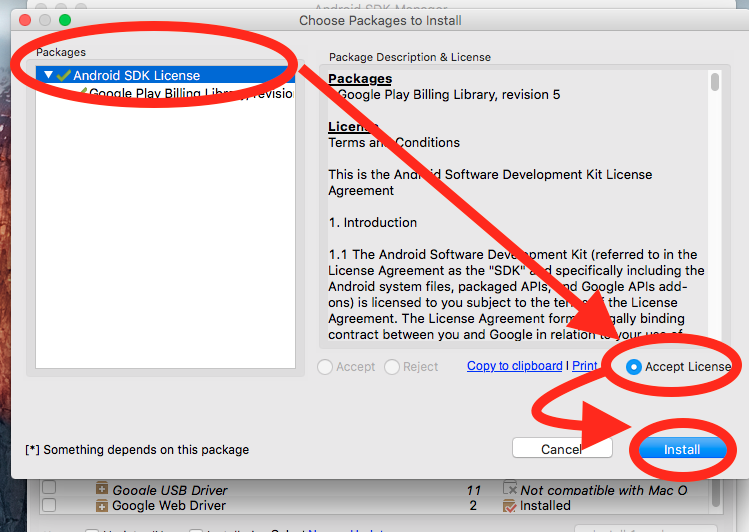
- Wait until all SDK is installed then close the current window
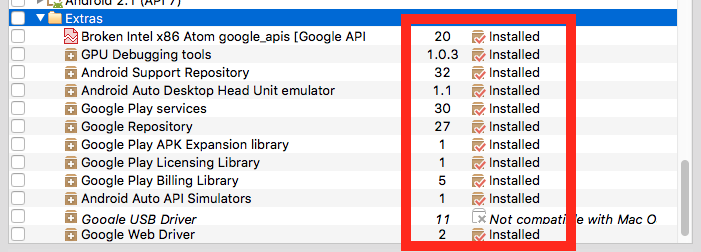
- Click OK
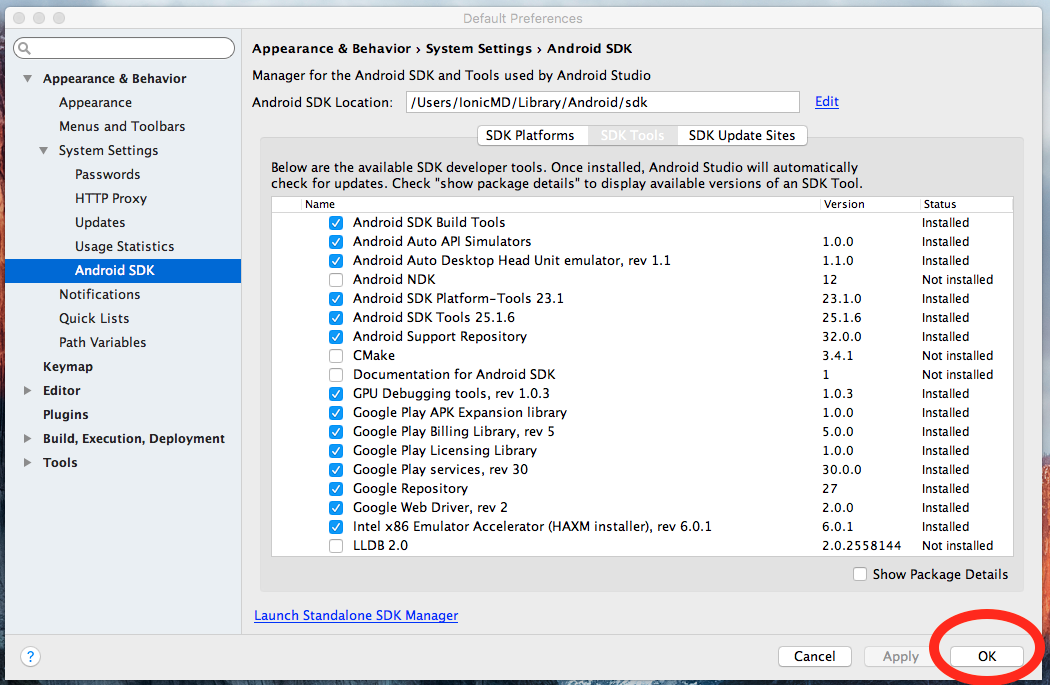
- Close Android Studio
For Mac OS El Capitan
You will found the issue of cordova when add platform then it will get failed return (cordova keeps a cached version in your ${HOME}/.cordova folder.).
Reference from Ionicframework Forum Add platform ios failed,
However to fix this issue please following below steps.
Open a new Terminal and run :
rm -rf ~/.cordova
D-2) Open Project - top
After you extract files from a zip package. Move Folder IonicMaterialDesign to your local computer directory path.
D-3) Add Platform - top
To run project on IOS / Android you need to add ionic platform by following steps.
Open a new cmd.exe for windows or Terminal for mac and run :
      cd your_project_path/IonicMaterialDesign
      ionic platform add ios
      ionic platform add android
Ionic Framework will add platform to project for Build, Deploy or Emulate Application.
D-4) Add Ionic Plugin - top
You have to install below plugin for let the project work.
Install all plugin Set 1 and 2.
Open a new cmd.exe for windows or Terminal for mac.
Set 1
        cd your_project_path/IonicMaterialDesign
        ionic plugin add cordova-plugin-statusbar
        ionic plugin add cordova-plugin-contacts
        ionic plugin add cordova-plugin-camera
        ionic plugin add cordova-plugin-vibration
        ionic plugin add cordova-plugin-device
        ionic plugin add cordova-plugin-console
        ionic plugin add cordova-plugin-transport-security
        ionic plugin add cordova-plugin-inappbrowser
        ionic plugin add cordova-plugin-splashscreen
        ionic plugin add cordova-plugin-admobpro
Set 2
        ionic plugin add cordova-plugin-x-socialsharing
        ionic plugin add cordova-plugin-email-composer
        ionic plugin add ionic-plugin-keyboard
        ionic plugin add cordova-sms-plugin
        ionic plugin add https://github.com/apache/cordova-plugin-whitelist.git
        ionic plugin add https://github.com/devgeeks/Canvas2ImagePlugin.git
        ionic plugin add https://github.com/wymsee/cordova-imagePicker.git
        ionic plugin add https://github.com/litehelpers/Cordova-sqlite-storage.git#0.7.14
        ionic plugin add https://github.com/EddyVerbruggen/Flashlight-PhoneGap-Plugin
        ionic plugin add https://github.com/katzer/cordova-plugin-local-notifications
Now your project is ready to run.
D-5) Install Crosswalk Browser - top
Crosswalk is an open source project that allows you to specify a version of Chrome to use as your web browser in
Android. The compiled app will have your code hosted inside of this Chrome webview. Performancr will
better than devise browser. You can find mor information at Ionic Crosswalk
Install Crosswalk Browser
Open a new cmd.exe for windows or Terminal for mac.
        cd your_project_path/IonicMaterialDesign
        ionic browser add crosswalk
Now your project is ready for Crosswalk.
D-6) Run and Debug On Browser - top
Use ionic serve -l to start a local development and run on browser.
Open a new cmd.exe for windows or Terminal for
mac and run :
      cd your_project_path/IonicMaterialDesign
      ionic serve -l
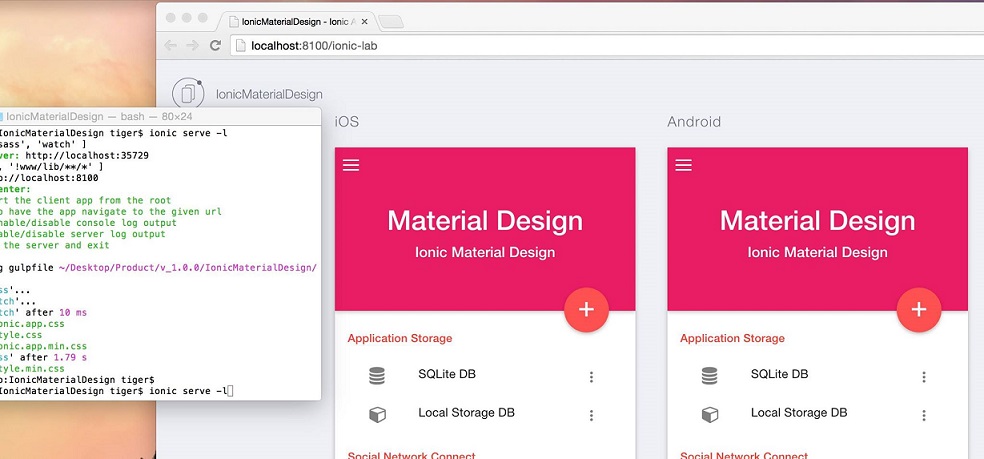
Important : Function that required device environment will not working on browser.
Learn More Option: Ionic Testing and Live Development
You can debug on browser by :
- Open google chrome
- Open debug console by right click and click inspect element
Learn More : Ionic Google Chrome Inspect Element
D-7) Android Build - top
To build project to android platform you have to install android and java runtime to your computer by following
instruction of :
Ionic Framework walkthrough installing Cordova, Android
Or Youtube walkthrough of Ionic Framework channel : Youtube
walkthrough on installing Cordova, Android
After install success to build android you have to follow this step:
Open a new cmd.exe for windows or Terminal for
mac and run :
      cd your_project_path/IonicMaterialDesign
      ionic build android
Build result will paste at Folder platforms - This is a place of android and ios project after build ionic will paste it here.
D-8) IOS Build - top
To build project to IOS platform you can build it only mac computer by following step:-
Open a new cmd.exe for windows or Terminal for
mac and run :
      cd your_project_path/IonicMaterialDesign
      ionic build ios
Build result will paste at Folder platforms - This is a place of android and ios project after build ionic will paste it here. - Open your Xcode by go to your project path. your_project_path/platforms/ios/IonicMaterialDesign.xcodeproj. You can run it by select your IOS device or device emulator. and click play button.
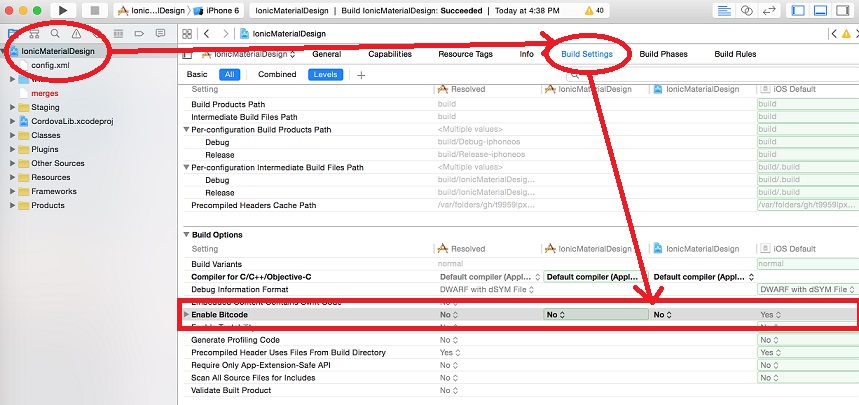
- Important for Xcode 7. You have to set build option to disabled Bitcode
for using Google AdMob by following step :
- Open your xcode by go to your project path. your_project_path/platforms/ios/IonicMaterialDesign.xcodeproj.
- Click Project Property
- Click Build Setting
- Change to Enable Bitcode to No
D-9) Deploy To Android device - top
To install this Ionic Material Design project to your Android device you have to follow this step:
Open a new cmd.exe for windows or Terminal for
mac and run :
      cd your_project_path/IonicMaterialDesign
      ionic run android
Important : You have to installing Cordova, Android to your computer.
Learn More : Android Build Section
Note : You have to set your android device to debug mode and connect it to computer before run command.
D-10) Deploy To IOS device - top
To install this Ionic Material Design project to your IOS device you have to follow this step:
- Open a new cmd.exe for windows or Terminal for
mac and run :
      cd your_project_path/IonicMaterialDesign
      ionic build ios
Note : You have to connect ios device to computer before run command. - Open your xcode by go to your project path. your_project_path/platforms/ios/IonicMaterialDesign.xcodeproj
-
Select your IOS device or device emulator.

-
Click build button. It will install to your IOS device

D-11) Sass Setup - top
Ionic Material Design use Powerfull tool Ionic Sass
for default css file.
Directory : project_path/scss :
Setup
You have to install gulpjs is required for run sass by :
open a new cmd.exe for windows or Terminal for
mac and run :
       cd your_project_path
       npm install gulp
Then setup Sass
ionic setup sass
Note: After you success sass setup. It will change css reference at index.html (head section). You Need to manual set it back. by add below code to index.html file at head section
    <link rel="stylesheet" href="css/ionic.app.css">
    <link rel="stylesheet" href="css/style.css">
    ...
Learn more: Ionic Sass
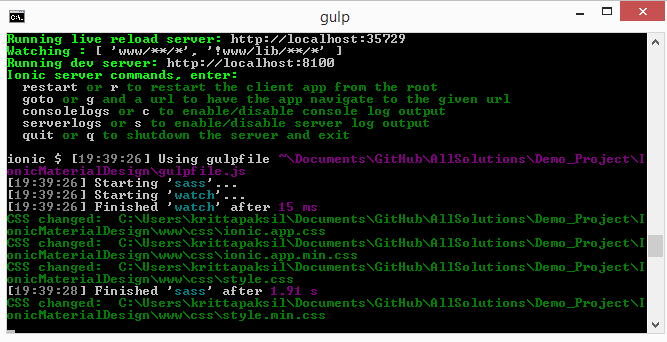
After save file style.scss file nodejs will convert to css file at path www/css/style.css. We reference style.css at www/index.html
Important:
To convert file scss to css file you need to run ionic server for start gup task :
Open a new cmd.exe for windows or Terminal for
mac and run :
      cd your_project_path/IonicMaterialDesign
      ionic serve -l
D-12) Icon and Splash Screen - top
To change Application Icon and Splash Screen Ionic Framework have tool for create it to all device size and platform by following step.
- Create icon by save an icon.png, icon.psd or icon.ai file within the resources
directory at the root of the project. The icon image's minimum dimensions should be 192x192 px, and
should have no rounded corners. Note that each platform will apply it's own mask and
effects to the icons. For example, iOS will automatically apply it's custom rounded corners, so the source
file should not already come with rounded corners. This Photoshop icon template provides the
recommended size and guidelines of the artwork's safe zone.
-
Create splash screen by save a splash.png ,splash.psd or splash.ai
file within the resources directory at the root of the project. Splash screen
dimensions vary for each platform, device
and orientation, so a square source image is required the generate each of various sizes. The source
image's minimum dimensions should be 2208x2208 px, and its artwork should be centered within the square,
knowing that each generated image will be center cropped into landscape and portrait images. The splash
screen's artwork should roughly fit within a center square (1200x1200 px). This Photoshop splash screen template
provides the recommended size and guidelines of the artwork's safe zone. Additionally, when the
Orientationpreference config is set to eitherlandscapeorportraitmode, then only the necessary images will be generated.
-
open a new cmd.exe for windows or Terminal for
mac and run :
    cd your_project_path/IonicMaterialDesign
    ionic resources
Ionic framework will create image file all size and platform at resources/ios and android directory at the root of the project
-
Deploy to device new application icon and splash screen will change.
Deploy To Android device
Deploy To IOS device
Learn More : Icon and Splash Screen
D-13) Update project to latest version - top
Please follow below step to update project for the latest version of Ionic Material Design.
You have to uninstall all plugin from your project and install it again by using below upgrade procedure :
- Create copy of Backup you project
- Open a new cmd.exe for windows or Terminal for mac.
- Remove platfrom IOS and Android
cd your_project_path/IonicMaterialDesign
ionic platform remove android
ionic platform remove ios
- Uninstall all plugin by remove all plugin in project.
cd your_project_path/IonicMaterialDesign
ionic plugin remove cordova-plugin-googleplayservices
ionic plugin remove com.cordova.plugins.sms
ionic plugin remove com.synconset.imagepicker
ionic plugin remove org.apache.cordova.splashscreen
ionic plugin remove cordova-plugin-admob
ionic plugin remove cordova-plugin-camera
ionic plugin remove cordova-plugin-console
ionic plugin remove cordova-plugin-contacts
ionic plugin remove cordova-plugin-flashlight
ionic plugin remove cordova-plugin-inappbrowser
ionic plugin remove cordova-plugin-splashscreen
ionic plugin remove cordova-plugin-transport-security
ionic plugin remove cordova-plugin-vibration
ionic plugin remove cordova-plugin-whitelist
ionic plugin remove cordova-plugin-x-socialsharing
ionic plugin remove cordova-sqlite-storage
ionic plugin remove de.appplant.cordova.plugin.email-composer
ionic plugin remove de.appplant.cordova.plugin.local-notification
ionic plugin remove ionic-plugin-keyboard
ionic plugin remove org.devgeeks.Canvas2ImagePlugin
ionic plugin remove com.google.admobsdk
ionic plugin remove cordova-plugin-app-event
ionic plugin remove cordova-plugin-crosswalk-webview
ionic plugin remove cordova-plugin-admobpro
ionic plugin remove cordova-plugin-email-composer
ionic plugin remove cordova-plugin-extension
ionic plugin remove cordova-plugin-image-picker
ionic plugin remove cordova-plugin-device
ionic plugin remove cordova-plugin-statusbar
- Update file package.json by :
- Open file at root path ~/IonicMaterialDesign/package.json
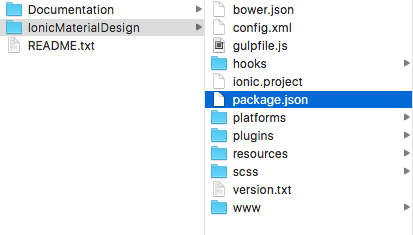
- Set value of cordovaPlugins to empty array []
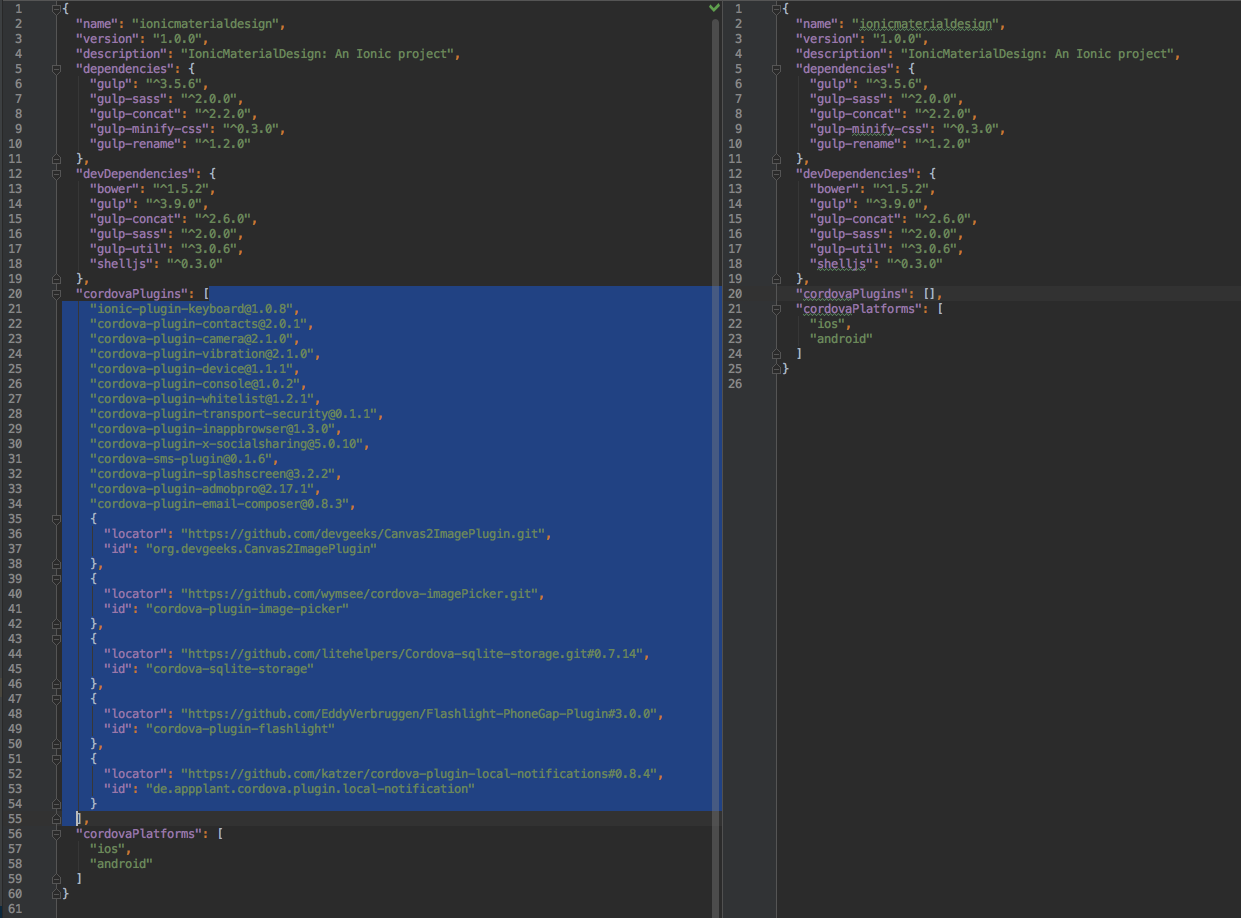
- Open file at root path ~/IonicMaterialDesign/package.json
- Save the file.
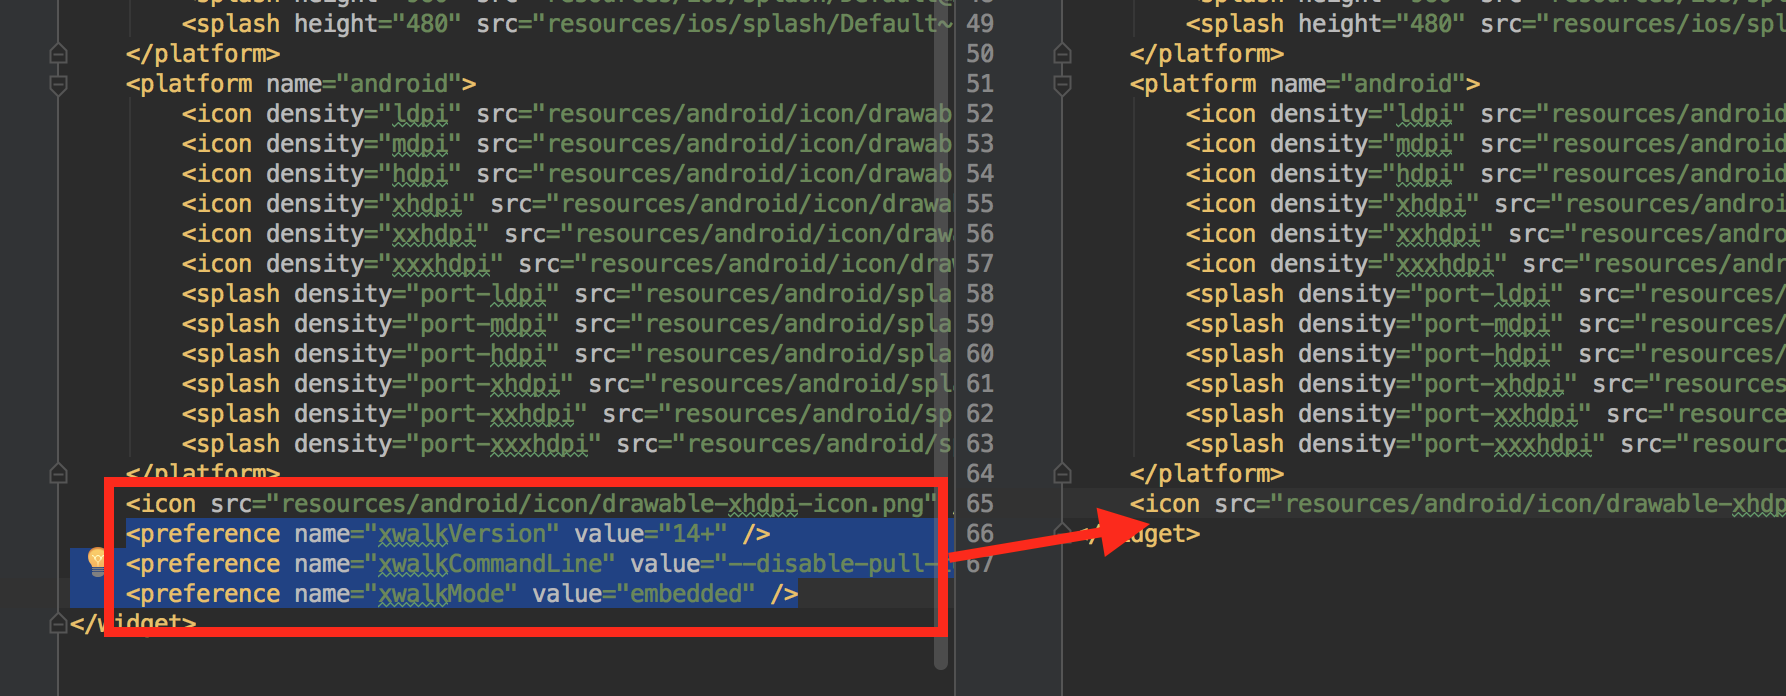
- Update file ~/IonicMaterialDesign/config.xml by :
-
Remove XML node <preference name="xwalk...*" value="...*" > like below list
- <preference name="xwalkVersion" value="14+" />
- <preference name="xwalkCommandLine" value="--disable-pull-to-refresh-effect" />
- <preference name="xwalkMode" value="embedded" />
- <preference name="xwalkMultipleApk" value="true" />
-
Remove XML node <preference name="xwalk...*" value="...*" > like below list
- Open directory of your project IonicMaterialDesign rename or remove folder platforms and plugins
- This version we have update below file for new feature of Ionic Material Design
You can copy below file from new package and then paste to your project :
- SCSS/style.scss
- www/css/style.css
- www/css/style.min.css
- Following installation step of project documentation D1 – D10 at
- D-1 Installing Ionic Framework
- D-2 Open Project
- D-3 Add Platform
- D-4 Add Ionic Plugin
- D-5 Install Crosswalk Browser
- D-6 Run and Debug On Browser
- D-7 Android Build
- D-8 IOS Build
- D-9 Deploy to Android device
- D-10 Deploy to IOS device
E) How to edit a Project File. - top
You can use below editors to edit project file on Windows and Mac :F) HTML Files and Structure - top
Please find HTML structure of Ionic Material Design :
- index.html : This is a main HTML file of project default page when application
start and all reference of css and javascript lib is here.
- If you would like to add or update reference of CSS, Javascript
Lib, Angular
Controller, Angular Module, You can add or update it at <head>
section
-
Ionic navigation bar section is a directive of Ionic Framework for show
application navigation
bar. And present a view to the page.
Learn more: Ionic ion-nav-bar
- If you would like to add or edit Angular custom template you would do the following:
- Go to Angular custom template section
-
Add new template by create new script :
-
File Structure :
<!--This is a main HTML file of project default page when application start.-->
<!--All reference of css and javascript lib is here.-->

<!DOCTYPE html>
<html>

<!--head section This is a place of all reference of css and javascript lib-->
<head>
    <!-- Meta section -->
    <meta charset="utf-8">
    <meta name="viewport" content="initial-scale=1, maximum-scale=1, user-scalable=no, width=device-width">
    <meta name="format-detection" content="telephone=no"> <!-- To disable phone number typing.-->
    <!-- end Meta section -->
    <title></title>

    <!-- Font reference section -->
    <link href="lib/robotodraft/robotodraft.css">
    <!-- end Font reference section -->

    <!-- CSS reference section -->
    <link rel="stylesheet" href="css/ionic.app.css">
    <link rel="stylesheet" href="css/style.css">
    <link rel="stylesheet prefetch" href="lib/angular-material/angular-material.css">
    <link rel="stylesheet" href="lib/font-awesome-4.4.0/css/font-awesome.css">
    <!-- end CSS reference section -->

    <!-- Ionic javascript lib -->
    <script src="lib/ionic/js/ionic.bundle.js"></script>
    <!-- end Ionic javascript lib -->

    <!-- Angular javascript lib -->
    <script src="lib/angular-messages/angular-messages.js"></script>
    <script src="lib/angular-aria/angular-aria.js"></script>
    <script src="lib/angular-material/angular-material.js"></script>
    <!-- end Angular javascript lib -->

    <!-- Cordova script (this will be a 404 during development) -->
    <script src="lib/ngCordova/dist/ng-cordova.js"></script>
    <script src="cordova.js"></script>
    <!-- end Cordova script -->

    <!--ionic framework ngIOS9UIWebViewPatch-->
    <!--Learn more about ngIOS9UIWebViewPatch at : http://blog.ionic.io/ios-9-potential-breaking-change/-->
    <script src="lib/ngIOS9UIWebViewPatch/angular-ios9-uiwebview.patch.js"></script>
    <!--end ionic framework ngIOS9UIWebViewPatch-->

    <!-- app.js section-->
    <script src="js/app.js"></script>
    <!-- end app.js section-->

    <!-- Controllers section-->
    <script src="js/controllers.js"></script>
    <script src="js/shared/directives.js"></script>
    <script src="js/shared/filter.js"></script>
    <script src="js/shared/controllers.js"></script>
    <script src="templates/menu/js/controllers.js"></script>
    <script src="templates/material-user-interface/dashboard/js/controllers.js"></script>
    <script src="templates/application-storage/sqLite/js/controllers.js"></script>
    <script src="templates/application-storage/sqLite/js/services.js"></script>
    <script src="templates/application-storage/local-application-db/js/controllers.js"></script>
    <script src="templates/application-storage/local-application-db/js/services.js"></script>
    <script src="templates/social-network-connect/facebook/js/controllers.js"></script>
    <script src="templates/social-network-connect/instagram/js/controllers.js"></script>
    <script src="templates/social-network-connect/google-plus/js/controllers.js"></script>
    <script src="templates/social-network-connect/foursquare/js/controllers.js"></script>
    <script src="templates/social-network-connect/dropbox/js/controllers.js"></script>
    <script src="templates/share-application-content/social-share/js/controllers.js"></script>
    <script src="templates/share-application-content/email-message/js/controllers.js"></script>
    <script src="templates/hardware-connect/device-information/js/controllers.js"></script>
    <script src="templates/hardware-connect/mobile-contract/js/controllers.js"></script>
    <script src="templates/hardware-connect/flash-light/js/controllers.js"></script>
    <script src="templates/hardware-connect/vibration/js/controllers.js"></script>
    <script src="templates/advertising-application/googleAdmob/js/controllers.js"></script>
    <script src="templates/hardware-connect/image-picker/js/controllers.js"></script>
    <script src="templates/social-network-connect/wordpress/js/controllers.js"></script>
    <script src="templates/material-user-interface/dashboard/js/controllers.js"></script>
    <script src="templates/material-user-interface/default-user-interface/js/controllers.js"></script>
    <script src="templates/themes/menu-dashboard/js/controllers.js"></script>
    <script src="templates/themes/expense-dashboard/js/controllers.js"></script>
    <script src="templates/themes/catalog/js/controllers.js"></script>
    <script src="templates/push-notification/single-push-notification/js/controllers.js"></script>
    <script src="templates/push-notification/schedule-push-notification/js/controllers.js"></script>
    <!-- end Controllers section-->

    <!-- jQuery section-->
    <script src="lib/jQuery/jquery.js"></script>
    <!-- end jQuery section-->

</head><!-- end head section-->

<!--body section-->
<body ng-app="starter" class="hide-native-scroll-y">

<!--Custom Style section-->
<style type="text/css">
    {{customStyle}}
</style><!-- end Custom Style section-->

<!-- Ionic navigation bar section-->
<ion-nav-view></ion-nav-view>
<!-- end Ionic navigation bar section-->

</body><!-- end body section-->


<!-- Angular custom template section-->

<!--Share template confirm-dialog section-->
<script type="text/ng-template" id="confirm-dialog.html">
    <md-dialog aria-label="confirm-dialog">
        <form>
            <md-dialog-content>
                <div>
                    <h2 class="md-title">{{displayOption.title}}</h2>

                    <p>{{displayOption.content}}</p>
                </div>
            </md-dialog-content>
            <div class="md-actions" layout="row">
                <a class="md-primary-color dialog-action-btn" ng-click="cancel()">
                    {{displayOption.cancel}}
                </a>
                <a class="md-primary-color dialog-action-btn" ng-click="ok()">
                    {{displayOption.ok}}
                </a>
            </div>
        </form>
    </md-dialog>
</script> <!-- end share template confirm-dialog section-->

<!-- Share template toast section-->
<script type="text/ng-template" id="toast.html">
    <md-toast class="toast-form">
        <span flex>{{displayOption.title}}</span>
    </md-toast>
</script><!-- end share template toast section-->

<!-- end Angular custom template section-->

</html>
- If you would like to add or update reference of CSS, Javascript
Lib, Angular
Controller, Angular Module, You can add or update it at <head>
section
- templates html : Ionic Material Design use ion-nav-view and
ion-content for present
children view to navigation bar directive of Ionic framework. If you would like to edit templates html view,
You can add html to Content section and please use below html structure :
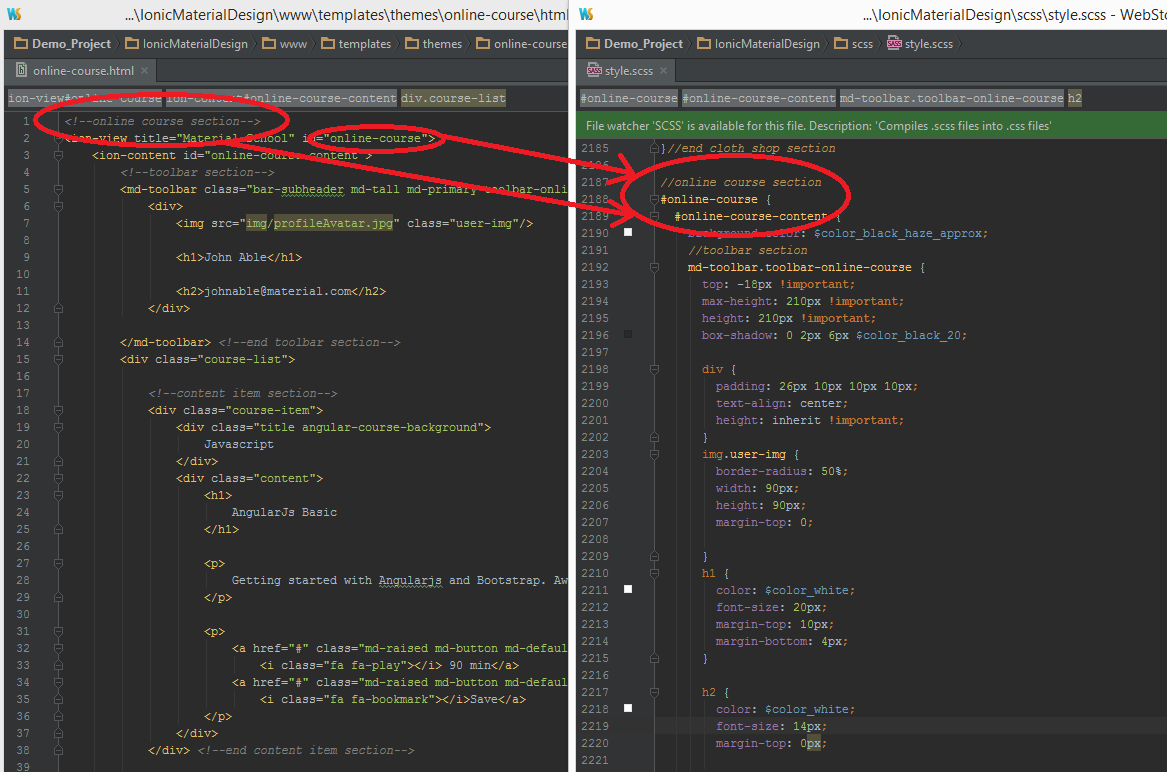
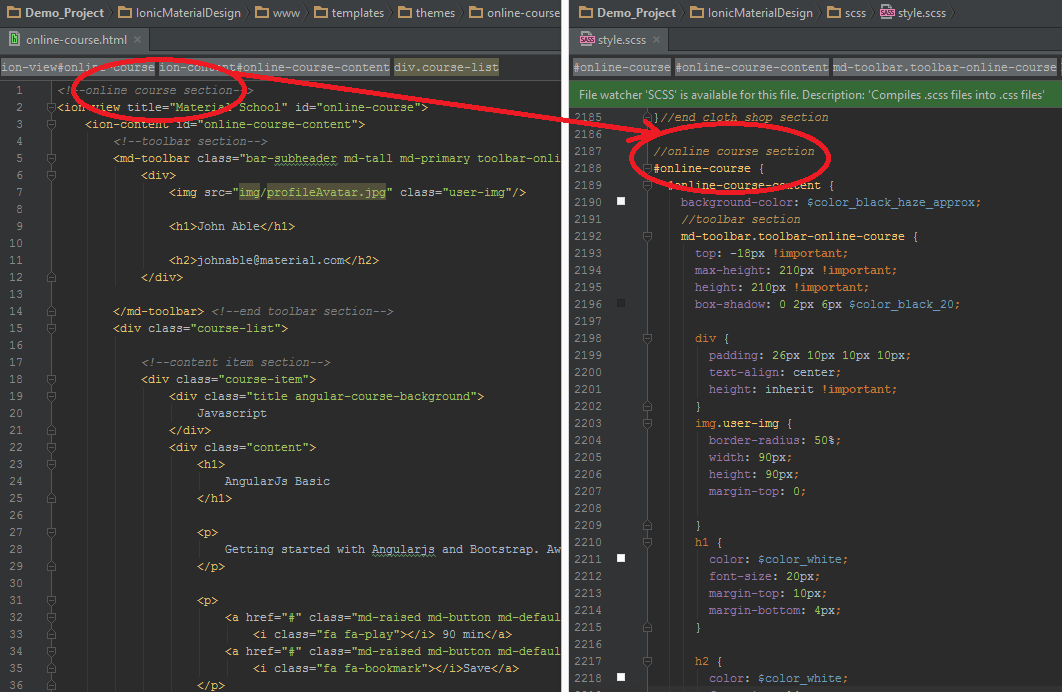
This is a sample
All section of html will have label section name, ID that reference to css. If you would like to edit you can open projectPath/scss/style.scss then find id of reference and edit it.
G) CSS Files and Structure - top
Ionic Material Design use css library as below :
- Default CSS - Is a default CSS of Project.
- SASS Directory: scss/style.scss
- CSS Directory: www/css/style.css
- Ionic Framework CSS - Is a default CSS of Ionic Framework.
- CSS Directory : www/css/ionic.app.css
- Angular Material CSS - Is a default CSS of Angular Material.
- CSS Directory : www/lib/angular-material/angular-material.css
- Goolge Font robotodraft
- CSS Directory : www/lib/robotodraft/robotodraft.css
- Font Awesome
- CSS Directory : www/lib/font-awesome-4.4.0/css/font-awesome.css
Default CSS of Project.
This project use Ionic Sass to create default CSS file . You can go to Sass Setup Section to setup sass.
If you would like to edit default CSS of project. Open style.scss file at path scss/style.scss you will found a section of :
- global variable section - Is a place of global variable of scss file.
- colors variable section - Place of all color reference, You can change a value of variable to change a color here.
- fonts variable section - Place of all fonts reference, You can change a value of variable to change a font here.
- urls variable section - Place of all urls reference, You can change a value of variable to change a urls of resource here.
//global variable section

//colors variable section
$color_white: white;
$color_gray: gray;
$color_alto: #dbdbdb;
$color_black: black;
$color_mercury: #e5e5e5;
$color_black_14: rgba(0, 0, 0, 0.14);
$color_black_12: rgba(0, 0, 0, 0.12);
$color_black_20: rgba(0, 0, 0, 0.2);
$color_black_084: rgba(0, 0, 0, 0.084);
$color_black_098: rgba(0, 0, 0, 0.098);
$color_black_haze_approx: #f6f6f6;
$color_angular: #E15258;
$color_ionic: #3079AB;
$color_material: #E59A13;
$color_ios: #45AFA8;
$color_facebook: #3c5c99;
$color_google_plus: #d73d32;
$color_instagram: #517fa4;
$color_foursquare: #f94777;
$color_dropbox: #017ee6;
$color_wordoress: #0087BE;
$color_romance_approx: #fefefe;
$color_alabaster: #fafafa;
$color_gondola_40_approx: rgba(34, 25, 25, 0.4);
$color_celeste_approx: #ccc;
$color_mine_shaft_approx: #333;
$color_carnation_approx: #ff5252;
$color_chenin_approx: #e3cf7a;
$color_red_orange_approx: #f44336;
$color_border_under_line: rgba(0, 0, 0, 0.12);
$color_md_tabs_border: #E1E1E1;
$color_md-whiteframe: #fff;
$color_border_menu_dashboard: rgba(225, 225, 225, 0.69);
$color_news_header: #2882D8;

//fonts variable section
$font_roboto_draft: RobotoDraft;
$font_roboto: Roboto;
$font_helvetica_neue: Helvetica Neue;
$font_sans-serif: sans-serif;
$font_arial: Arial;

//urls variable section
$url_background_cover_pixels: url(../img/background_cover_pixels.png);
$url_background_cover_contract_us: url(../img/contract_us_bg.jpg);
$url_background_cover_try_app_01: url(../img/slide_01.png);
$url_background_cover_try_app_02: url(../img/slide_02.png);
$url_background_cover_try_app_03: url(../img/slide_03.png);
$url_background_cover_try_app_04: url(../img/slide_04.png);
$url_background_cover_try_app_05: url(../img/slide_05.png);
$url_background_cover_try_app_06: url(../img/slide_06.png);
$url_background_cover_try_app_07: url(../img/slide_07.png);
$url_background_cover_try_app_08: url(../img/slide_08.png);
$url_background_cover_restaurant_01: url(../img/food_01.png);
$url_background_cover_restaurant_02: url(../img/food_02.png);
$url_background_cover_restaurant_03: url(../img/food_03.png);

//end global variable section

//global class section
If you would like to edit a specific section of the site, simply find the appropriate label, section, ID in
the CSS file, and then scroll down until you find the appropriate style that needs to be edited.
Grid system.
This project use Ionic Framework Grid System.
If you would like to create or edit layout you can use Column Percentage Class names for view
layout by using this structure :
.col.col-50.col.col.col.col-75.col.col.col.col-75.col.col

Learn more about: Ionic Framework Grid System.
H) Javascript Files and Structure - top
This application imports three Javascript files.
- Ionic Framework - Is the JavaScript frameworks,
open source front-end SDK for
developing hybrid mobile apps with web technologies.
- Directory: www/lib/ionic/js/ionic.bundle.js
- Angular Material - Angular
Material JavaScript frameworks is an implementation of Material
Design in Angular.js
- Directory: www/lib/angular-material/angular-material.js
- Required Framework of Angular Material :
- Angular Messages -
Is a JavaScript frameworks of Angular Messages provides enhanced support for displaying
messages.
- Directory: www/lib/angular-messages/angular-messages.js
- Angular Aria - Is a
JavaScript frameworks of Angular Aria provides support for common
ARIA
attributes that convey state or semantic information about the application for users
of assistive technologies, such as screen readers.
- Directory: www/lib/angular-messages/angular-aria.js
- Angular Messages -
Is a JavaScript frameworks of Angular Messages provides enhanced support for displaying
messages.
- ngCordova - Is a JavaScript frameworks of AngularJS
Services for Cordova and Phonegap.
- Directory: www/lib/ngCordova/dist/ng-cordova.js
- jQuery
- Directory: www/lib/jQuery/jquery.js
- Main Angular Javascript Of Application - This is a main javascript file of project. All
javascript setting is here.
- Directory: www/js/app.js
- You can change javascript setting of :
- Global Variable use for setting color, start page, message, oAuth key.
// //Welcome to app.js //This is main application config of project. You can change a setting of : // - Global Variable // - Theme setting // - Icon setting // - Register View // - Spinner setting // - Custom style // //global variable use for setting color, start page, message, oAuth key. var db = null; //Use for SQLite database. window.globalVariable = { color: {//custom color style variable appPrimaryColor: "", dropboxColor: "#017EE6", facebookColor: "#3C5C99", foursquareColor: "#F94777", googlePlusColor: "#D73D32", instagramColor: "#517FA4", wordpressColor: "#0087BE" },//end custom color style variable startPage: { url: "/app/dashboard", //Url of start page. state: "app.dashboard"//State name of start page. }, message: { errorMessage: "Technical error please try again later." //Default error message. }, oAuth: { dropbox: "xxx-xxx-xxx", //Use for Dropbox API clientID. facebook: "xxx-xxx-xxx", //Use for Facebook API clientID. foursquare: "xxx-xxx-xxx", //Use for Foursquare API clientID. instagram: "xxx-xxx-xxx", //Use for Instagram API clientID. googlePlus: "xxx-xxx-xxx", //Use for Google API clientID. adMob: "xxx-xxx-xxx" //Use for AdMob API clientID. } };//end global variable - Theme setting - Use mdThemingProvider for change theme color of Ionic
Material Design Appplication.
//mdThemingProvider use for change theme color of Ionic Material Design Appplication. /* You can select color from Material Color List configuration : * red * pink * purple * purple * deep-purple * indigo * blue * light-blue * cyan * teal * green * light-green * lime * yellow * amber * orange * deep-orange * brown * grey * blue-grey */ //Learn more about material color patten: https://www.materialpalette.com/ //Learn more about material theme: https://material.angularjs.org/latest/#/Theming/01_introduction $mdThemingProvider .theme('default') .primaryPalette('pink') .accentPalette('red'); - Icon setting - Use mdIconProvider to improve performance loading. You can
add new .SVG file or edit here.
//mdIconProvider is function of Angular Material. It use for reference .SVG file and improve performance loading. $mdIconProvider .icon('facebook', 'img/icons/facebook.svg') .icon('twitter', 'img/icons/twitter.svg') .icon('mail', 'img/icons/mail.svg') .icon('message', 'img/icons/message.svg') .icon('share-arrow', 'img/icons/share-arrow.svg') .icon('more', 'img/icons/more_vert.svg'); - Register View - You can change setting of view in application here.
//$stateProvider is using for add or edit HTML view to navigation bar. // //Setting by : //state_name(String) : Name of state to use in application. //page_name(String) : Name of page to present at localhost url. //cache(Bool) : Cache of view and controller default is true. Change to false if you want page reload when application navigate back to this view //html_file_path(String) : Path of html file. //controller_name(String) : Name of Controller. // //Learn more about ionNavView at http://ionicframework.com/docs/api/directive/ionNavView/ //Learn more about AngularUI Router's at https://github.com/angular-ui/ui-router/wiki $stateProvider .state('app', { url: "/app", abstract: true, templateUrl: "templates/menu/html/menu.html", controller: 'menuCtrl' }) - Spinner setting
//use for change ionic spinner to android pattern.
$ionicConfigProvider.spinner.icon("android");
- Global Variable use for setting color, start page, message, oAuth key.
- Main Angular Controller Of Application- This is main AngularJs module of controllers and
service file of
project. All controller is here.
- Directory: www/js/controllers.js
- This application have 2 module as below detail :
var appControllers = angular.module('starter.controllers', []); //Use for all controller of application.
var appServices = angular.module('starter.services', []); //use for all service of application.
- Shared Controller , directives , filter Of Application - This is a place of shared angular
controllers, directives, filter.
- Directory: www/js/shared/controllers.js
//This is controller for Dialog box appControllers.controller('DialogController', function ($scope, $mdDialog, displayOption) { //this variable for display wording of dialog. //object schema: //displayOption: { // title: "Confirm to remove all data?", // content: "All data will remove from local storage.", // ok: "Confirm", // cancel: "Close" //} $scope.displayOption = displayOption; $scope.cancel = function () { $mdDialog.cancel(); //close dialog. }; $scope.ok = function () { $mdDialog.hide();//hide dialog. }; });//end controller for Dialog box. //This is controller for toast appControllers.controller('toastController', function ($scope, displayOption) { //this variable for display wording of toast. //object schema: // displayOption: { // title: "Data Saved !" //} $scope.displayOption = displayOption; });//end controller for toast. - Directory: www/js/shared/directives.js
//Directive numbersOnly : //Use for change input to have ability accept only number. //Example : // appControllers.directive('numbersOnly', function () { return { require: 'ngModel', link: function (scope, element, attr, ngModelCtrl) { function fromUser(text) { if (text) { var transformedInput = text.replace(/[^0-9]/g, ''); if (transformedInput !== text) { ngModelCtrl.$setViewValue(transformedInput); ngModelCtrl.$render(); } return transformedInput; } return undefined; } ngModelCtrl.$parsers.push(fromUser); } }; });//end Directive numbersOnly. - Directory: www/js/shared/filter.js
//Filter epochToDate : //Use for convert epoch date format to default date format. //Example : //
{{item.createdAt |epochToDate | date:"short"}}
appControllers.filter('epochToDate', function ($filter) { return function (input) { return new Date(Date(input)); }; });//end Filter epochToDate. //Filter numberSuffix : //Use for convert number to have suffix 1,000 to 1K //Example : //{{item.likes.summary.total_count | numberSuffix}} // appControllers.filter('numberSuffix', function () { return function (input) { var exp; var suffixes = ['k', 'M', 'G', 'T', 'P', 'E']; if (window.isNaN(input)) { return 0; } if (input < 1000) { return input; } exp = Math.floor(Math.log(input) / Math.log(1000)); return (input / Math.pow(1000, exp)).toFixed(1) + suffixes[exp - 1]; } });//end Filter numberSuffix.
- Directory: www/js/shared/controllers.js
- templates Controller - This is a place of themplete controller.
- Directory: www/templates/component_name/component/js/controllers.js
If you would like to edit controller go to directory of component, Then this is a sample of templates Controller : // For using social share you have to install $cordovaSocialSharing by running the following // command in your cmd.exe for windows or Terminal for mac: // $ cd your project path // $ ionic plugin remove nl.x-services.plugins.socialsharing // $ ionic plugin add https://github.com/EddyVerbruggen/SocialSharing-PhoneGap-Plugin.git // // For using save image you have to install Canvas2ImagePlugin by running the following // command in your cmd.exe for windows or Terminal for mac: // $ cd your project path // $ ionic plugin remove org.devgeeks.Canvas2ImagePlugin // $ ionic plugin add https://github.com/devgeeks/Canvas2ImagePlugin.git // // Controller of product list Page. appControllers.controller('productListCtrl', function ($scope, $timeout, $state, $http) { // This function is the first activity in the controller. // It will initial all variable data and let the function works when page load. $scope.initialForm = function () { // $scope.productList is the variable that store user product data. $scope.productList = []; // loading progress $timeout(function () { if ($scope.isAndroid) { jQuery('#product-list-loading-progress').show(); } else { jQuery('#product-list-loading-progress').fadeIn(700); } }, 400); $timeout(function () { jQuery('#product-list-loading-progress').hide(); jQuery('#product-list-content').fadeIn(); }, 4000);// End loading progress };// End initialForm // navigateTo is for navigate to other page. // by using targetPage to be the destination page // and send object to the destination page. // Parameter : // targetPage = destination page. // objectData = object data that sent to destination page. $scope.navigateTo = function (targetPage, objectData) { $state.go(targetPage, { product: objectData }); };// End navigateTo // loadMore is for loadMore product list. $scope.loadMore = function () { $timeout(function () { //get product list from json at paht: www/app-data/product-list.json $http.get('app-data/product-list.json') .success(function (productList) { // Success retrieve data. // Store user data to $scope.productList. for (var product = 0; product < productList.length; product++) { $scope.productList.push(productList[product]); } // To stop loading progress. $scope.$broadcast('scroll.infiniteScrollComplete'); }); }, 2000); };// End loadMore $scope.initialForm(); });// End of product list controller. // Controller of product Detail Page. appControllers.controller('productDetailCtrl', function ($scope, $mdToast, $mdBottomSheet, $timeout, $stateParams) { // This function is the first activity in the controller. // It will initial all variable data and let the function works when page load. $scope.initialForm = function () { //$scope.product is product detail // $stateParams.product is the object that pass from product list page. $scope.product = $stateParams.product; // Loading progress. $timeout(function () { if ($scope.isAndroid) { jQuery('#product-detail-loading-progress').show(); } else { jQuery('#product-detail-loading-progress').fadeIn(700); } }, 400); $timeout(function () { jQuery('#product-detail-loading-progress').hide(); jQuery('#product-detail-content').fadeIn(); }, 3000);// End loading progress };// End initialForm // addToCart for show Item Added ! toast. $scope.addToCart = function () { $mdToast.show({ controller: 'toastController', templateUrl: 'toast.html', hideDelay: 800, position: 'top', locals: { displayOption: { title: "Item Added !" } } }); }; // End addToCart // sharedProduct fro show shared social bottom sheet by calling sharedSocialBottomSheetCtrl controller $scope.sharedProduct = function ($event, product) { $mdBottomSheet.show({ templateUrl: 'bottom-sheet-shared.html', controller: 'sharedSocialBottomSheetCtrl', targetEvent: $event, locals: { product: product } }); };// End sharedProduct $scope.initialForm(); });// End of product list controller. // Controller of share social bottom sheet. appControllers.controller('sharedSocialBottomSheetCtrl', function ($scope, $mdBottomSheet, $timeout, product, $mdToast, $cordovaSocialSharing) { // This function is the first activity in the controller. // It will initial all variable data and let the function works when page load. $scope.initialForm = function () { //$scope.setCanvasImage for set canvas image to save to your mobile gallery. $scope.setCanvasImage(product.img); //$scope.isSaving is image saving status. $scope.isSaving = false; };// End initialForm //setCanvasImage for set canvas image to save to your mobile gallery. $scope.setCanvasImage = function (imgPath) { // create canvas image var canvas = document.getElementById('imgCanvas'); var context = canvas.getContext('2d'); var imageObj = new Image(); imageObj.onload = function () { canvas.height = this.height; canvas.width = this.width; context.drawImage(imageObj, 0, 0); }; //image path. imageObj.src = imgPath; return canvas.toDataURL(); };// End setCanvasImage // getCanvasImageUrl for get canvas image path. $scope.getCanvasImageUrl = function () { var canvas = document.getElementById('imgCanvas'); return canvas.toDataURL(); };// End getCanvasImageUrl // sharedFacebook for share product picture to facebook by calling $cordovaSocialSharing $scope.sharedFacebook = function () { $cordovaSocialSharing.shareViaFacebook(" ", $scope.getCanvasImageUrl()); $mdBottomSheet.hide(); }// End sharedFacebook // sharedTwitter for share product picture to twitter by calling $cordovaSocialSharing $scope.sharedTwitter = function () { $cordovaSocialSharing.shareViaTwitter(" ", $scope.getCanvasImageUrl()); $mdBottomSheet.hide(); }// End sharedTwitter // sharedMail for share product picture to email by calling $cordovaSocialSharing $scope.sharedMail = function () { $cordovaSocialSharing.shareViaEmail(" ", "Shopping with ionic meterial", "ionicmaterialdesign@gmail.com", "cc@IonicMeterial.com", "bcc@IonicMeterial.com", $scope.getCanvasImageUrl()); $mdBottomSheet.hide(); }// End sharedMail // saveImage for save product picture to mobile gallery. $scope.saveImage = function () { if ($scope.isSaving == false) { try { // calling canvas2ImagePlugin to save image to gallery. window.canvas2ImagePlugin.saveImageDataToLibrary( function (msg) { }, function (err) { throw err; }, document.getElementById('imgCanvas')); $scope.isSaving = true; // show Image Saved ! toast when save image success. $mdToast.show({ controller: 'toastController', templateUrl: 'toast.html', hideDelay: 800, position: 'top', locals: { displayOption: { title: "Image Saved !" } } }); } catch (e) { console.log(e); // show Save Failed : Please try again! toast when save image is error. $mdToast.show({ controller: 'toastController', templateUrl: 'toast.html', hideDelay: 800, position: 'top', locals: { displayOption: { title: "Save Failed : Please try again!" } } }); } } // hide bottom sheet $timeout(function () { $mdBottomSheet.hide(); }, 1800); }// End saveImage // sharedMore for hide bottom sheet $scope.sharedMore = function () { $mdBottomSheet.hide(); }// End sharedMore $scope.initialForm(); });// End of share social bottom sheet controller. // Controller of product check out page. appControllers.controller('productCheckoutCtrl', function ($scope, $mdToast, $mdDialog) { //You can do some thing hear when tap on a credit card button. $scope.doSomeThing = function () { }// End doSomeThing // showConfirmDialog for show alert box. $scope.showConfirmDialog = function ($event) { //mdDialog.show use for show alert box for Confirm to complete order. $mdDialog.show({ controller: 'DialogController', templateUrl: 'confirm-dialog.html', targetEvent: $event, locals: { displayOption: { title: "Complete Order", content: "Confirm to complete Order.", ok: "Confirm", cancel: "Close" } } }).then(function () { // For confirm button to complete order. //Showing Order Completed. Thank You ! toast. $mdToast.show({ controller: 'toastController', templateUrl: 'toast.html', hideDelay: 1200, position: 'top', locals: { displayOption: { title: "Order Completed. Thank You !" } } }); }, function () { // For cancel button to complete order. }); }// End showConfirmDialog });// End of product check out controller.
Learn more about framework : Ionic Framework, Angular Material, Angular Messages, Angular Aria, ngCordova
All Javascript framework is reference at www/index.html at <head> section :
<!--head section This is a place of all reference of css and javascript lib-->
<head>
    <!-- Meta section -->
    <meta charset="utf-8">
    <meta name="viewport" content="initial-scale=1, maximum-scale=1, user-scalable=no, width=device-width">
    <meta name="format-detection" content="telephone=no"> <!-- To disable phone number typing.-->
    <!-- end Meta section -->
    <title></title>

    <!-- Font reference section -->
    <link href="lib/robotodraft/robotodraft.css">
    <!-- end Font reference section -->

    <!-- CSS reference section -->
    <link rel="stylesheet" href="css/ionic.app.css">
    <link rel="stylesheet" href="css/style.css">
    <link rel="stylesheet prefetch" href="lib/angular-material/angular-material.css">
    <link rel="stylesheet" href="lib/font-awesome-4.4.0/css/font-awesome.css">
    <!-- end CSS reference section -->

    <!-- Ionic javascript lib -->
    <script src="lib/ionic/js/ionic.bundle.js"></script>
    <!-- end Ionic javascript lib -->

    <!-- Angular javascript lib -->
    <script src="lib/angular-messages/angular-messages.js"></script>
    <script src="lib/angular-aria/angular-aria.js"></script>
    <script src="lib/angular-material/angular-material.js"></script>
    <!-- end Angular javascript lib -->

    <!-- Cordova script (this will be a 404 during development) -->
    <script src="lib/ngCordova/dist/ng-cordova.js"></script>
    <script src="cordova.js"></script>
    <!-- end Cordova script -->

    <!--ionic framework ngIOS9UIWebViewPatch-->
    <!--Learn more about ngIOS9UIWebViewPatch at : http://blog.ionic.io/ios-9-potential-breaking-change/-->
    <script src="lib/ngIOS9UIWebViewPatch/angular-ios9-uiwebview.patch.js"></script>
    <!--end ionic framework ngIOS9UIWebViewPatch-->

    <!-- app.js section-->
    <script src="js/app.js"></script>
    <!-- end app.js section-->

    <!-- Controllers section-->
    <script src="js/controllers.js"></script>
    <script src="js/shared/directives.js"></script>
    <script src="js/shared/filter.js"></script>
    <script src="js/shared/controllers.js"></script>
    <script src="templates/menu/js/controllers.js"></script>
    <script src="templates/material-user-interface/dashboard/js/controllers.js"></script>
    <script src="templates/application-storage/sqLite/js/controllers.js"></script>
    <script src="templates/application-storage/sqLite/js/services.js"></script>
    <script src="templates/application-storage/local-application-db/js/controllers.js"></script>
    <script src="templates/application-storage/local-application-db/js/services.js"></script>
    <script src="templates/social-network-connect/facebook/js/controllers.js"></script>
    <script src="templates/social-network-connect/instagram/js/controllers.js"></script>
    <script src="templates/social-network-connect/google-plus/js/controllers.js"></script>
    <script src="templates/social-network-connect/foursquare/js/controllers.js"></script>
    <script src="templates/social-network-connect/dropbox/js/controllers.js"></script>
    <script src="templates/share-application-content/social-share/js/controllers.js"></script>
    <script src="templates/share-application-content/email-message/js/controllers.js"></script>
    <script src="templates/hardware-connect/device-information/js/controllers.js"></script>
    <script src="templates/hardware-connect/mobile-contract/js/controllers.js"></script>
    <script src="templates/hardware-connect/flash-light/js/controllers.js"></script>
    <script src="templates/hardware-connect/vibration/js/controllers.js"></script>
    <script src="templates/advertising-application/googleAdmob/js/controllers.js"></script>
    <script src="templates/hardware-connect/image-picker/js/controllers.js"></script>
    <script src="templates/social-network-connect/wordpress/js/controllers.js"></script>
    <script src="templates/material-user-interface/dashboard/js/controllers.js"></script>
    <script src="templates/material-user-interface/default-user-interface/js/controllers.js"></script>
    <script src="templates/themes/menu-dashboard/js/controllers.js"></script>
    <script src="templates/themes/expense-dashboard/js/controllers.js"></script>
    <script src="templates/themes/catalog/js/controllers.js"></script>
    <script src="templates/push-notification/single-push-notification/js/controllers.js"></script>
    <script src="templates/push-notification/schedule-push-notification/js/controllers.js"></script>
    <!-- end Controllers section-->

    <!-- jQuery section-->
    <script src="lib/jQuery/jquery.js"></script>
    <!-- end jQuery section-->

</head><!-- end head section-->
I) Configuration - top
I-1) Theme Color - top
If you would like to change theme color of this application please following below step :
- Open File www/js/app.js
-
Go to Line : 297
$mdThemingProvider .theme('default') .primaryPalette('pink') .accentPalette('red'); -
You can change the primaryPalette and accentPalette of theme by using
below support color :
- red
- pink
- purple
- purple
- deep-purple
- indigo
- blue
- light-blue
- cyan
- teal
- green
- light-green
- lime
- yellow
- amber
- orange
- deep-orange
- brown
- grey
- blue-grey
-
Build project again theme color will change.

- material color patten for idea and inspiration about color: https://www.materialpalette.com/
- Material theme: https://material.angularjs.org/latest/#/Theming/01_introduction
I-2) Android Keyboard - top
To disable push up the screen when android keyboard was show up.
- Go to AndroidManifest.xml by project path : yourProjectPaht/platforms/android/AndroidManifest.xml
- Put adjustPan for android:windowSoftInputMode in tag activity

I-3) Disable phone number typing - top
To disable phone number typing.
Go to yourProjectPath/www/index.html and put this following code in the
meta area on head section.
<meta name="format-detection" content="telephone=no">
I-4) Phone call - top
To allow application to using mobile phone call.
Go to yourProjectPath/config.xml and put this following code
in the access area.
<access origin="tel:*" launch-external="yes"/>
J) Component Detail - top
This is the main feature of Ionic Material Design Application that include of many components. In this section will introduce you all component detail. You will know what is it, how it work and how to use it.
Source Code Structure
We have added a comment of description
how to get the component work in source code.
This is the sample structure:
HTML :Java Script :SQLite Database
Application Storage
{{ contract.firstName }} {{ contract.lastName }}
// Controller will call ContractDB Services to present data to html view.
//
// For using sqlite you have to install $cordovaSQLite by running the following
// command in your cmd.exe for windows or Terminal for mac:
// cd your project path
// $ ionic plugin remove io.litehelpers.cordova.sqlite
// $ ionic plugin add https://github.com/litehelpers/Cordova-sqlite-storage.git
//
// Learn more about $cordovaSQLite :
// http://ngcordova.com/docs/plugins/sqlite/
//
// Controller of Contract List Page.
appControllers.controller('contractListCtrl', function ($scope, $filter, $mdDialog, $timeout, $ionicModal, $state, $mdBottomSheet, ContractDB) {

    // initialForm is the first activity in the controller.
    // It will initial all variable data and let the function works when page load.
    $scope.initialForm = function () {
        // $scope.contracts  is the variable that store data from ContractDB service.
        $scope.contracts = [];

        // $scope.filterText  is the variable that use for searching.
        $scope.filterText = "";

        // The function for show/hide loading progress.
        $timeout(function () {
            if ($scope.isAndroid) {
                jQuery('#contract-list-loading-progress').show();
            }
            else {
                jQuery('#contract-list-loading-progress').fadeIn(700);
            }
        }, 400);
        $timeout(function () {

            ////Get all contracts.
            $scope.getContractList();

            jQuery('#contract-list-loading-progress').hide();
            jQuery('#contract-list-content').fadeIn();
        }, 3000);// End loading progress.

    };// End initialForm.

    // getContractList is for get all contracts.
    // By calling ContractDB.all() service.
    $scope.getContractList = function () {
        $scope.contracts = ContractDB.all();
    };//End getContractList.

    // updateContract is for update contracts.
    // By sending contract to ContractDB.update(contract) service.
    // Parameter :
    // contract = contract that user select from view.
    $scope.updateContract = function (contract) {
        ContractDB.update(contract);
    };// End updateContract.

    // navigateTo is for navigate to other page
    // by using targetPage to be the destination page
    // and sending objectData to the destination page.
    // Parameter :
    // targetPage = destination page.
    // objectData = object that will sent to destination page.
    $scope.navigateTo = function (targetPage, objectData) {
        $state.go(targetPage, {
            contractdetail: objectData,
            actionDelete: (objectData == null ? false : true)
        });
    };// End navigateTo.

    $scope.initialForm();

});// End of Contract List Page  Controller.
J-1) Application Storage - top
Every application have to store data. We will introduce you to using application storage to store data in your application by using SQLite and LocalStorage.
J-1-1) SQLite Database - top
SQLite is the best way to store data to application storage. It allow you to manage complex relational database.
Advantage of SQLite it have unlimit ability to store data. It will create the sqlite file that store in the application. Also can store more complex data such as relation between tables.

We use SQLite function to create a small contract application that including function to :
- Select data
- Add data
- Update data
- Delete data
Project file path :
-
your_project_path/www/templates/application-storage/sqLite/html :
- Place of html view.
- your_project_path/www/js/app.js : Contains instruction how to create SQLite table in modules.run() method.
-
your_project_path/www/templates/application-storage/sqLite/js/controllers.js :
- Contains instruction that connect with ContractDB Services to present data to html view.
-
your_project_path/www/templates/application-storage/sqLite/js/services.js :
- Contains instruction of using factory for connecting with SQLite database.
J-1-2) Local Storage Database - top
LocalStorage have ability to store data by HTML5 loacalStorage function.
We use LocalStorage function to create a notes application that including function to :
- Select data
- Add data
- Update data
- Delete data
Project file path :
-
your_project_path/www/templates/application-storage/local-application-db/html :
- Place of html view.
-
your_project_path/www/templates/application-storage/local-application-db/js/controllers.js
:
- Contains instruction that connect with LocalStorage Services for present data to html view.
-
your_project_path/www/templates/application-storage/local-application-db/js/services.js :
- Contains instruction of using factory for connecting with LocalStorage database.
J-2) Social Network Connect - top
Using Social Network Connect for connect your application with social network. You can use it to be your application log in authentication and get user profile information from social network. Also it can retrieve data object of user timeline.
Advantage of Social Network Connect is you don't need to create login page for your application just use social log in authentication. And it is easy for user to login.
J-2-1) WordPress - top
Getting WordPress feed by input your WordPress URL to application. It will use WP REST API for connecting with WordPress Feed.

The function include:
- Get post feed
- Get post detail
- Get post comment
Project file path :
-
your_project_path/www/templates/social-network-connect/wordpress/html :
- Place of html view.
-
your_project_path/www/templates/social-network-connect/wordpress/js/controllers.js :
- Contains instruction for connect with WordPress.
Install WP REST API
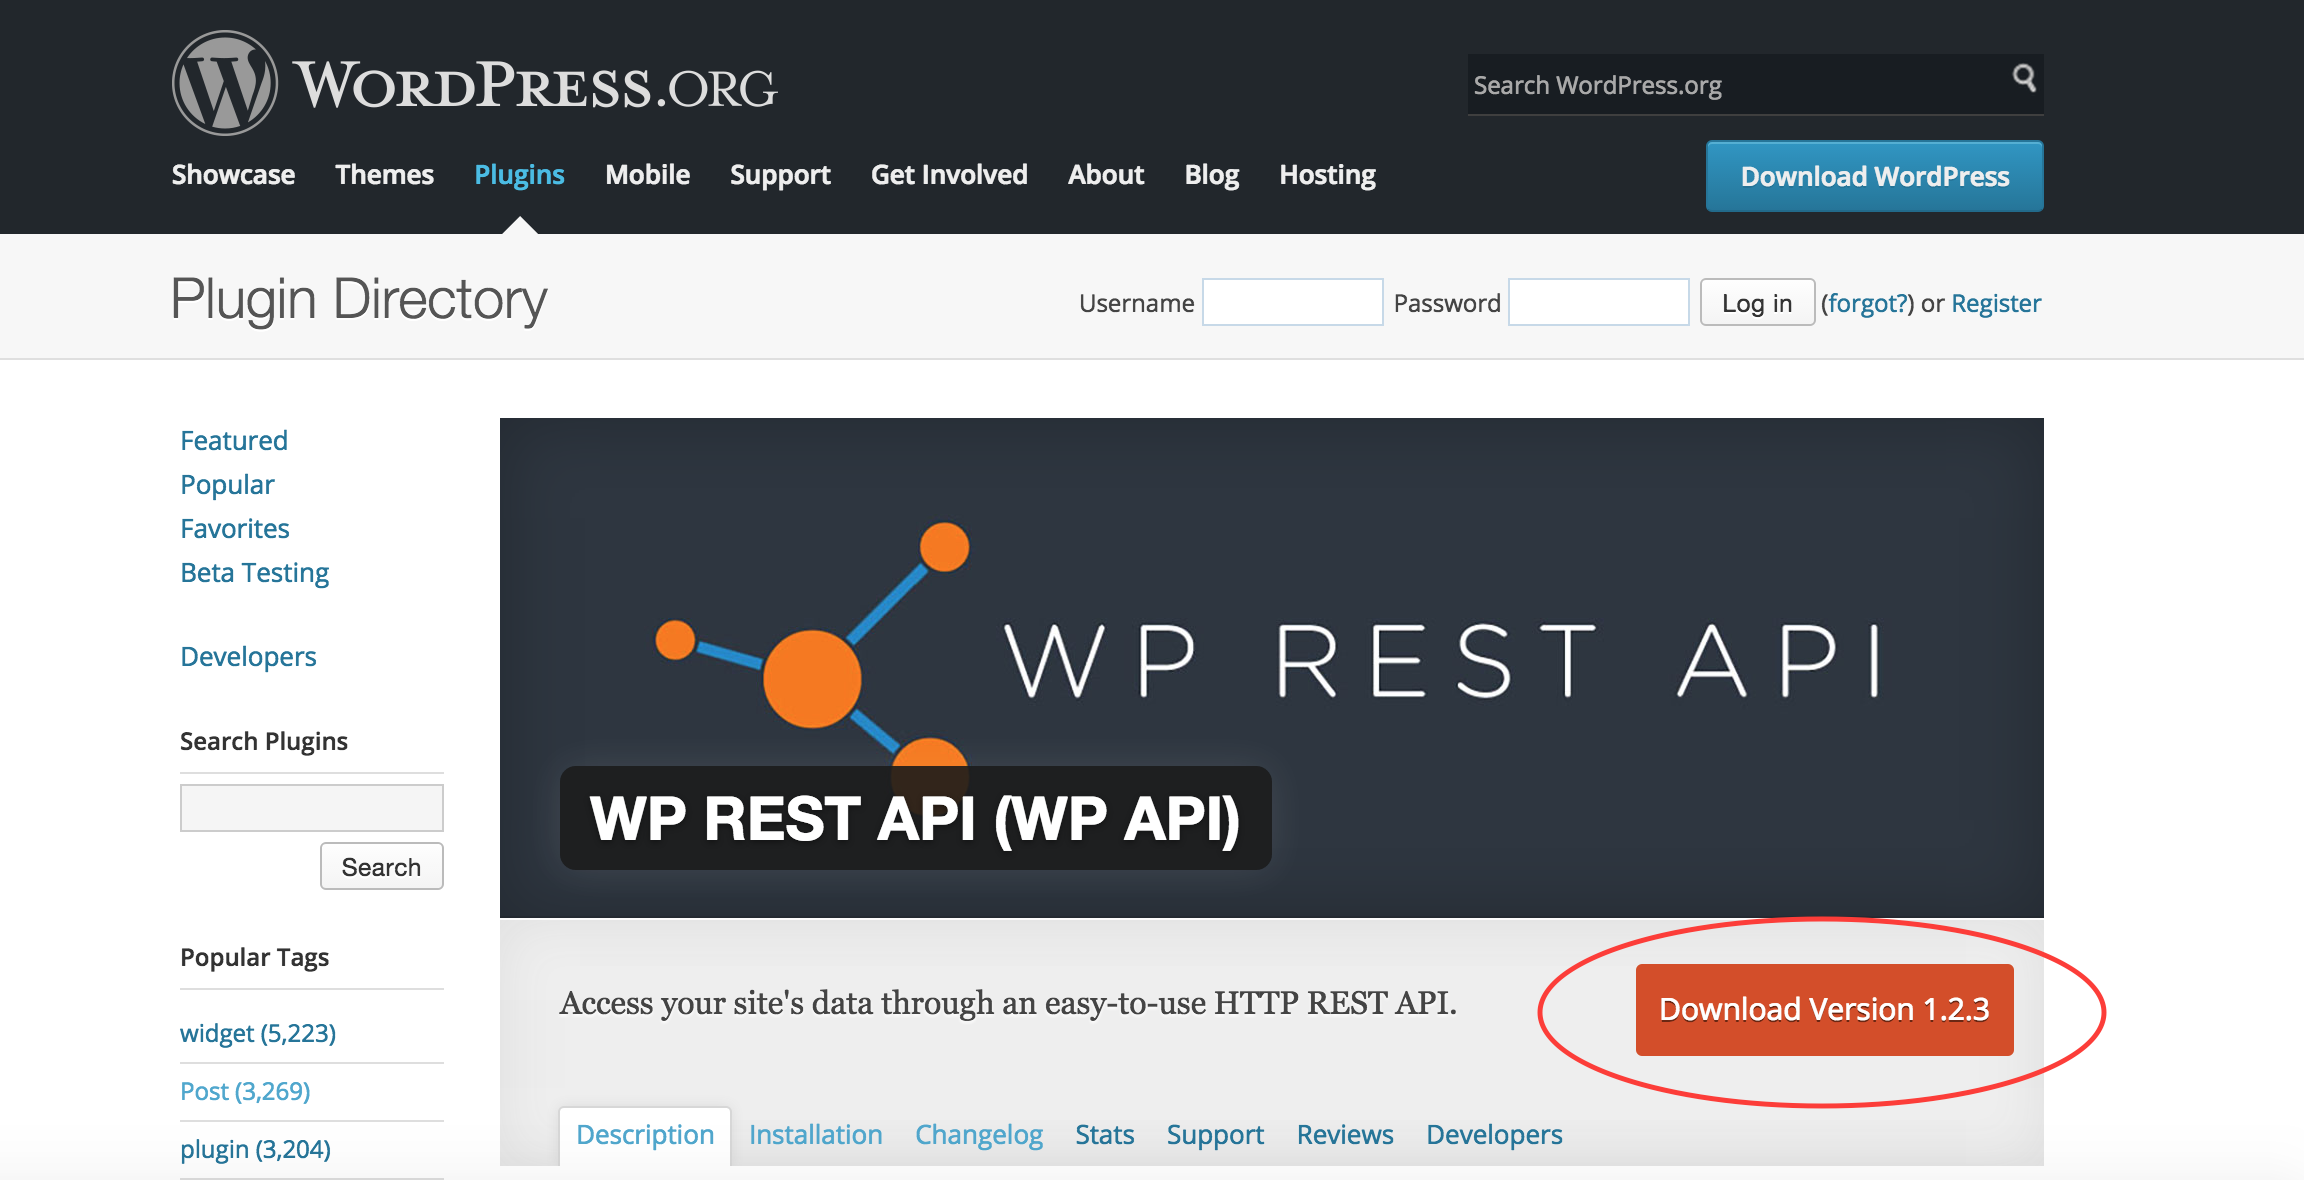
To getting WordPress feed you have to install WP REST API plugin to your WordPress by this following instruction :-
Download WP REST API plugin to install in to your website from
https://wordpress.org/plugins/json-rest-api/
-
Add plugin to your website by this following :
- Add new plugin.
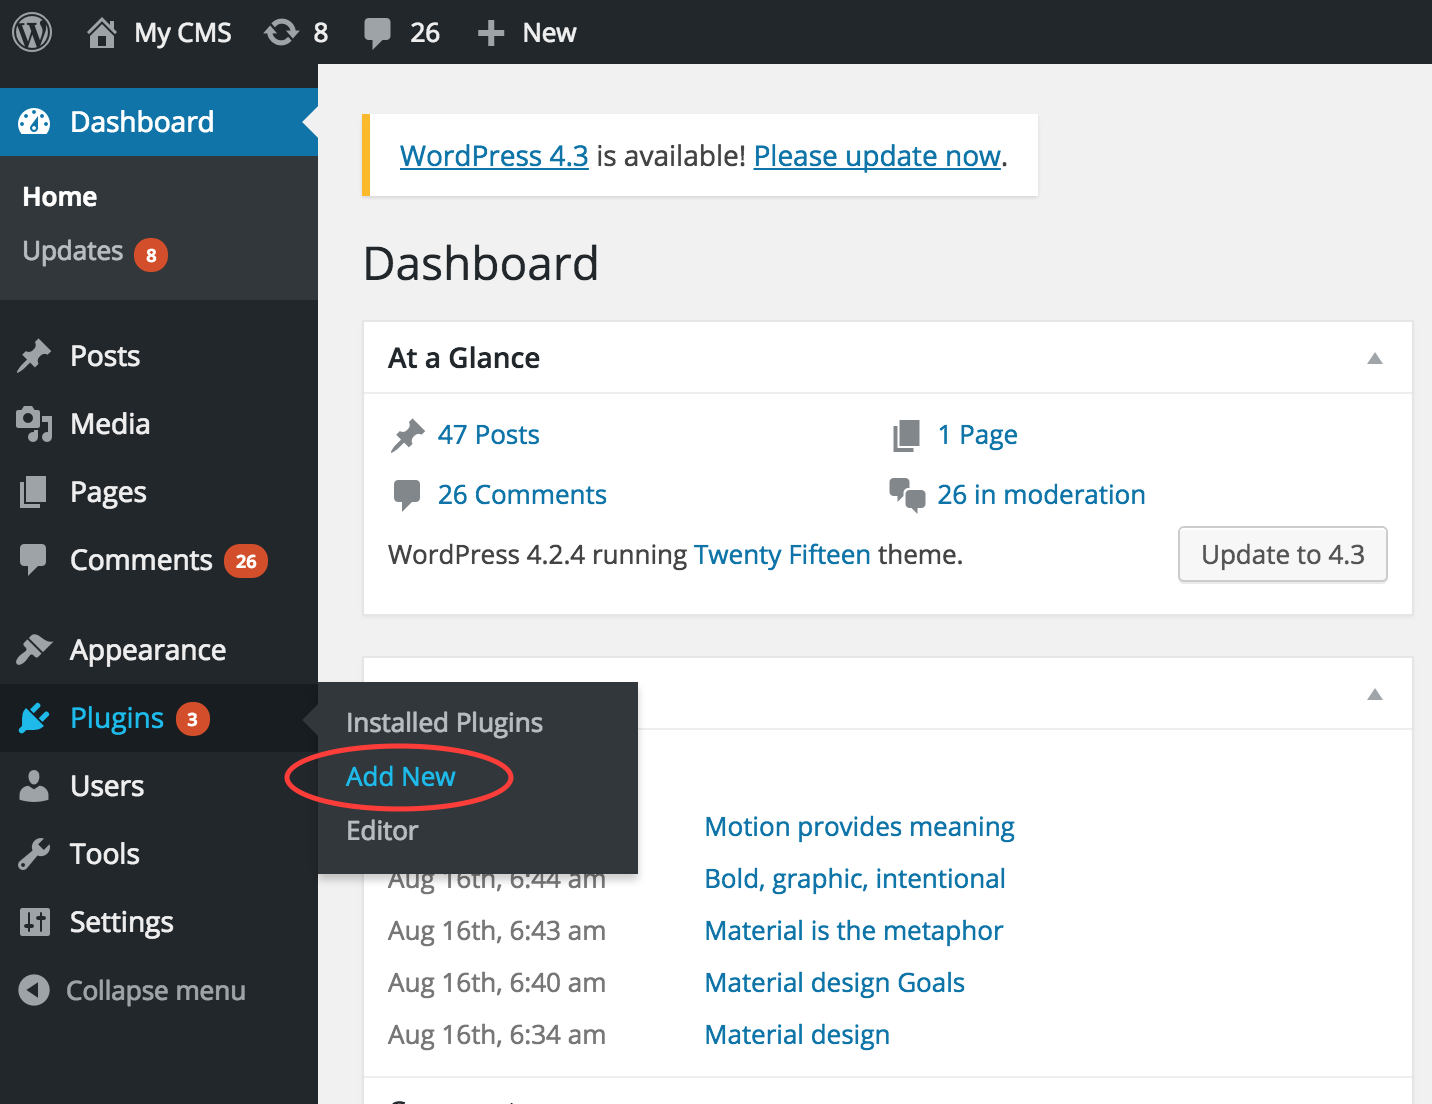
- Upload plugin.
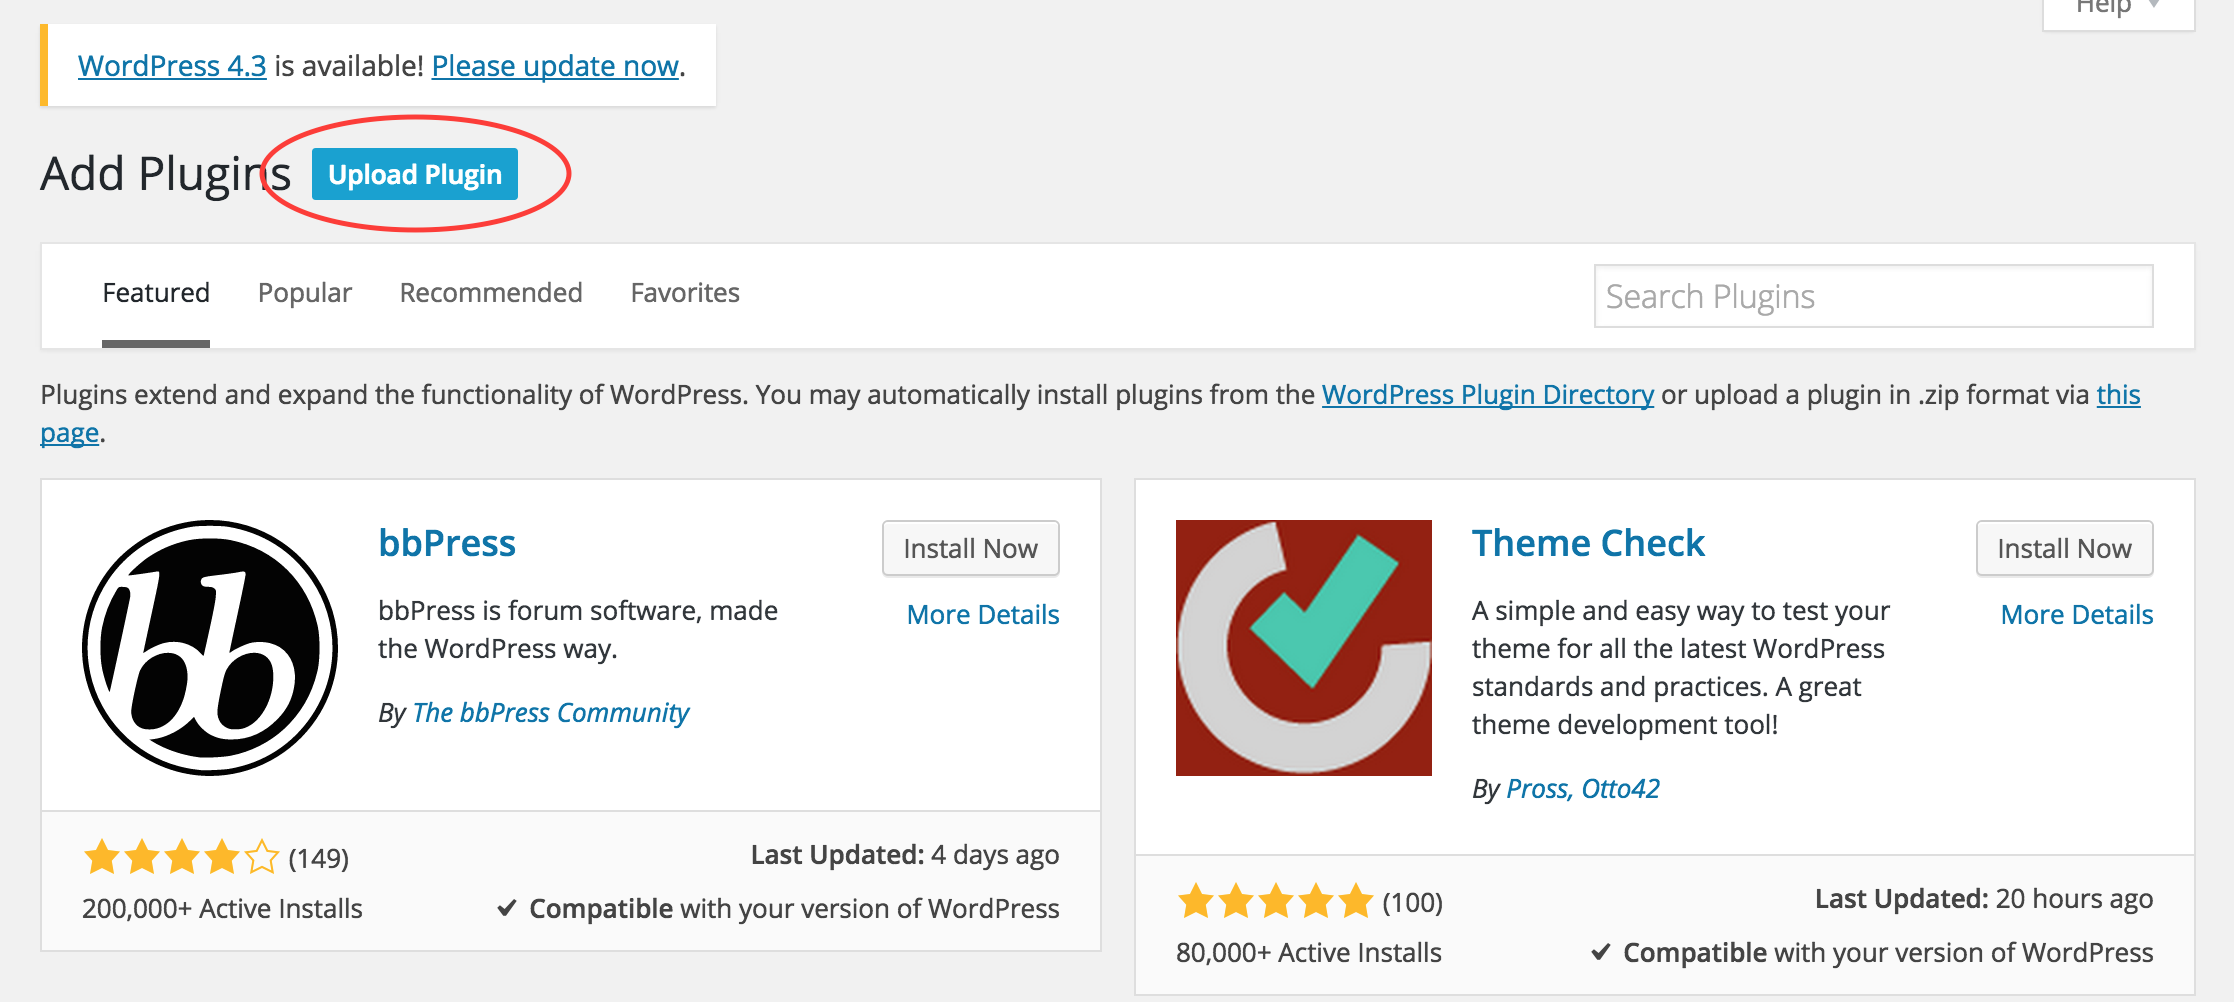
- Upload WP REST API to install.
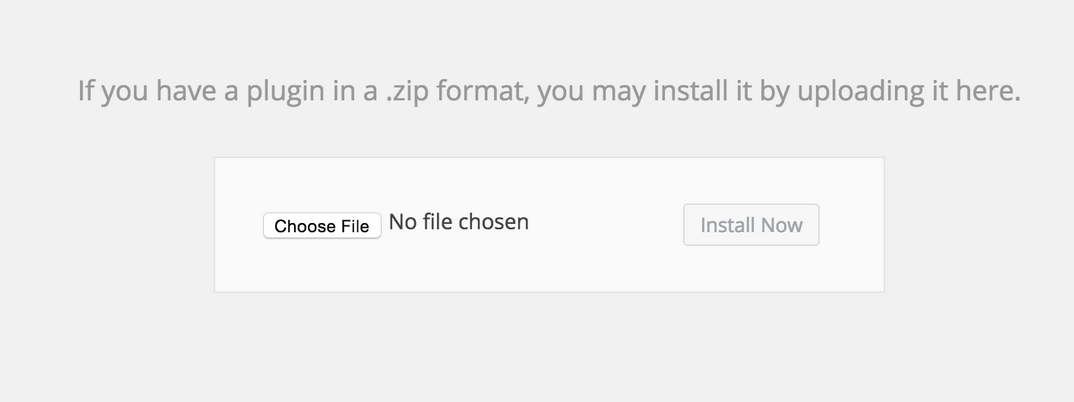
- Add new plugin.
- Active this plugin.
- Set website format to support with WP REST API by this following:
- Go to Permalink Settings.
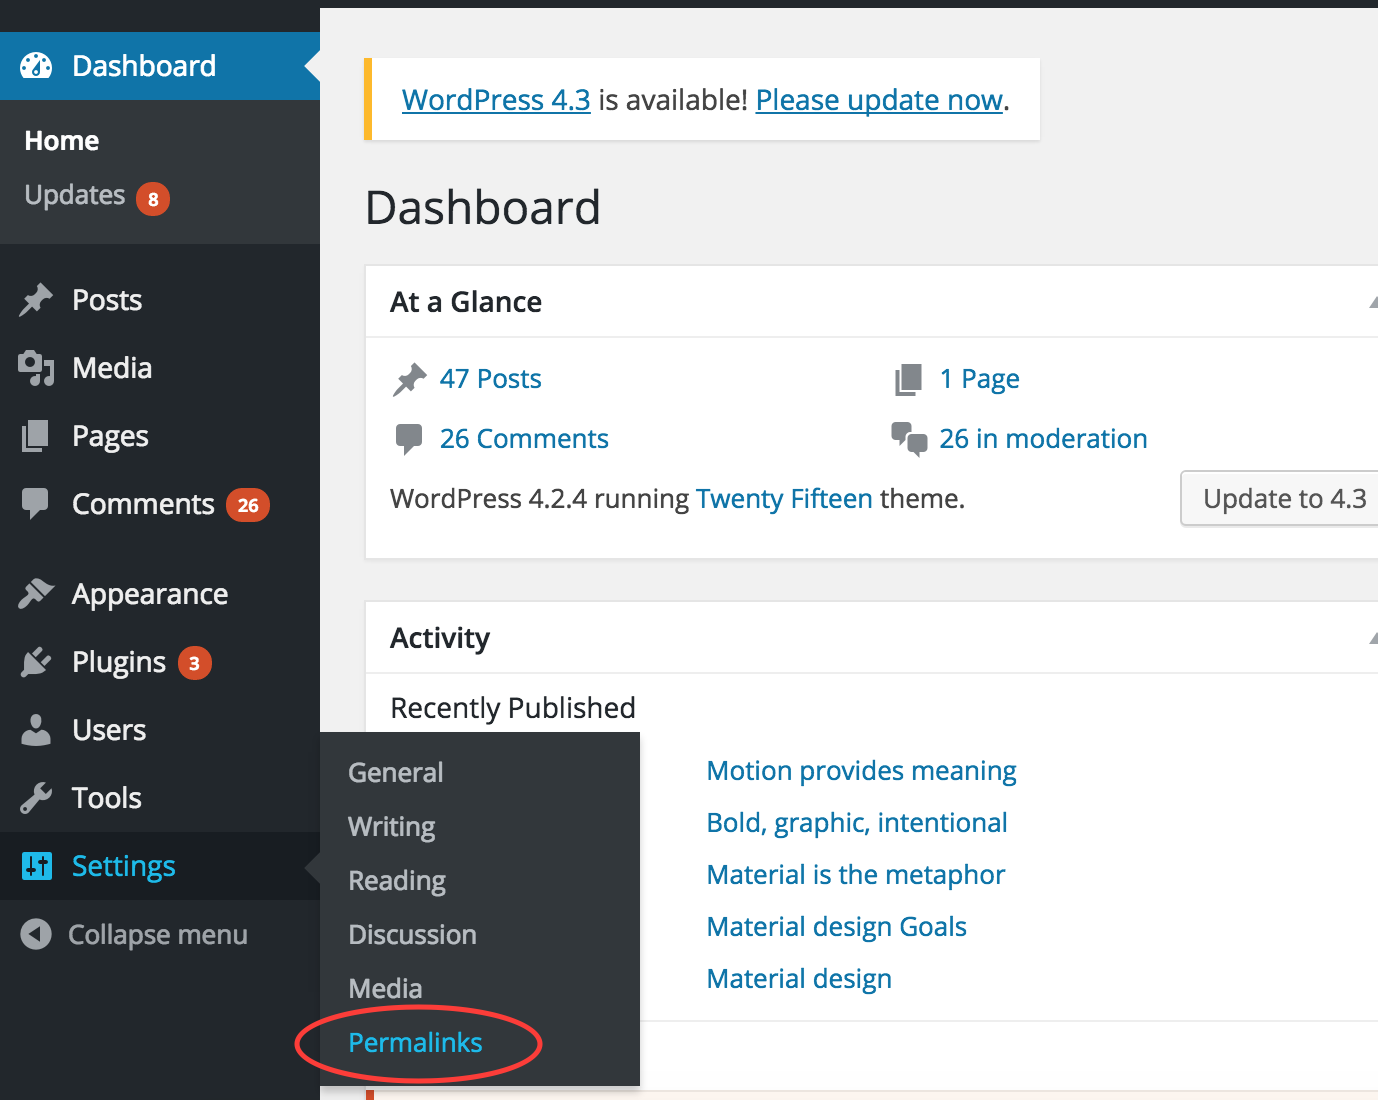
- Select Post name then save change.
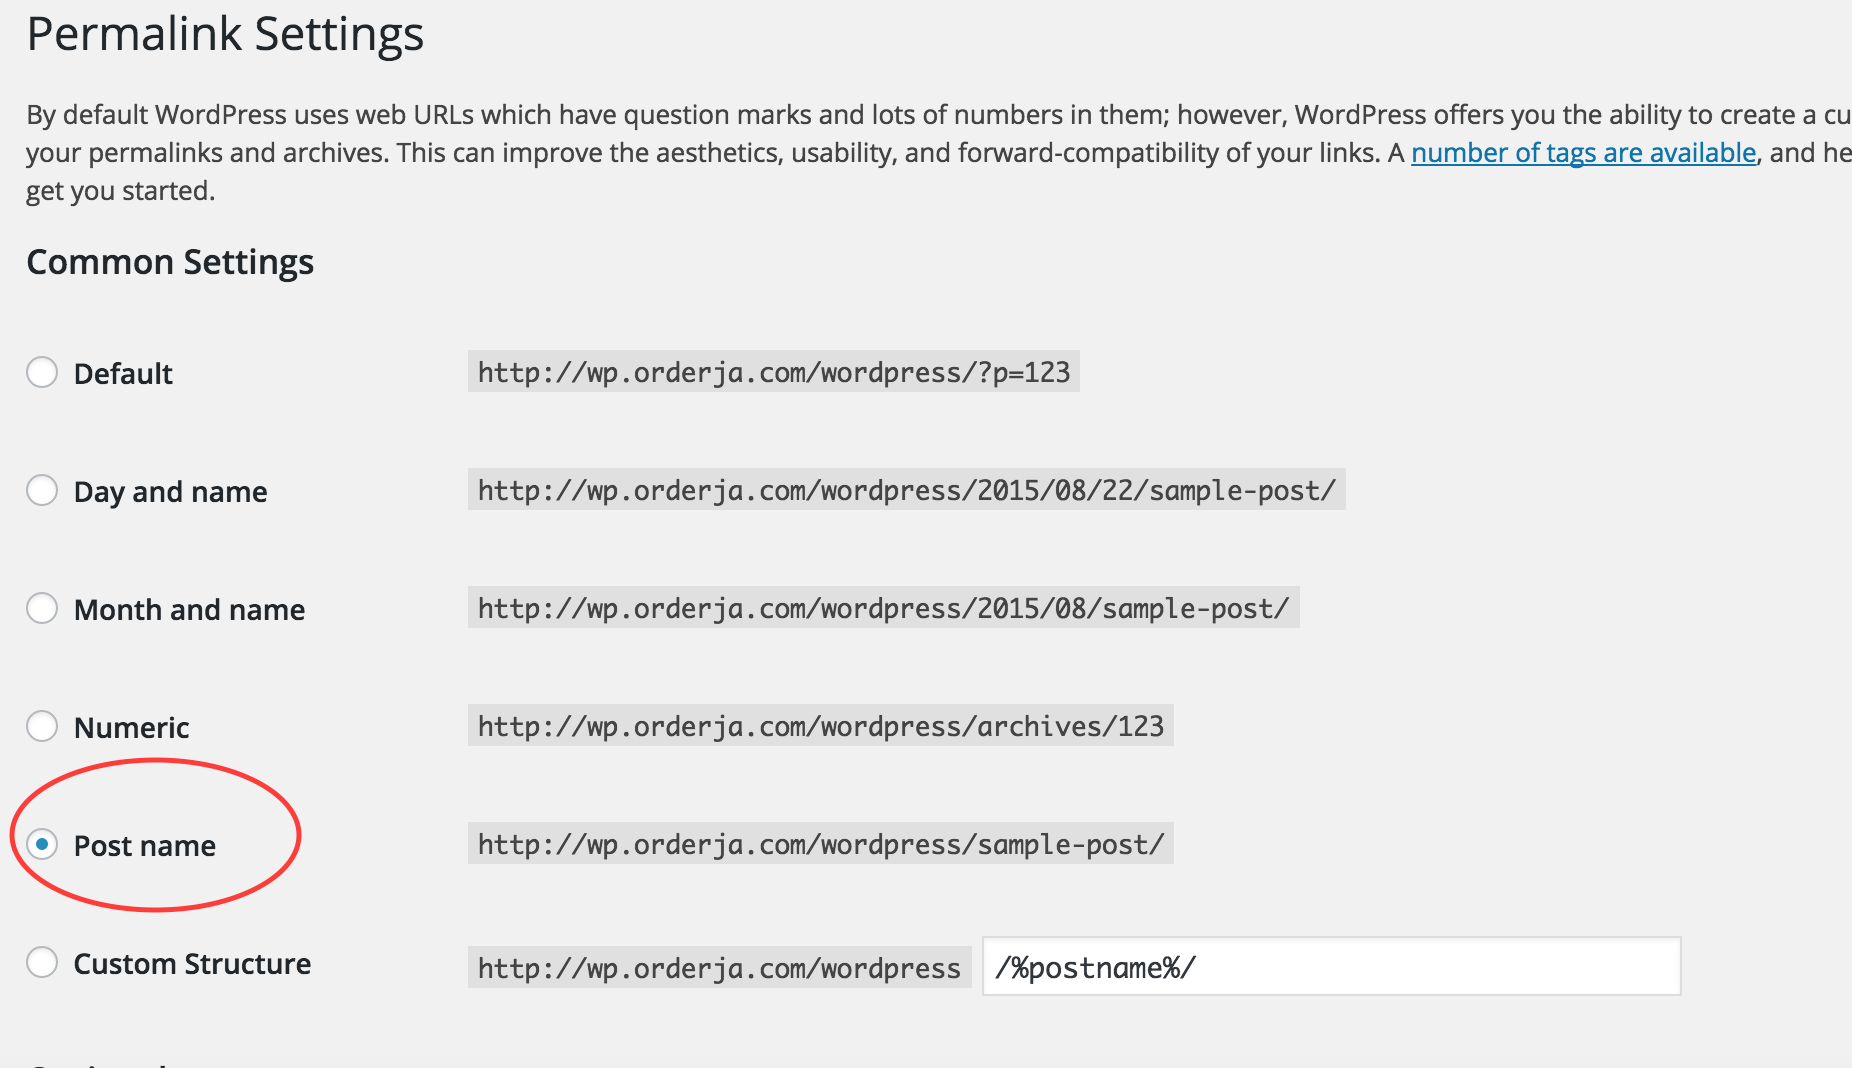
- Go to Permalink Settings.
-
To get json object of feed from API by using URl structure:
- YOUR_WORDPRESS_URL/wp-json/posts?_jsonp=JSON_CALLBACK&page=PAGE_NUMBER
-
To get json object of comment from API by using URl structure:
- YOUR_WORDPRESS_URL/wp-json/posts/POST_ID/comments

J-2-2) Facebook - top
Use cordovaOauth for connect with facebook to get user profile information, user timeline and friend list by calling facebook API.
The function include:
- Log in
- Get user profile information
- Get user timeline
- Get friend list
Project file path :
-
your_project_path/www/templates/social-network-connect/facebook/html :
- Place of html view.
-
your_project_path/www/templates/social-network-connect/facebook/js/controllers.js :
- Contains instruction for connect with facebook.
Important :
- You have to register the application API before using this feature. Then add App ID to file: www/app.js at global variable section to get the function work.
- This feature is not support Ionic View because of ngCordova Oauth issue, However the ticket has been raised on Github of Ionic Framework at https://github.com/driftyco/ionic-view-issues/issues/45
- This feature is required device environment it will not working on browser.
Facebook API Registration :
To connect with facebook you have to register facebook application developer to get APP ID by this following :-
Go to https://developers.facebook.com/
then go to myApp menu select add a new app then select
Website.
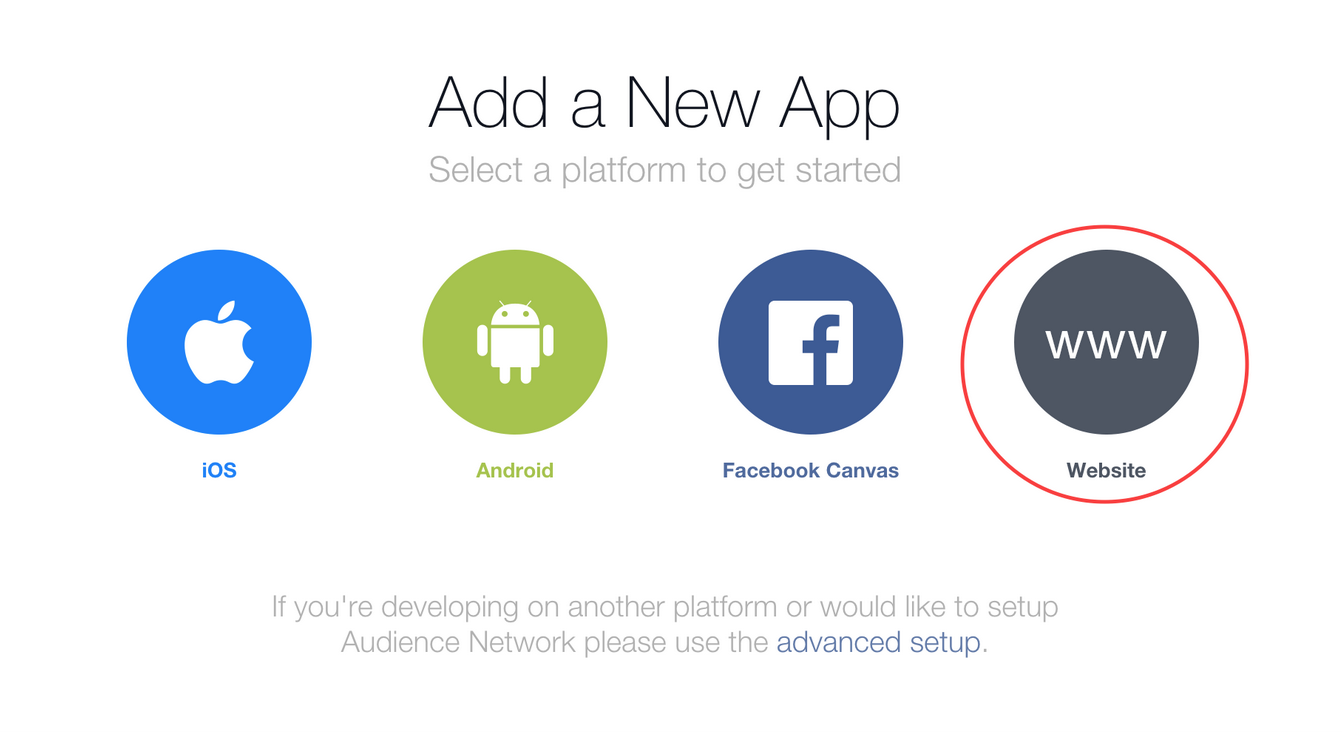
-
Input your application name and click create new application.
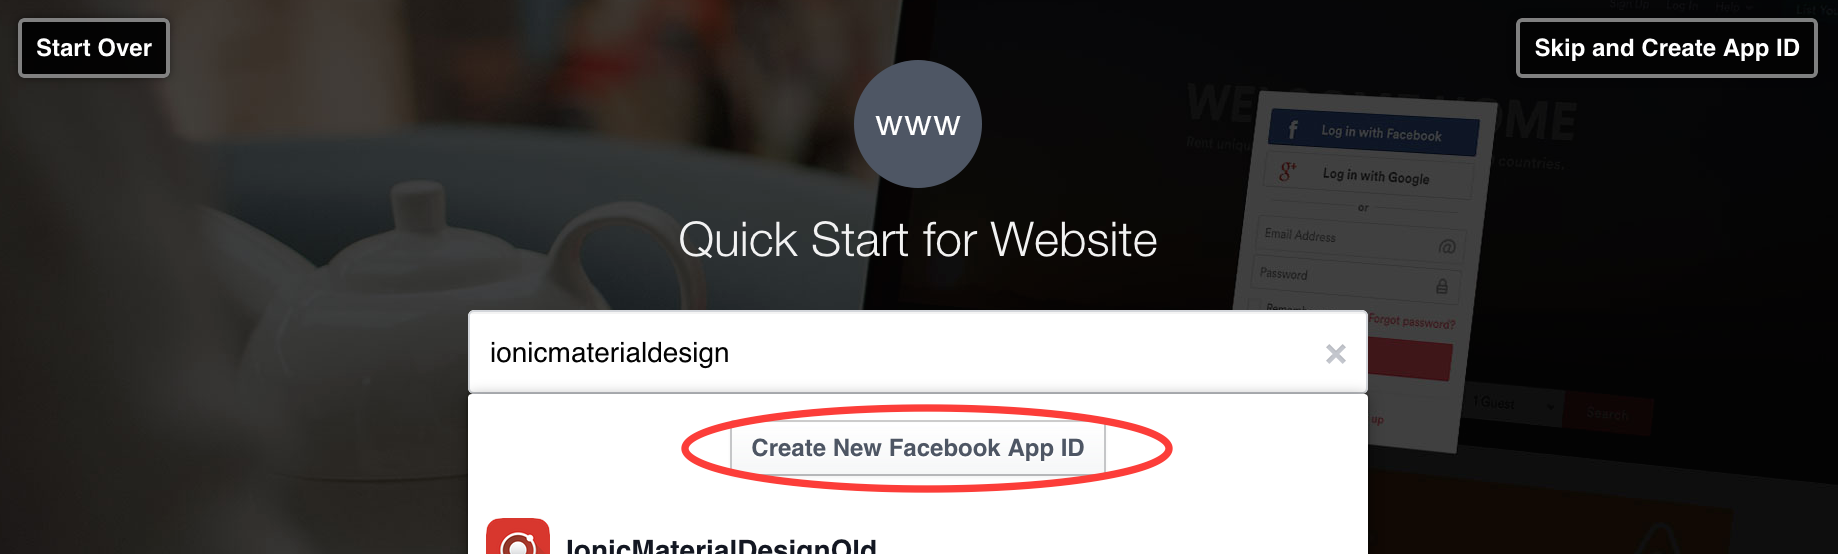
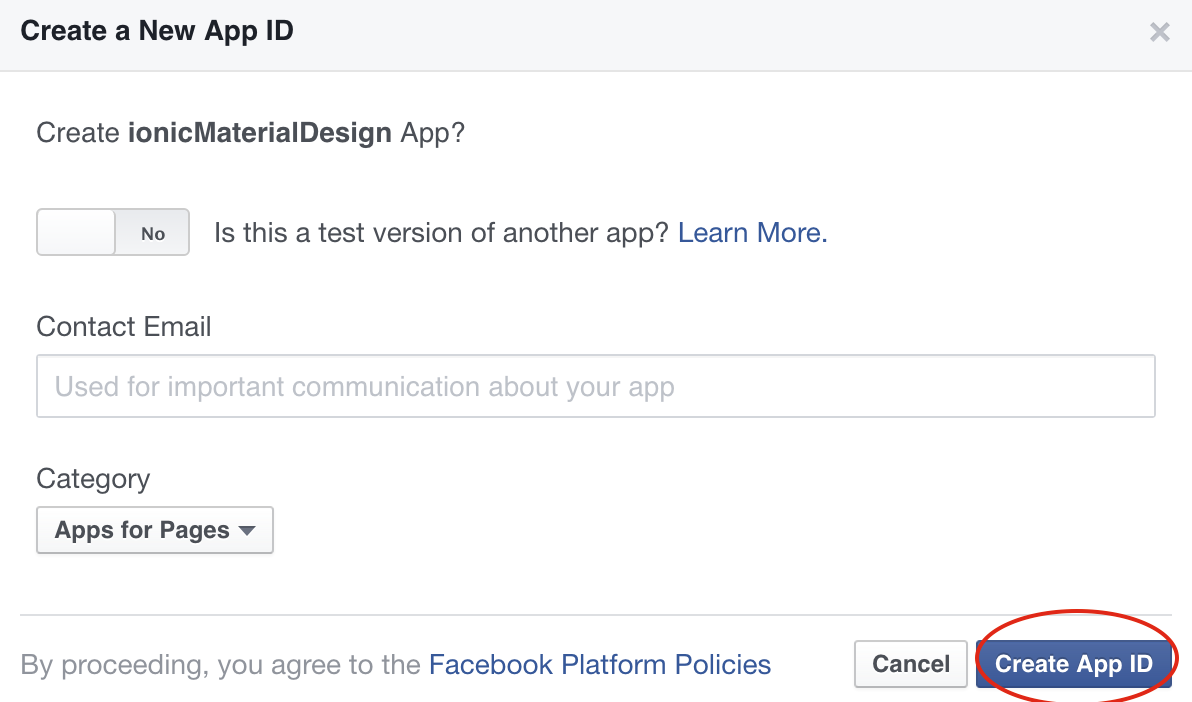
-
Select your application category and click create App ID.
-
Click skip quick start.
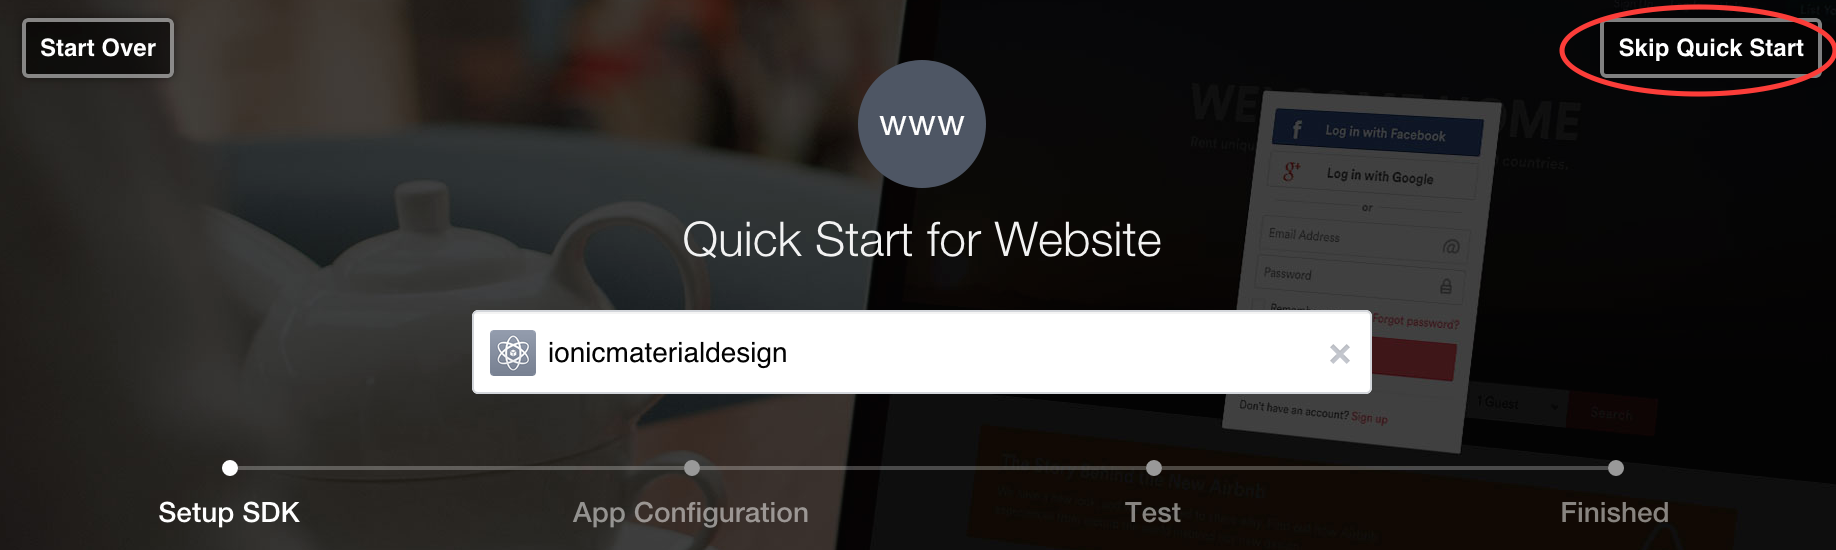
-
It will go to your facebook application dashboard.
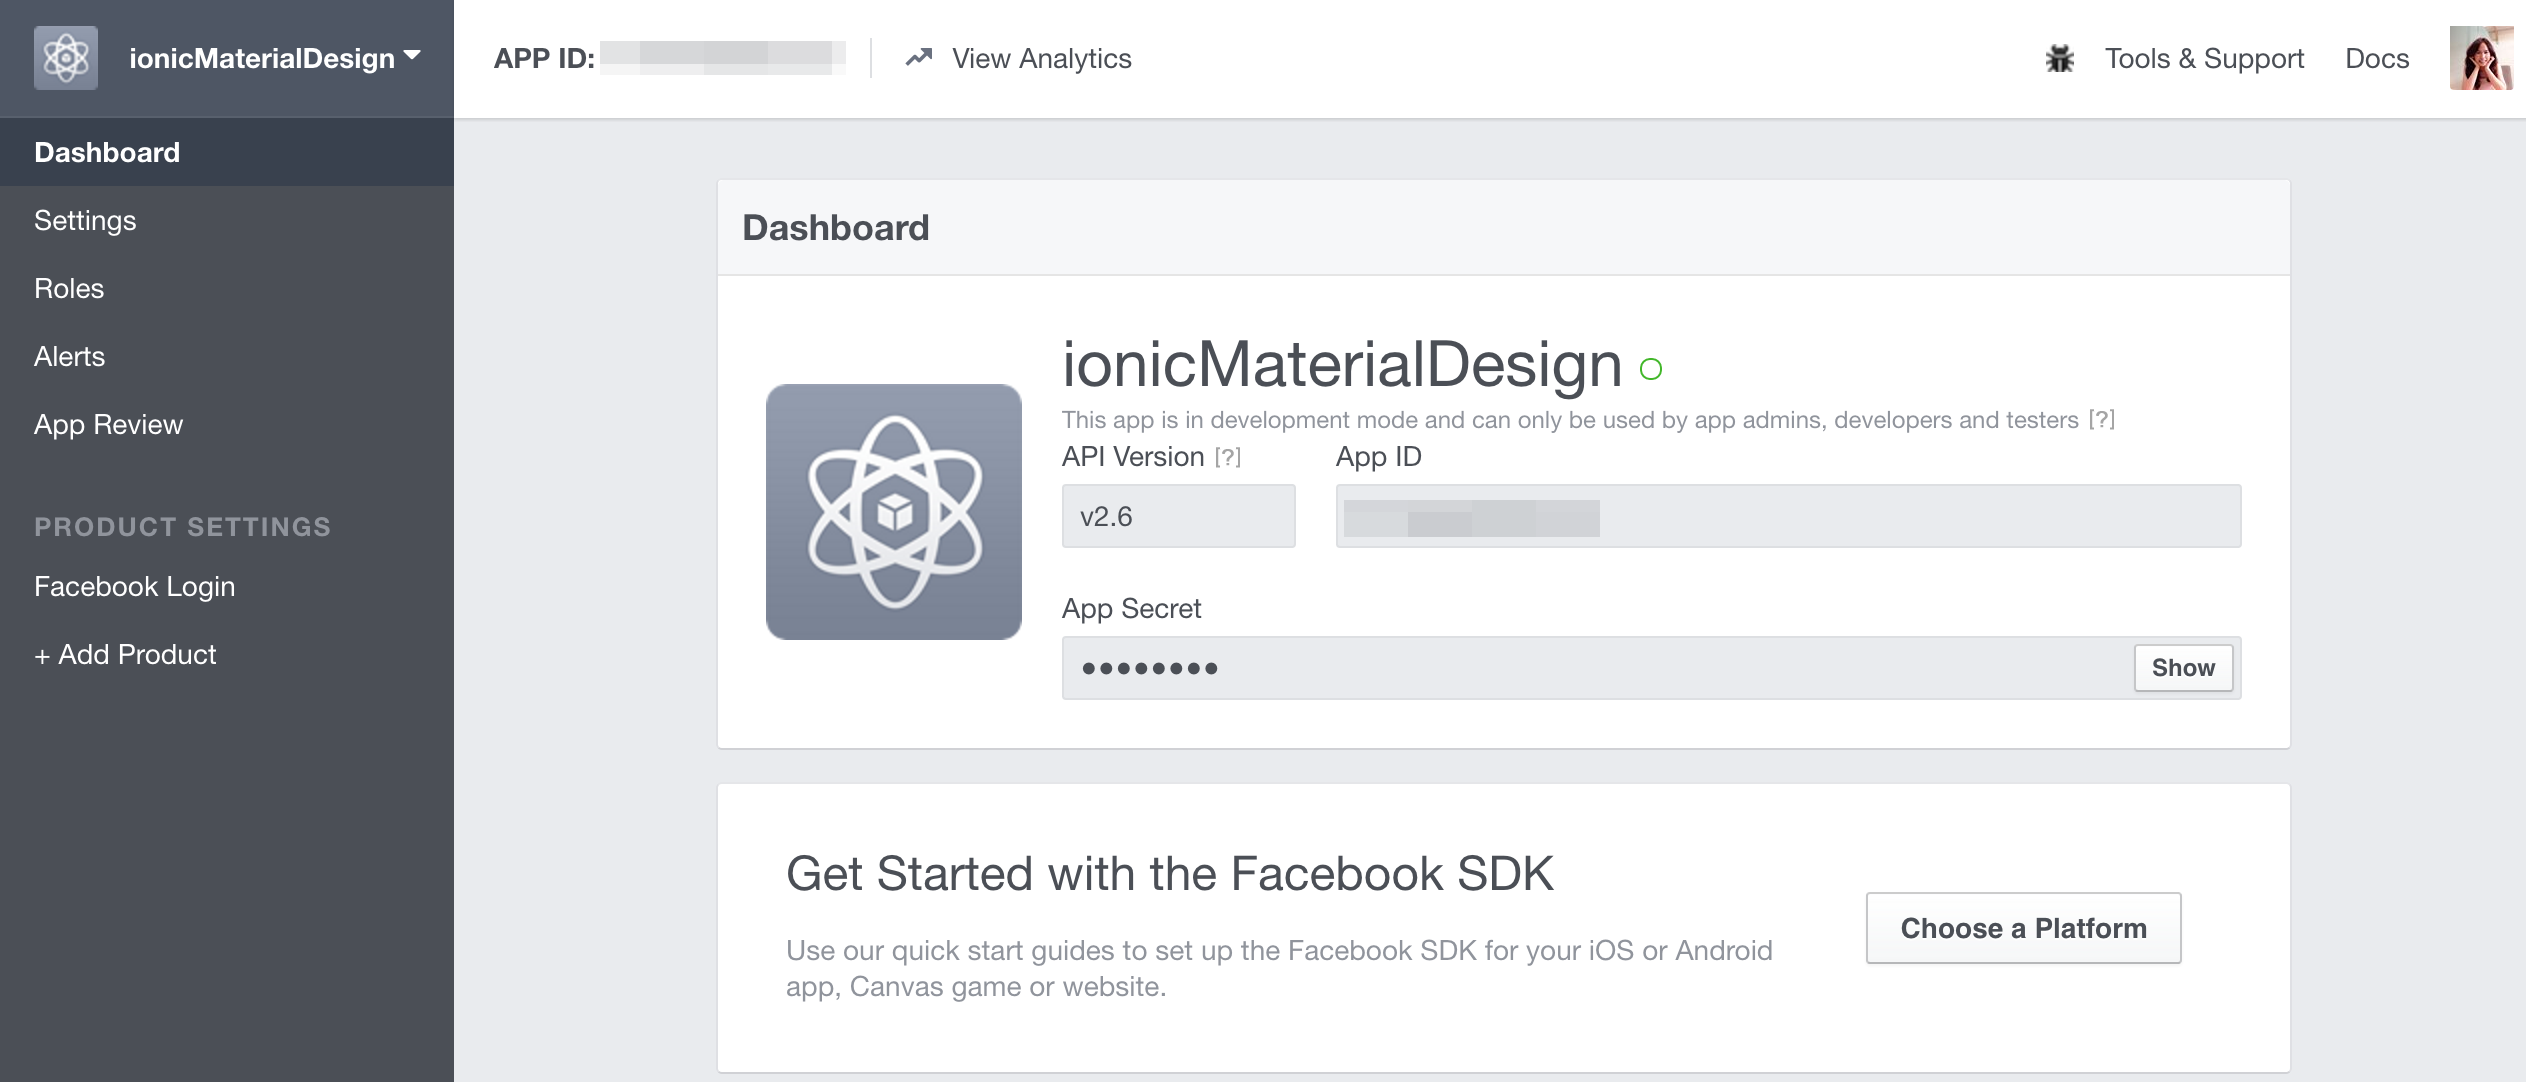
-
You have to setting Valid OAuth redirect URIs for connect with cordovaOauth by this following:
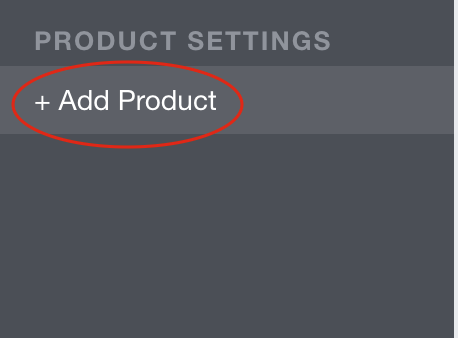
-
Go to Product Setting and select Add Product.
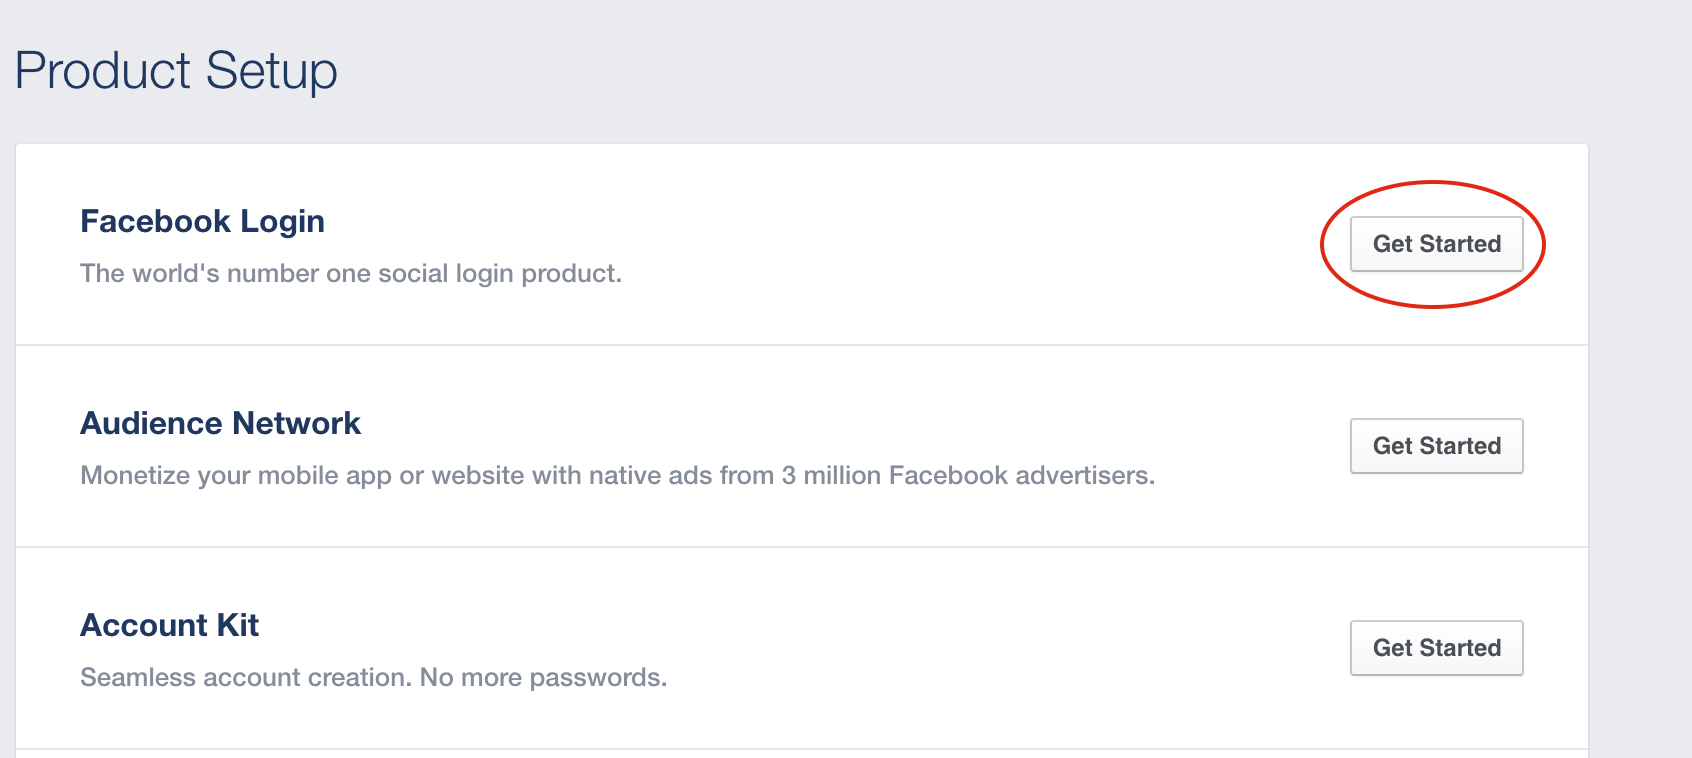
-
Select Get Started for Facebook Login.
-
Set Valid OAuth redirect URIs = http://localhost/callback then save.

-
Go to Product Setting and select Add Product.
- Add App ID to file: www/app.js at global variable section to get the function work.
J-2-3) Google Plus - top
Use cordovaOauth for connect with Google to get user profile information and user activity by calling Google API.
The function include:
- Log in
- Get user profile information
- Get user activity feed
Project file path :
-
your_project_path/www/templates/social-network-connect/google-plus/html :
- Place of html view.
-
your_project_path/www/templates/social-network-connect/google-plus/js/controllers.js :
- Contains instruction for connect with Google.
Important :
- You have to register the application API before using this feature. Then add App ID to file: www/app.js at global variable section to get the function work.
- This feature is not support Ionic View because of ngCordova Oauth issue, However the ticket has been raised on Github of Ionic Framework at https://github.com/driftyco/ionic-view-issues/issues/45
- This feature is required device environment it will not working on browser.
Google API Registration :
To connect with google you have to register google application developer to get Client ID by this following :-
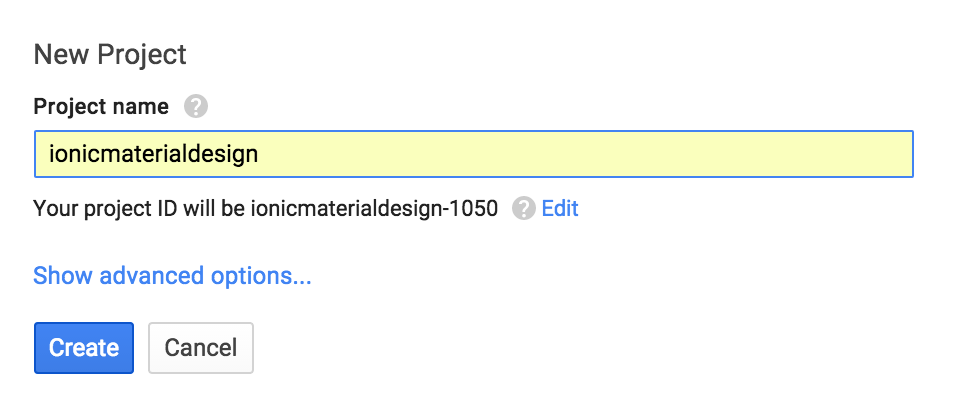
Go to https://console.developers.google.com/ then go to
create a project

-
Input your project name and click create.
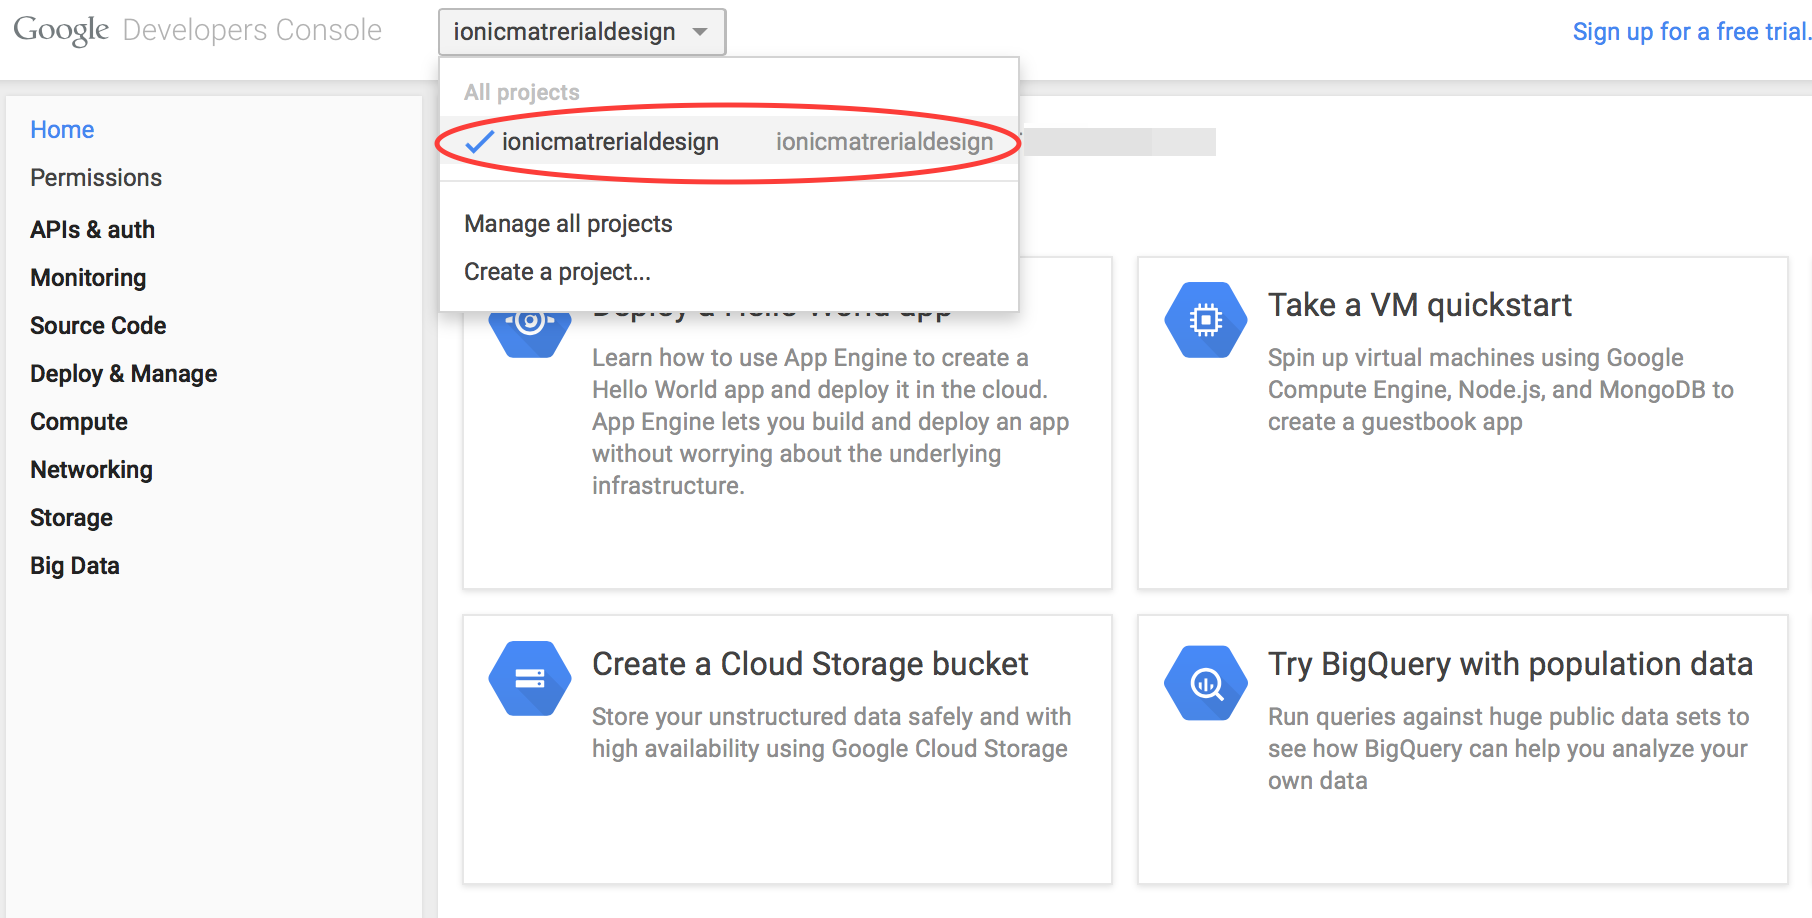
-
Go to your project.
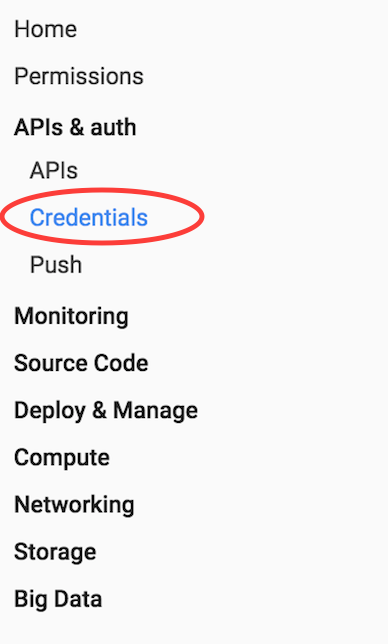
-
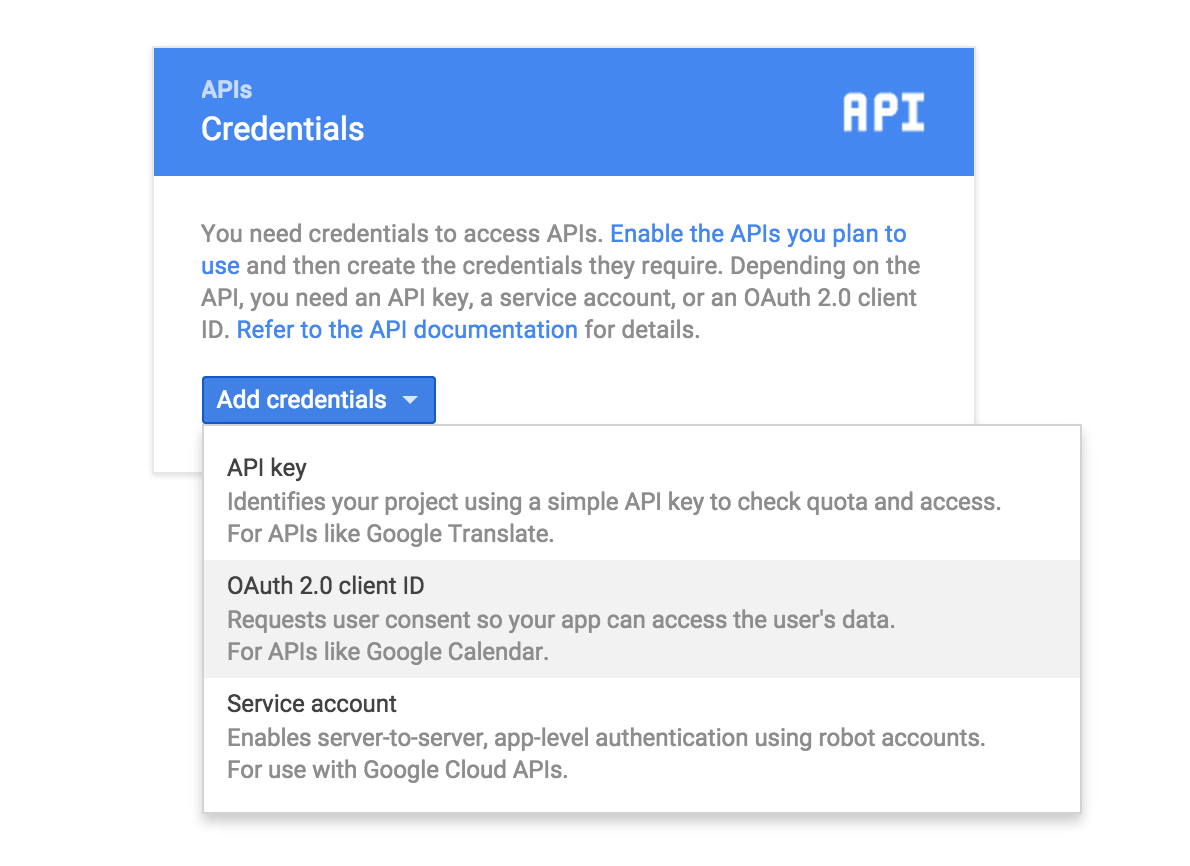
Click credentials menu under Api & auth.
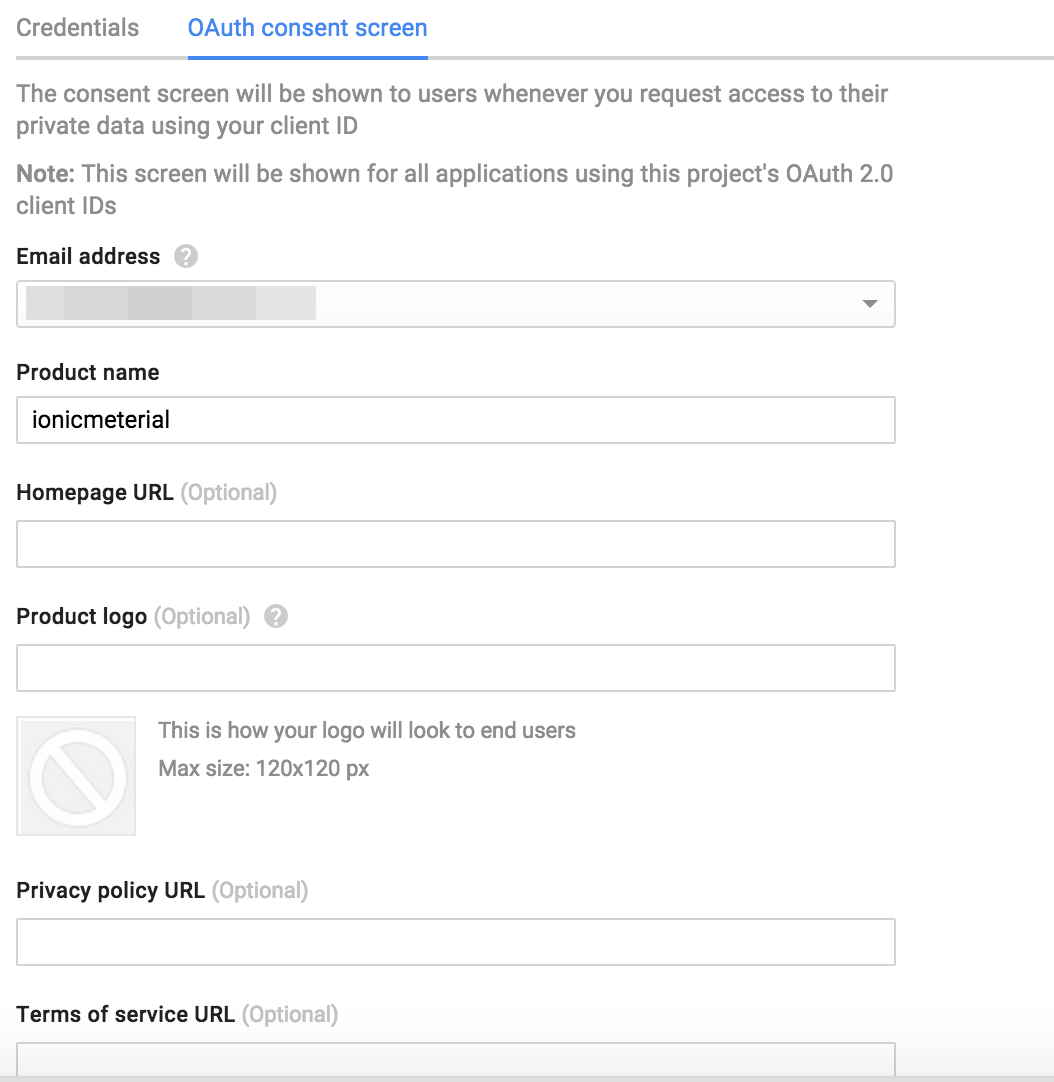
-
Go to OAuth consent screen and input detail then save.
-
Add credentials for OAuth2.2 client ID
-
Select Web application and put http://localhost/callback
for Authorized redirect URIs to connect with cordovaOauth then click create.
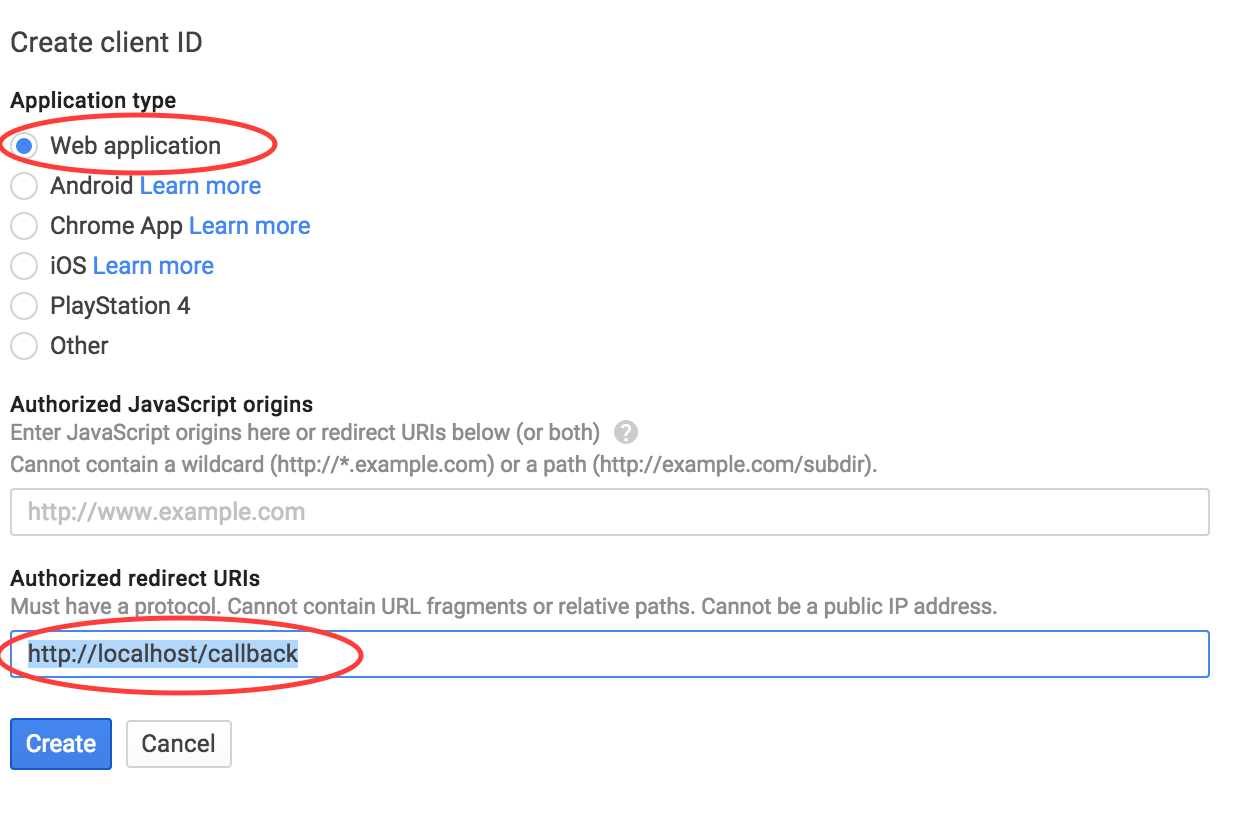
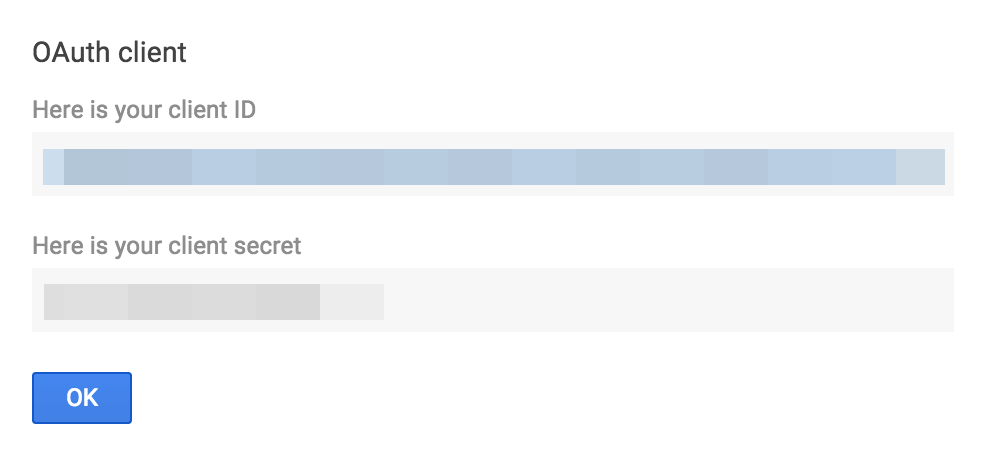
-
It will show your application Client ID and Client secret.
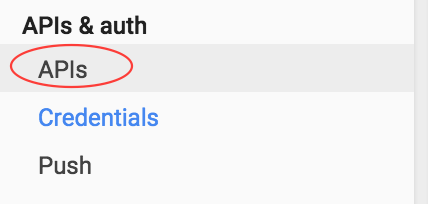
-
To allow application to connect with Google Plus API by go to APIs menu.
-
Select Google Plus API.
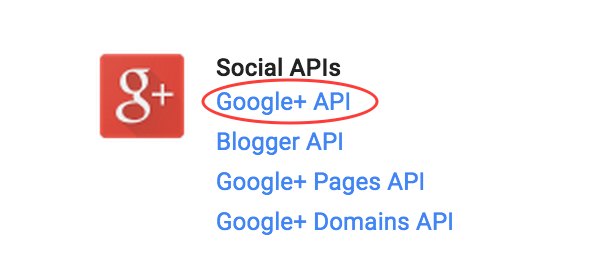
-
Click Enable API.
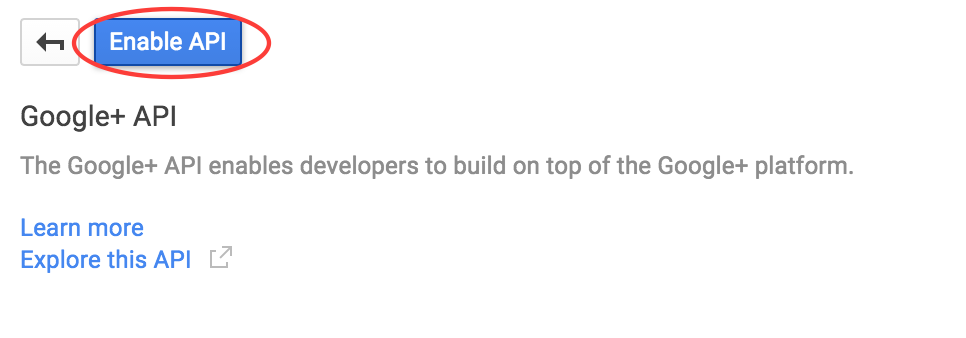
- Add Client ID to file: www/app.js at global variable section to get the function work.
J-2-4) Instagram - top
Use cordovaOauth for connect with instagram to get user profile information and user feed by calling instagram API.
The function include:
- Log in
- Get user profile information
- Get user feed
Project file path :
-
your_project_path/www/templates/social-network-connect/instagram/html :
- Place of html view.
-
your_project_path/www/templates/social-network-connect/instagram/js/controllers.js :
- Contains instruction for connect with instagram.
Important :
- You have to register the application API before using this feature. Then add App ID to file: www/app.js at global variable section to get the function work.
- This feature is not support Ionic View because of ngCordova Oauth issue, However the ticket has been raised on Github of Ionic Framework at https://github.com/driftyco/ionic-view-issues/issues/45
- This feature is required device environment it will not working on browser.
Instagram API Registration :
To connect with instagram you have to register instagram application developer to get Client ID by this following :-
Go to https://instagram.com/developer/
then go to Register your application.

-
Click Register a New Client.

-
Input your application information.

-
You have to setting Redirect URI(s) for connect with cordovaOauth by this following:
-
Set Valid redirect URIs = http://localhost/callback.

-
Set Valid redirect URIs = http://localhost/callback.
-
Go to tab Security uncheck for Disable implicit OAuth and Enforce
signed requests then click register.

-
It will go to your instagram Manage Clients application.

- Add Client ID to file: www/app.js at global variable section to get the function work.
J-2-5) Foursquare - top
Use cordovaOauth for connect with foursquare to get user profile information and user tips feed by calling foursquare API.
The function include:
- Log in
- Get user profile information
- Get user tips feed
Project file path :
-
your_project_path/www/templates/social-network-connect/foursquare/html :
- Place of html view.
-
your_project_path/www/templates/social-network-connect/foursquare/js/controllers.js :
- Contains instruction for connect with foursquare.
Important :
- You have to register the application API before using this feature. Then add App ID to file: www/app.js at global variable section to get the function work.
- This feature is not support Ionic View because of ngCordova Oauth issue, However the ticket has been raised on Github of Ionic Framework at https://github.com/driftyco/ionic-view-issues/issues/45
- This feature is required device environment it will not working on browser.
Foursqure API Registration :
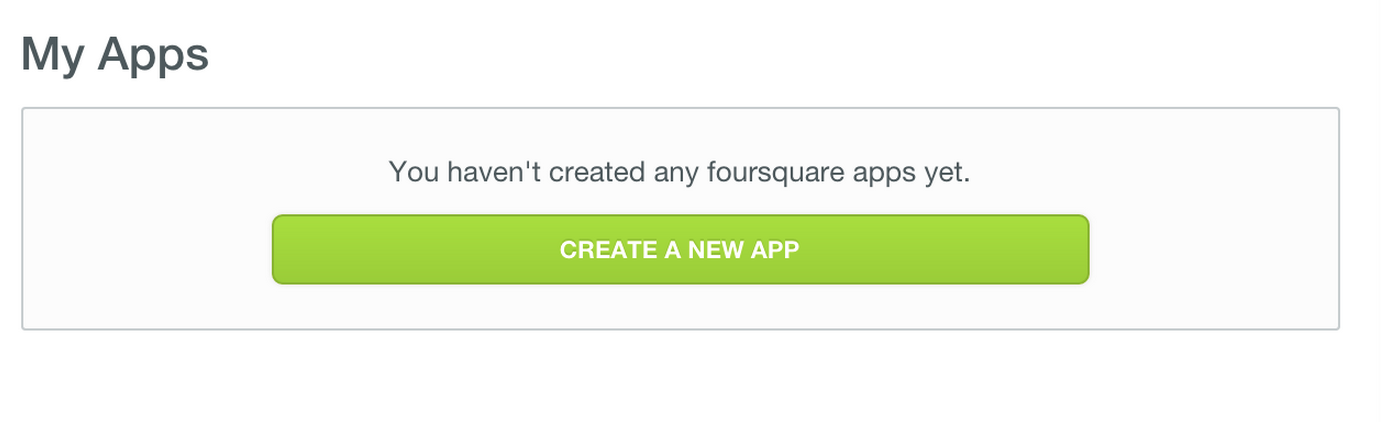
To connect with foursquare you have to register foursquare application developer to get Client ID by this following :-
Go to https://developer.foursquare.com/
then go to My Apps

-
Click create a new apps.
-
Input your application information.
 You have to setting Redirect URI(s) for connect with cordovaOauth by this following:
-
Set Redirect URI(s)= http://localhost/callback
then click save changes

-
It will go to your application detail.
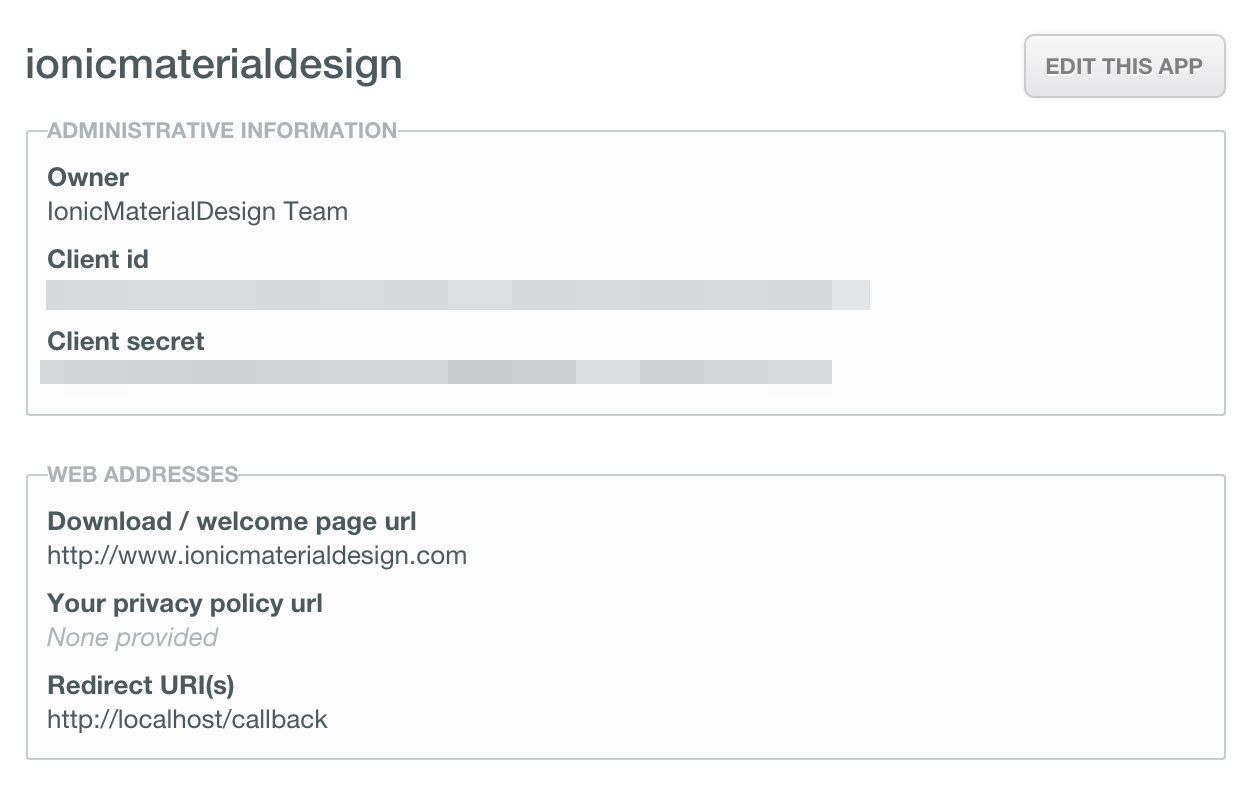
- Add Client ID to file: www/app.js at global variable section to get the function work.
J-2-6) Dropbox - top
Use cordovaOauth for connect with dropbox to get user profile information and user files directory feed by calling dropbox API.
The function include:
- Log in
- Get user profile information
- Get files directory feed
Project file path :
-
your_project_path/www/templates/social-network-connect/dropbox/html :
- Place of html view.
-
your_project_path/www/templates/social-network-connect/dropbox/js/controllers.js :
- Contains instruction for connect with dropbox.
Important :
- You have to register the application API before using this feature. Then add App ID to file: www/app.js at global variable section to get the function work.
- This feature is not support Ionic View because of ngCordova Oauth issue, However the ticket has been raised on Github of Ionic Framework at https://github.com/driftyco/ionic-view-issues/issues/45
- This feature is required device environment it will not working on browser.
Dropbox API Registration :
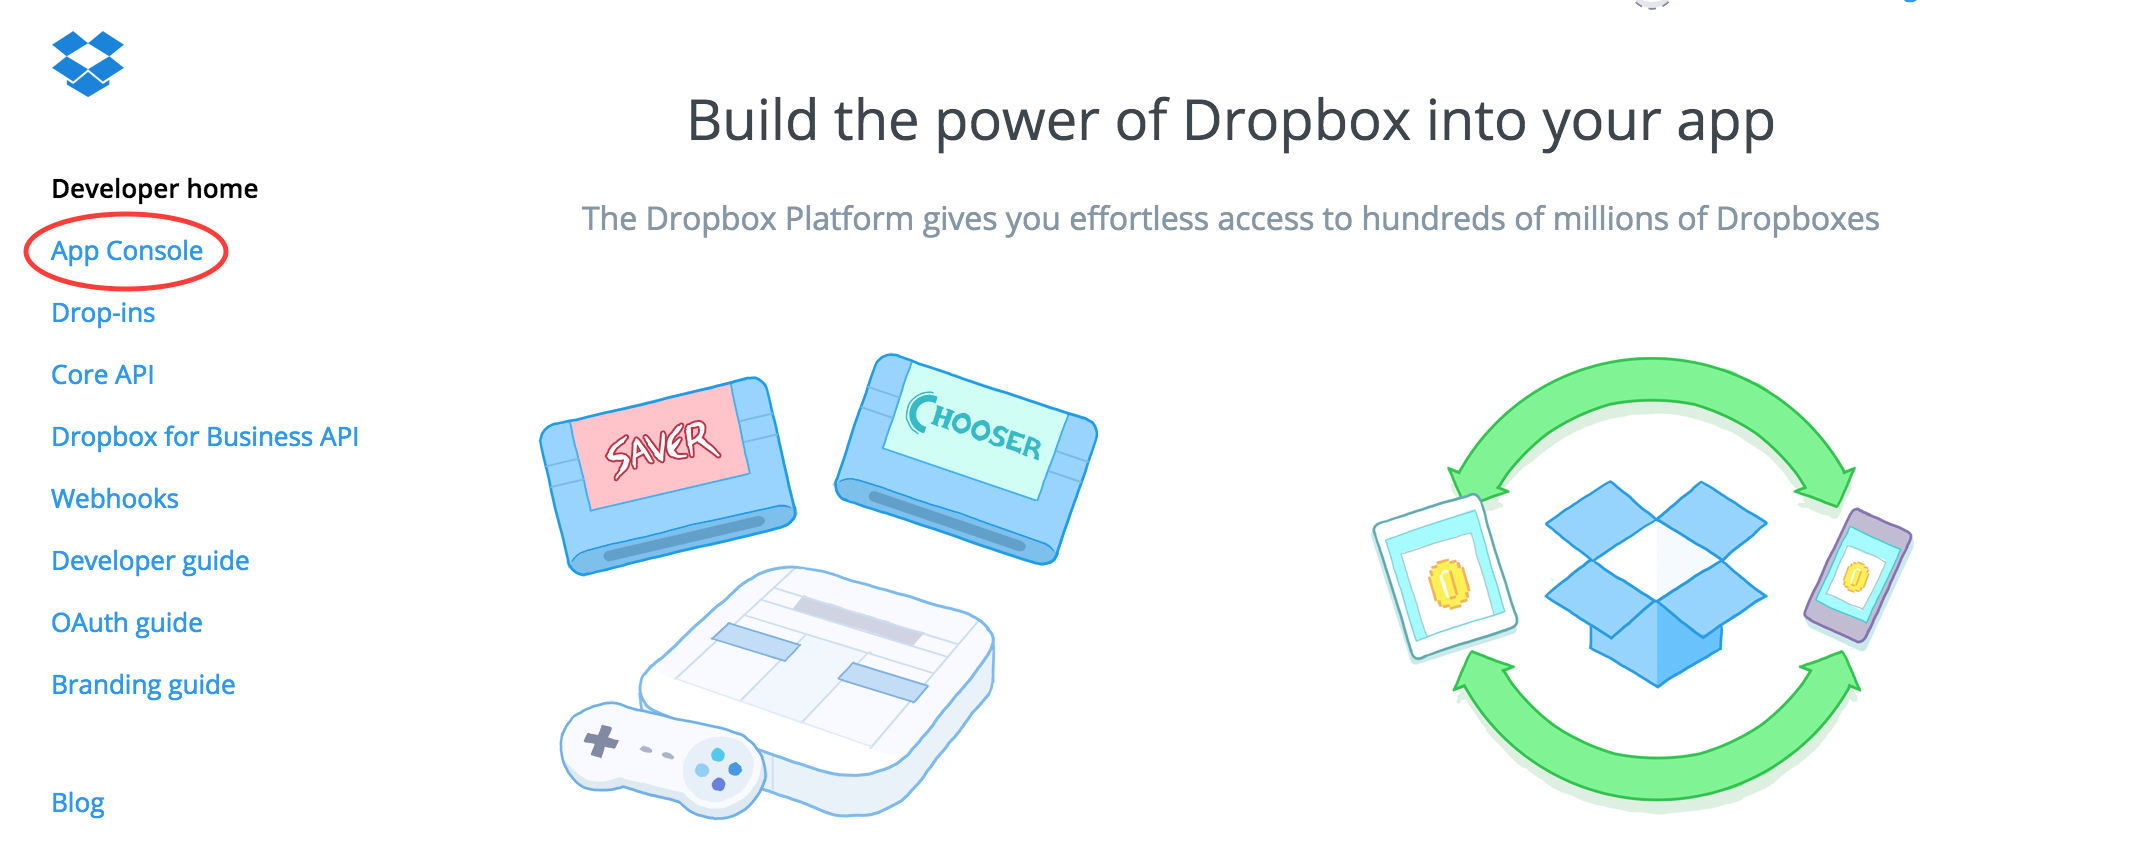
To connect with dropbox you have to register dropbox application developer to get App Key by this following :-
Go to https://www.dropbox.com/developers
then go to App Console.
-
Click create app.

-
Select Dropbox API app .
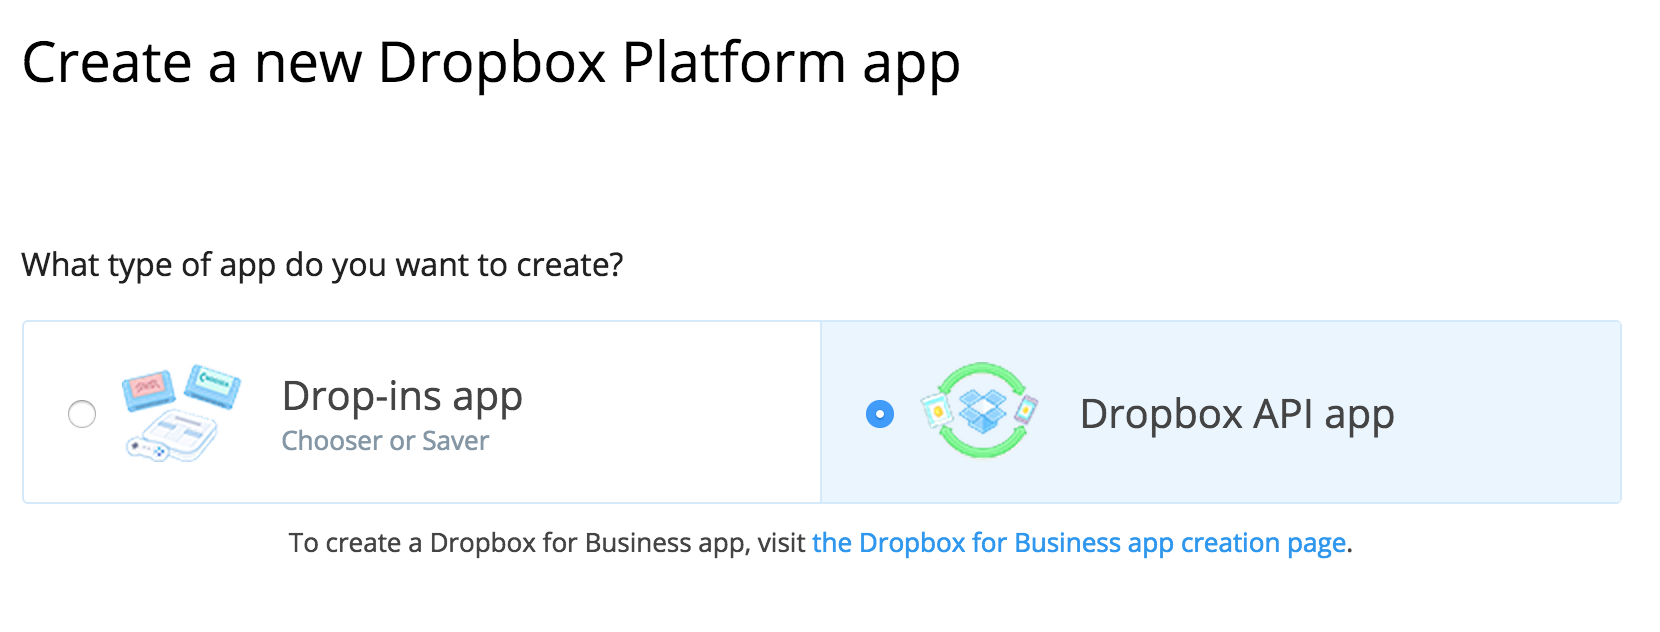
-
It will go to your application detail.
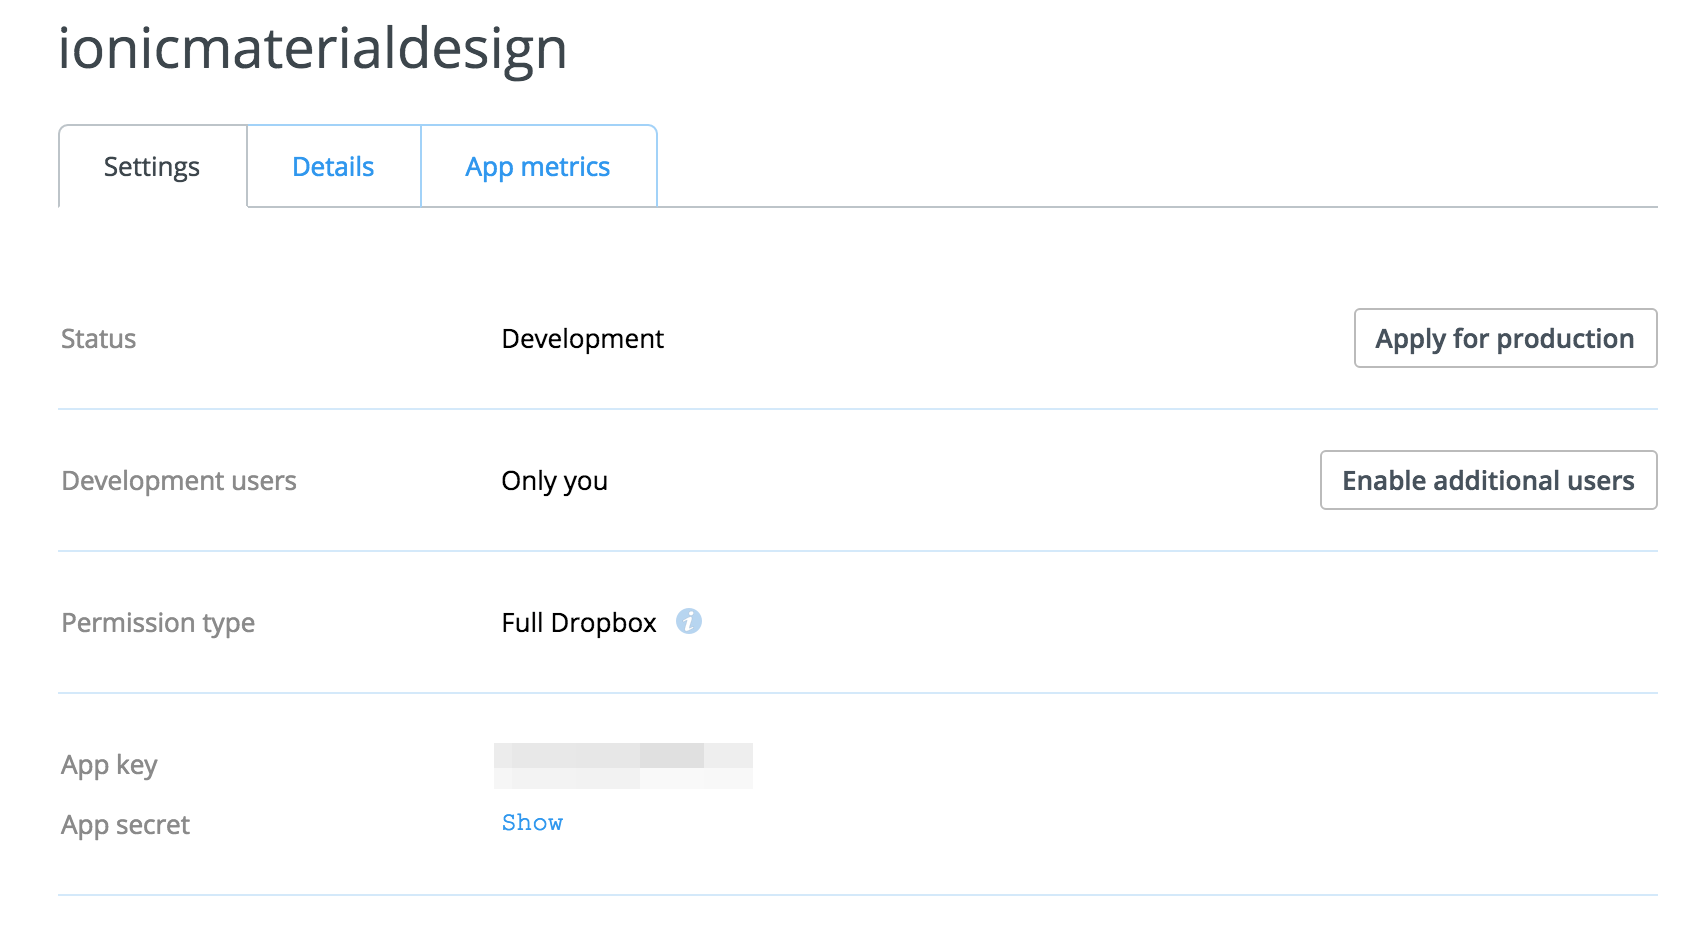
-
Go to setting Redirect URIs for connect with cordovaOauth by this following:
-
Set Redirect URIs= http://localhost/callback
then click add.

-
Set Redirect URIs= http://localhost/callback
then click add.
- Add App Key to file: www/app.js at global variable section to get the function work.
J-3) Share Application Content - top
Share Application Content is for share content from the application to social network by using feature of ngCordova.
J-3-1) Social Share - top
Using cordovaSocialSharing for share application content to social network and using Canvas2ImagePlugin for save image to mobile gallery.
The function include:
- Share content to facebook
- Share content to twitter
- Share content to e-mail
- Save image to mobile gallery
Project file path :
-
your_project_path/www/templates/share-application-content/social-share/html :
- Place of html view.
-
your_project_path/www/templates/share-application-content/social-share/js/controllers.js :
- Contains instruction of using share application content.
Important :
- This feature is required device environment it will not working on browser.
J-3-2) Email & Message - top
Using cordovaSocialSharing for send email from the application and using cordovaSMS for sent message.
The function include:
- Send e-mail
- Send message
- Mobile calling
Project file path :
-
your_project_path/www/templates/share-application-content/email-message/html :
- Place of html view.
-
your_project_path/www/templates/share-application-content/email-message/js/controllers.js
:
- Contains instruction for send email, message and using mobile calling.
Important :
- This feature is required device environment it will not working on browser.
J-4) Advertising Application - top
J-4-1) Google AdMob - top
Using Google AdMob for earning money to your application. By using AdMob Pro.
The function include:
- Show AdMob
- Hide AdMob
Project file path :
-
your_project_path/www/templates/advertising-application/googleAdmob/html :
- Place of html view.
-
your_project_path/www/templates/advertising-application/googleAdmob/js/controllers.js :
- Contains instruction for using AdMob.
Important :
- You have to register the application API before using this feature. Then add App ID to file: www/app.js at global variable section to get the function work.
- This feature is required device environment it will not working on browser.
Google AdMob Registration :
You have to register google AdMob by this following :- Go to https://apps.admob.com/admob/signup to sign up for AdMob.
- Go to https://apps.admob.com/#home you will see your AdMob dashboard.
-
Select menu monetize then click this following button for create google admob.

-
Select one of this AdMob to present on your application.
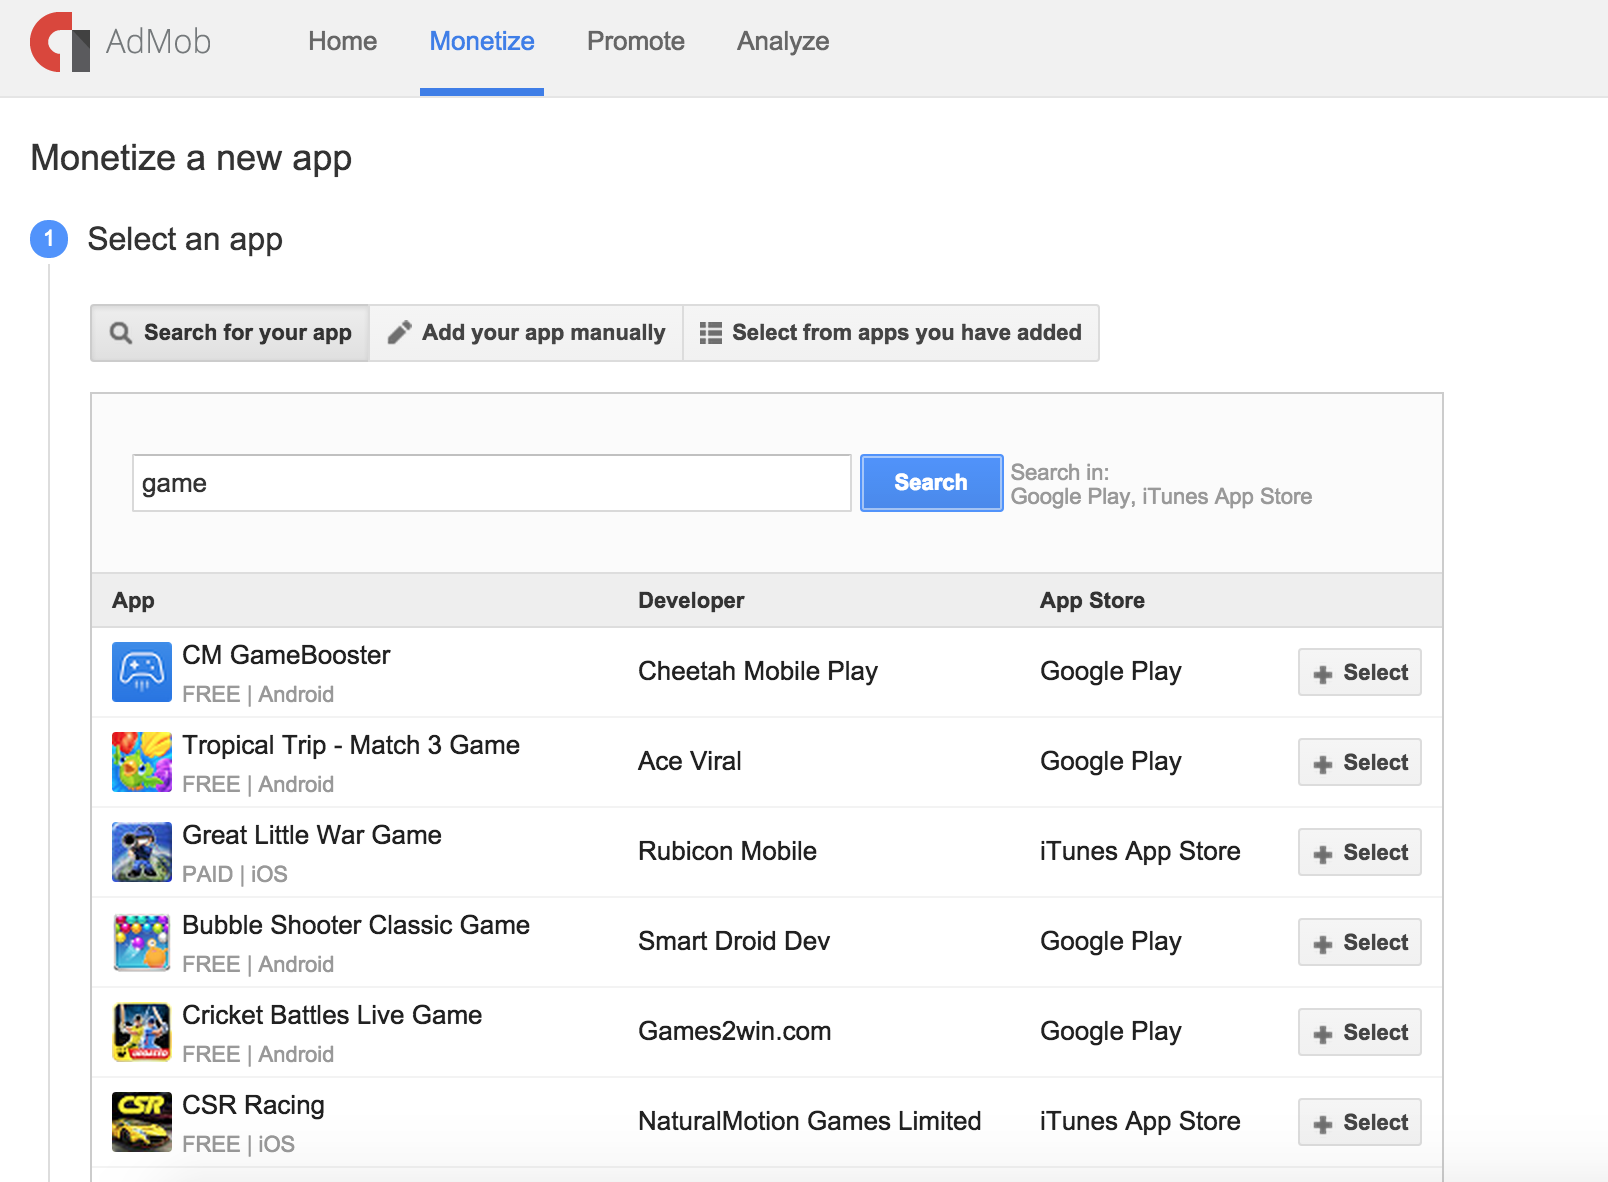
-
Selecting your AdMob format and name AdMob unit then save.
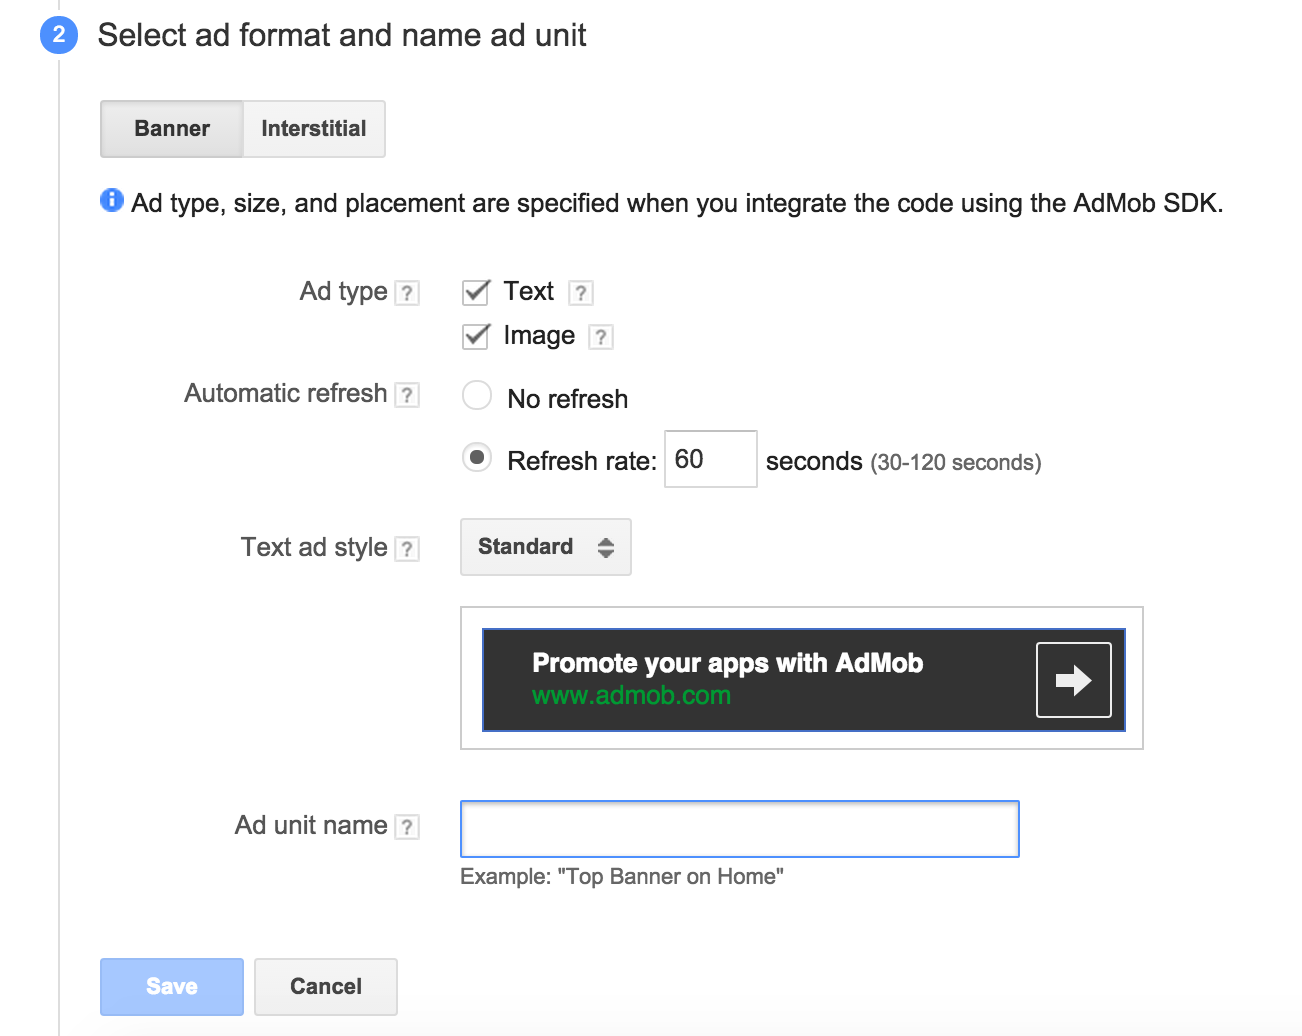
-
It will show this following ID for your AdMob to put in your application.
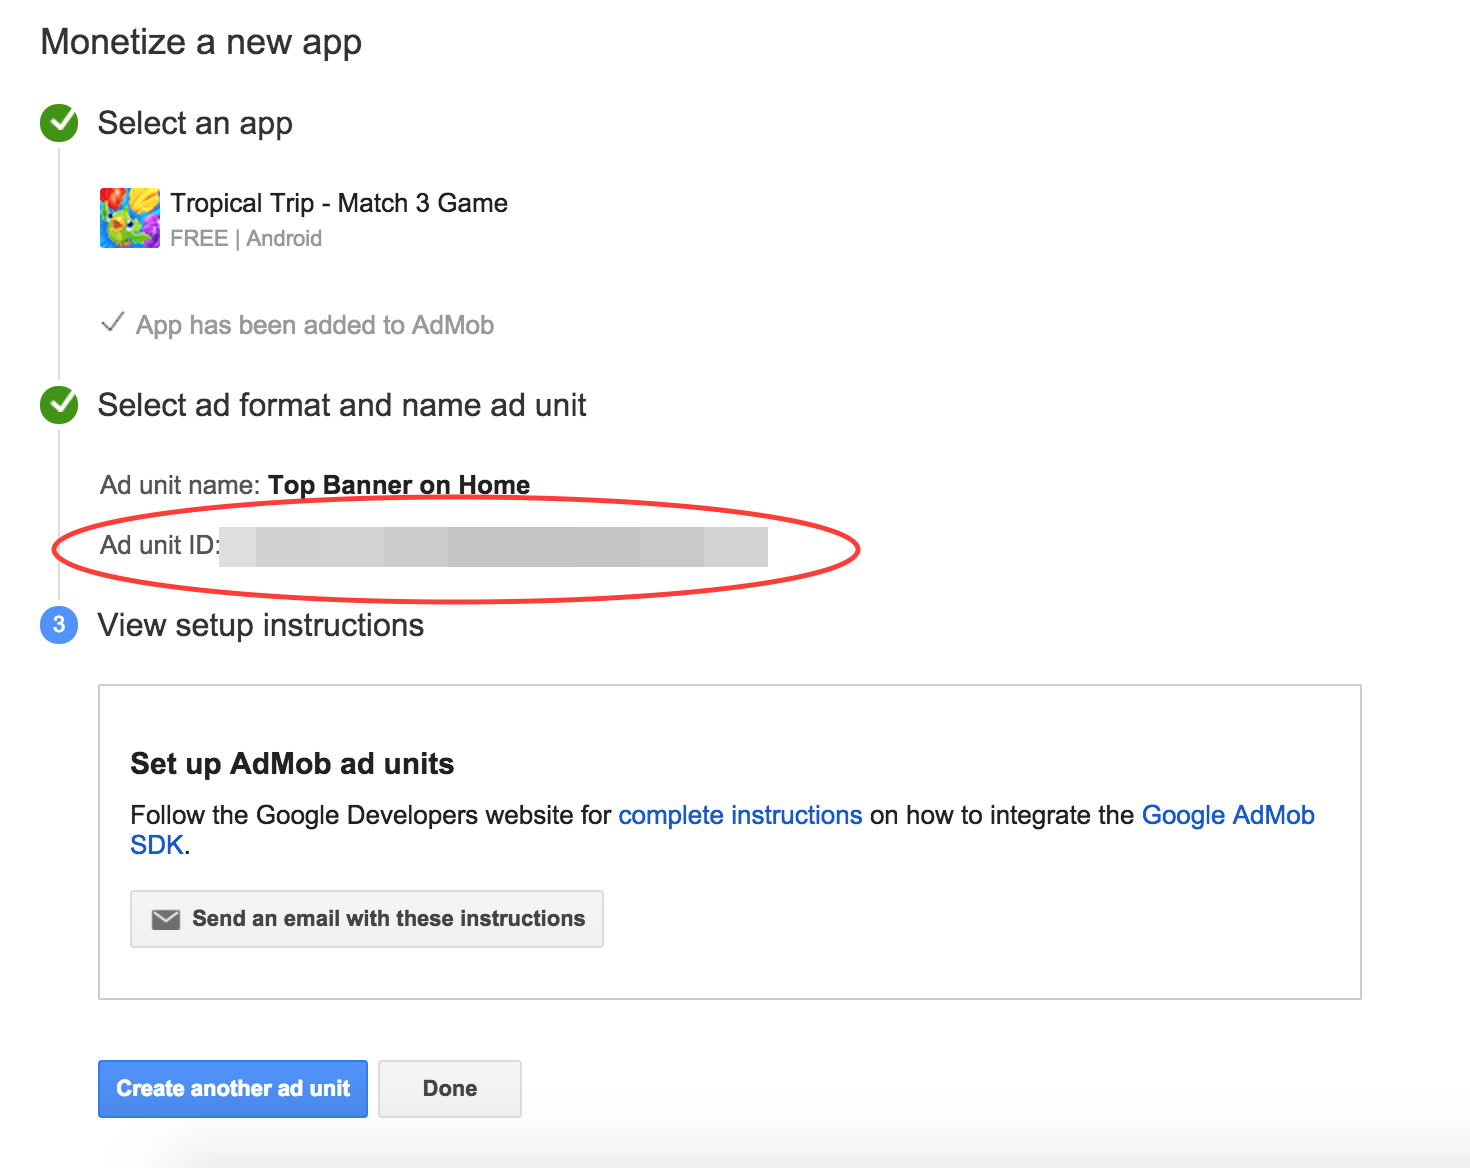
- Add Ad unit ID to file: www/app.js at global variable section to get the function work.
J-5)Push Notification - top
Push Notification is for sent local notification from application to interactive with user.
J-5-1) Single Push - top
To send notification for interact with user by sending single message.
The function include:
- Send single push notification: It will send single message to notification center of your device.
- Clear all push notification: It will clear all notification of this application in your device notification center.
Project file path :
-
your_project_path/www/templates/push-notification/single-push-notification/html/single-push-notification.html
:
- Place of html view.
-
your_project_path/www/templates/push-notification/single-push-notification/js/controllers.js :
- Contains instruction for using single push.
Important :
- This feature is required device environment it will not working on browser.
J-5-2) Schedule Push - top
To send notification for interact with user by sending message with schedule queue.
The function include:
- Send push notification: It will create schedule queue for sent notification message.
- Clear all push notification: It will clear all notification of this application in your device notification center.
Project file path :
-
your_project_path/www/templates/push-notification/schedule-push-notification/html/schedule-push-notification.html
:
- Place of html view.
-
your_project_path/www/templates/push-notification/schedule-push-notification/js/controllers.js
:
- Contains instruction for using schedule push.
Important :
- This feature is required device environment it will not working on browser.
J-6)Map API Connect - top
Map API Connect is for connect the application with map application.
J-6-1) IOS Map - top
To connect the application with map application.
The function include:
- Connect to IOS map application: It will connect with IOS map application.
- Connect to Google map application: It will connect with Google map application.
Project file path :
-
your_project_path/www/templates/map-and-location/ios-map-connect/html/ios-map-connect.html
:
- Place of html view.
-
your_project_path/www/templates/map-and-location/ios-map-connect/js/controllers.js :
- Contains instruction for connecting with map application.
Important :
- For connect with Google map you have to install Google map application to your device before using this feature.
J-6-2) Android Map - top
To connect the application with map application.
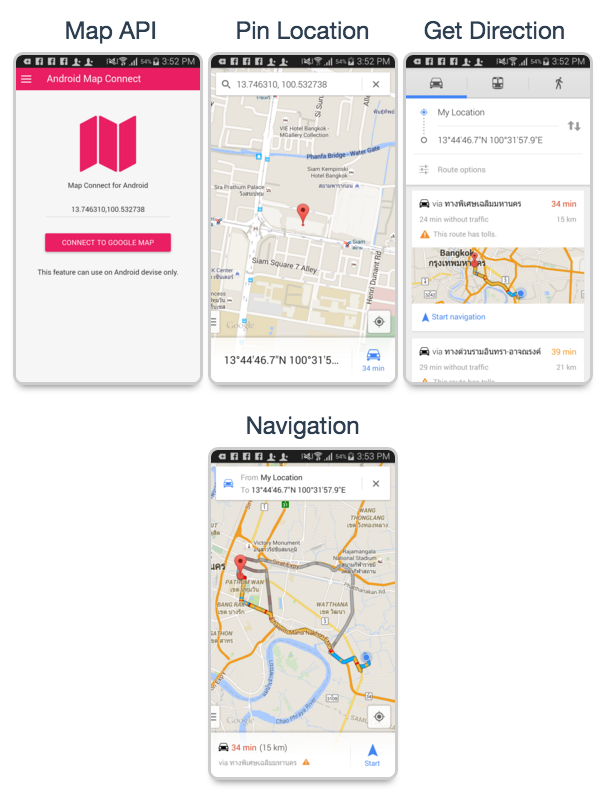
The function include:
- Connect to Android map application: It will connect with Google map application.
Project file path :
-
your_project_path/www/templates/map-and-location/android-map-connect/html/android-map-connect.html
:
- Place of html view.
-
your_project_path/www/templates/map-and-location/android-map-connect/js/controllers.js
:
- Contains instruction for connecting with map application.
Important :
- For connect with Google map you have to install Google map application to your device before using this feature.
J-7) Hardware Connect - top
Hardware Connect is for connecting with mobile feature by using ngCordova.
J-7-1) Mobile Contract - top
Using cordovaContacts for connecting the application to mobile contract.
The function include:
- Get all contracts
- Add new contract
- Update contract
- Delete contract
- Mobile calling
- Send message
- Send e-mail
Project file path :
-
your_project_path/www/templates/hardware-connect/mobile-contract/html :
- Place of html view.
-
your_project_path/www/templates/hardware-connect/mobile-contract/js/controllers.js :
- Contains instruction of using mobile contracts.
Important :
- This feature is required device environment it will not working on browser.
J-7-2) Image Picker - top
Using cordovaImagePicker for selecting image from mobile gallery.
The function include:
- Select single image
- Select multiple images
Project file path :
-
your_project_path/www/templates/hardware-connect/image-picker/html :
- Place of html view.
-
your_project_path/www/templates/hardware-connect/image-picker/js/controllers.js :
- Contains instruction of using image picker.
Important :
- This feature is required device environment it will not working on browser.
J-7-3) Vibration - top
Using cordovaVibration for using mobile vibration.
The function include:
- Vibrating
Project file path :
-
your_project_path/www/templates/hardware-connect/vibration/html :
- Place of html view.
-
your_project_path/www/templates/hardware-connect/vibration/js/controllers.js :
- Contains instruction of using vibration.
Important :
- This feature is required device environment it will not working on browser.
J-7-4) Flashlight - top
Using cordovaFlashlight for using mobile flashlight.

The function include:
- Turn on flashlight
- Turn off flashlight
Project file path :
-
your_project_path/www/templates/hardware-connect/flash-light/html :
- Place of html view.
-
your_project_path/www/templates/hardware-connect/flash-light/js/controllers.js :
- Contains instruction of using vibration.
Important :
- This feature is required device environment it will not working on browser.
J-7-5) Device Information - top
Using ionic.Platform.device for get device information.
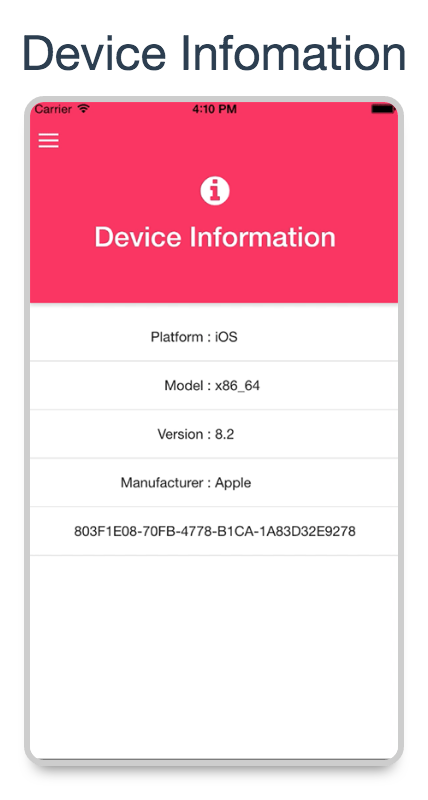
The function include:
- Get mobile device information
Project file path :
-
your_project_path/www/templates/hardware-connect/device-information/html :
- Place of html view.
-
your_project_path/www/templates/hardware-connect/device-information/js/controllers.js :
- Contains instruction of getting mobile device information.
Important :
- This feature is required device environment it will not working on browser.
J-8) Material Design Themes - top
Material theme that will help you to generate idea to create your powerful application.
Project file path :
-
your_project_path/www/templates/themes :
- Place of theme folder.
K) Known Issues - top
Ionic View :
- If you would like to upload Ionic Material Design to Ionic View you will found some
feature is not working. Because this project required to run on devise environment all feature will
not working 100% on Ionic View.
I recommend to run this project on emulator or mobile devise the performance will better than Ionic View and all feature will work 100%. -
The function of Social Connect : Facebook, Google plus, Instagram, Foursquare, Dropbox will not
working on Ionic View.
Because of ngCordova Oauth issue, However the ticket has been raised on Github of Ionic Framework at https://github.com/driftyco/ionic-view-issues/issues/45 - We not support the error case of this project from Ionic View
HTML Button Tag :
Problem : Ionic Material Design doesn't support HTML button Tag, Because Angular material and angular-aria will have double event when tap at the HTML button Tag on Mobile Browser.
Solution : Ionic Material Design avoid this issue by using HTML a to create button by :
<a class="md-raised md-button" href="#" ng-click="doSomeThing()">Button</a>To create button :
 .
.
Social connect :
Foursquare and Dropbox feed API have no paging so it cannot do load more function.
Social share :
- For send email user must add email to the native mail application before sent e-mail.
- Facebook and Twitter sharing can not send a text via ngCordova API to shareing screen. However user can type text message on sharing screen.
-
The reference limitation of $cordovaSocialSharing :

Learn more: ngcordova socialSharing
Mobile contract :
For get all contracts you have to wait more than 2 sec for loading contracts form device (depend on data size).
Image size
Application will lag and slow if image size are large.
L) Compatibility - top
This project was tested in :
- IOS Version 9 iPhone 6s Plus
- IOS Version 9 iPhone 6
- IOS Version 9 iPhone 5c
- IOS Version 8 iPhone 5c
- IOS Version 7 iPhone 5
- Android Version 4.4.4 Samsung E5
Compatible with:
- IOS Version 9
- IOS Version 8
- IOS Version 7
- Android Version 4.4.4
M) Support - top
If you found any bug, please use the theme comment section or report it to us describing:
- Device platform
- Device version
- Problem details
- Explain how to reproduce the problem, step by step.
Important : We not support the error case of this project from :
- Ionic View : If you would like to upload Ionic Material Design to Ionic View you will found some feature is not working. Because this project required to run on devise environment all feature will not working 100% on Ionic View. known issues of Ionic View
- All Desktop Browser You have to know about this project is mobile hybrid application that run on mobile devise not
website that hosted on web serve that have to support all browser on desktop.
We not support error case from compatibility of web browser that run on all desktop browser. - Plugins : We not support the error case of plugin compatibility with platform and new plugin update because we can’t do anything to fix the issue. Because we don’t have the skill and knowledge to develop the plugin. We will let you know and update the instruction on project documentation if it have any update or workaround solutions.
- Device size : We not support the issue of tablet and web browser resolution size
N) Useful Resources - top
Please use this following link to help you find useful information :
- Getting Started with Ionic Framework
- Ionic Framework Documentation
- Blog of Ionic Framework
- Forum of Ionic Framework
- ngCordova Documentation
- WordPress REST API.
- Facebook Developers page for APIs registration.
- Google Developers page for APIs registration.
- Instagram Developers page for APIs registration.
- Foursquare Developers page for APIs registration.
- Dropbox Developers page for APIs registration.
- Google AdMob page for APIs registration.
- Introduction of Google Material Design.
- Dribbble.com for idea and inspiration.
- Materialpalette.com for create a material UI by material base color.
- Ionic Framework IOS 9 Potential Breaking Change
- Improve Android Performancr by using Crosswalk Browser
O)Sources and Credits - top
I've used the following Icons, Framework, Idea , Inspiration or Other files as listed. - Also a thanks to all the awesome resources I've used for the development of this project.
Resources used in Development
- Ionic Framework
- Angular Material
- Angular Messages
- Angular Aria
- ngCordova
- jQuery
- Fort Awesome
- Google Fort Roboto
Resources used in Design
P)Version History - top
-
Version 4.2 - Released 24 Jun 2016
- Plugin :
- Add plugin cordova-plugin-whitelist to avoid http 404 errors when your app tries to make network requests on android.
- CSS :
- Add hidden overflow-x to class product-slide-list to fix horizontal scroll bar appear on page load.
- Plugin :
-
Version 4.1 - Released 30 May 2016
-
Update Framework :
- Update cordova to lasted version.
- Remove fix plugin version.
- Update Feature :
- Change plugin AdMob to AdMob Pro version for use more stable version.
- Plugin :
Because of plugin update make npm throw error while installing plugin. We are changed below plugin to stable version :- Change plugin https://github.com/floatinghotpot/cordova-plugin-admob.git (AdMob) to cordova-plugin-admobpro (AdMob Pro)
- Change plugin de.appplant.cordova.plugin.email-composer@0.8.2 to cordova-plugin-email-composer
- Change plugin org.apache.cordova.splashscreen@1.0.0 to cordova-plugin-splashscreen
- Removed unused plugin cordova-plugin-googleplayservices@19.0.3 because of changed plugin AdMob to AdMob Pro version.
- Documentation :
-
Update content of section D-1 Installing Ionic Framework
- Add new instruction for build AdMob Pro in android to avoid build error.
-
Update content of section D-4) Add Ionic Plugin
- Change plugin https://github.com/floatinghotpot/cordova-plugin-admob.git (AdMob) to cordova-plugin-admobpro (AdMob Pro)
- Change plugin de.appplant.cordova.plugin.email-composer@0.8.2 to cordova-plugin-email-composer
- Change plugin org.apache.cordova.splashscreen@1.0.0 to cordova-plugin-splashscreen
- Removed unused plugin cordova-plugin-googleplayservices@19.0.3 because of changed plugin AdMob to AdMob Pro version.
-
Update content of section D-13) Update project to latest version
- Add new content of file and resource that update in this version.
-
Update content of section M) Support
- Add new content about devise size
-
Update content of section J-2-2) Facebook
- Update new content of Facebook API Registration according from Facebook update.
-
Update content of section D-1 Installing Ionic Framework
-
Update Framework :
-
Version 4 - Released 24 February 2016
- New Feature :
- Show popup dialog before application close when tap Back Button on android.
- Make the side menu close when swipe left on side menu.
- Make the side menu close when tap Back Button on android.
- Make the bottom sheet close when tap Back Button on android.
- Make the popup dialog close when tap Back Button on android.
- Make the md-menu close when tap Back Button on android.
- Make the md-select close when tap Back Button on android.
- Update Feature :
- SQLite contract list page will show grid with md-menu by default.
- Documentation :
-
Update content of section D-4) Add Ionic Plugin
- Update plugin cordova-plugin-inappbrowser to version 1.1.3
- Change cordova-plugin-splashscreen plugin to org.apache.cordova.splashscreen to support new version of Android and IOS
- Remove section of About local notifications plugin Because the probelm has been fixed.
- Remove content of section Plugin that will not working on El Capitan, Xcode 7 (Only IOS) Because the probelm has been fixed.
- Add new section Update project to latest version for project update instruction.
- Add new content of section Support
-
Update content of section D-4) Add Ionic Plugin
- New Feature :
-
Version 3.3 - Released 08 February 2016
- Documentation :
-
Update content of section D-4) Add Ionic Plugin
- Fix version of cordova plugin to avoid plugin update not compatible with framework make project build failed.
- Change plugin cordova-plugin-inappbrowser to version 1.1.1 because of version 1.1.2 have error about callback url.
- Add new section About local notifications plugin
- Update new content of section K) Known Issues : Plugin that will not working on El Capitan, Xcode 7 (Only IOS)
-
Update content of section D-4) Add Ionic Plugin
- Documentation :
-
Version 3.2 - Released 10 January 2016
- Plugin :
- Change ionic plugin keyboard to stable version from com.ionic.keyboard to ionic-plugin-keyboard
- Add new googleplayservices plugin to supprot dependencies update of AdMob plugin.
- Update package.json File :
- Update dependencies and devDependencies of gulp-sass from version ^1.3.3 to ^2.0.0 for support NodeJs version > 4.0.0
- Documentation :
- Update content of section D-1) Installing Ionic Framework to using NodeJs LTS version to avoid cordova plugin issue.
- Add new content of section D-1) Installing Ionic Framework about instruction for Mac OS El Capitan to fix issue of cordova when add platform then it will get failed return (cordova keeps a cached version in your ${HOME}/.cordova folder.)
- Plugin :
-
Version 3.1 - Released 9 December 2015
- JavaScript libraries :
- Update ngcordova to Version 0.1.23
- Plugin :
- Change inappbrowser plugin to stable version from org.apache.cordova.inappbrowser to cordova-plugin-inappbrowser
- Update :
- Update controller of AdMob to compatible with last updated of AdMob Plugin.
- Documentation :
- Update content of section D-1 because of the latest version of cordova is not stable. We recommend you to use cordova version 5.3.3 for avoiding plugin installation issue.
- Update content of section D-4 change link of inappbrowser plugin to stable version from org.apache.cordova.inappbrowser to cordova-plugin-inappbrowser
- JavaScript libraries :
-
Version 3.0 - Released 4 November 2015
- New Feature :
- Android Map Connect.
- IOS Map Connect.
- Setting for Enable/Disable view animation.
- Performance :
- Improve application performance by add Crosswalk Browser for Android.
- Improve view content and add new setting section for Enable/Disable view animation.
- Update :
- Update toggle left Menu to enable animation on IOS and disable on Android.
- Plugin :
- Change SQLite Plugin to https://github.com/litehelpers/Cordova-sqlite-storage.git
- Add new plugin cordova-plugin-transport-security to allow 'Arbitrary Loads' by adding a declaration to the Info.plist file to bypass the Xcode 7 and iOS 9 App Transport Security.
- Documentation :
- New Feature :
-
Version 2.0 - Released 4 October 2015
- New Feature :
- Single Push Notification.
- Schedule Push Notification.
- Update Library :
- Font Awesome 4.3.0 to 4.4.0
- Compatibility :
- This project was tested in IOS 9 iPhone 6s & 6s+ PASS
- This project Can Build on Xcode 7 PASS
- Documentation :
- Add new section for detail of Single Push Notification. J-5-1
- Add new section for detail of Schedule Push Notification. J-5-2
- Update VDO of section D.Getting Started for project installations IOS and Android.
- Add Important note to all section in J.Component Detail
- Update Google API Registration Instruction (Case of Google Update).
- Update Instagram API Registration Instruction (Case of Instagram Update).
- Add new section I-1 Theme Color About Theme Configuration.
- Add new Known issues about Ionic View at section K.Known Issues.
- Add Important note to section M.Support
- New Feature :
- Version 1.0 - Released 21 September 2015
Once again, thank you so much for purchasing Ionic Material Design. As I said at the beginning, I'd be glad to help you if you have any questions relating to this project. No guarantees, but I'll do my best to assist. If you have a more general question relating to the project on Codecanyon, you might consider visiting the forums and asking your question in the "Item Discussion" section.
Ionic Material Design Team